There are a growing number of conversations and discussions taking place around the country, in person and online, about a highly important emerging question – how are we going to feed ourselves with a growing population, diminishing resources and a challenging climate?
We see news reports of crop devastation from droughts, floods and other weather related impacts around the world. There was a world-wide food shortage in 2008, causing a sharp spike in wheat prices that started a series of governmental overthrows in the Middle East. Clearly, food is important in a way that many have not thought about here in the United States. We didn’t experience much in the way of price spikes in 2008, but if we look, there is clear evidence that we are experiencing our own price increases; they are just in a different manner.
The prices for food, when compared to a couple of years ago, have risen significantly, even here in America. Our food system is complex, with major food companies and distributors absorbing the brunt of price increases and passing them along in increments, instead of all at once, so that we are not as aware of the increases in food prices. With a severe drought across most of the country in 2012, and winter moisture levels significantly below normal for this year (2013), more crop failures are predicted along with higher prices.
It is natural that this conversation is beginning to happen. In venues ranging from upscale coffee shops to rural diners to governmental meetings, more and more people are asking, “How are we going to feed ourselves?” The conversation more often than not becomes some form of commercial vs. small scale agriculture, with both sides speaking passionately about the benefits of their systems and judiciously pointing out the shortcomings and detriments of the other systems. It becomes an either/or argument and is a great example of false dichotomy.
We are not against large-scale farms, as there are a number of great examples of how size does not automatically mean a dependence on petro-chemical inputs, using fertilizers, herbicides, pesticides in an attempt to change a natural process into an industrialized, mechanical one to be controlled.
There is a need for a food production system of many sizes and for many reasons. We need diversity in size and scale, as it gives resiliency to our food system as a whole.
 There is also an increasingly urgent need to re-examine our food distribution system, as there is an estimated 30 – 40% of food waste that happens before the food even reaches our homes. Utilizing this wasted food would go a long way toward easing hunger here in the United States.
During the course of these conversations a logical disconnect often occurs. The commercial scale folks talk in solid, proven, real world terms and numbers. They should, as this is what they know. They talk about how only industrial farming can feed the world, as it will require their technology, equipment and inputs to grow twice as much food. These are terms that they are familiar with. When the alternative of small scale, local and sustainable agriculture is put forth, they begin to talk in relative and theoretical terms, partly out of ignorance as they are not experienced or familiar with this different approach to agriculture. Sometimes it will be as a dismissal of the effectiveness of sustainable agriculture.
Here is where the disconnect happens: when advocates of local and sustainable agriculture talk, they also tend to talk in theoretical and abstract terms, not in the proven, real world results based terms that the industrial ag folks use. This skews the entire conversation!
Some of this is understandable, as the definition of “local and sustainable agriculture” is completely opposite on the spectrum of commercial and industrial. It is hard to speak about total food production or capacity from the local and sustainable model as it is from the commercial one, for the simple reason that there is more documenting and reporting of figures in large scale agriculture, with almost none in the local one.
This doesn’t mean that alternative agriculture has nothing to contribute. Far from it. Sustainable agriculture, on any scale, is a highly important contributor to the conversation, and our future. There is a school of thought that states, “We will ultimately wind up in a sustainable economic and agricultural model, either by choice or by force.” I’m going to ignore the economic portion of the statement for this article, as it is beyond the scope of our focus.
The thought goes on to show how we don’t have a choice on becoming sustainable in agriculture, as we simply cannot continue our current path of mining our soils of nutrients and using petroleum as a replacement. The petroleum is used for transportation, to power the mining equipment extracting the minerals used to replace those lost in the soil, and for herbicides, pesticides and petro-chemical based fertilizers. Both the nutrients and petroleum are finite, we all know this. What we don’t know is precisely when these resources will run out. They are becoming more expensive each year, looking past short-term fluctuations.
 We can make the choices to move our food production into a model where we aren’t strip-mining the earth of its nutrients to grow our food, or we will wind up with no more petroleum to replace these critical nutrients, and our food production on any scale comes to a halt, with devastating consequences. We at Terroir Seeds are working on the choice solution – rather than force – helping to create a better, healthier, more productive, diversified, decentralized and independent food production system that everyone has access to and can participate in, no matter where they live.
During the conversation on feeding ourselves, several examples of sustainable agriculture that are currently being practiced are usually brought up, such as Cuba. When Cuba suffered the oil embargoes and trade restrictions, many citizens died from the catastrophic decrease in daily calories as a result of very limited food production on the island in relation to the size of the population. Everyone lost around 30 pounds as they struggled to find ways to grow all of their own food with most people having little to no gardening experience and a loss of machines to work the land. Eventually they did succeed, and today Cuba is an example of small, local and sustainable agriculture feeding the population.
This example is pooh-poohed by the industrial ag proponents, “Of course Cuba can grow their own food, they are a tropical island, they can grow anything. It’s not like that here or in the rest of the world.” They ignore the difficult history and work that it took for Cubans to be able to grow their own food.
What if there was another example; one of an industrialized, well-populated country that is larger than the USA, grows about half of its total food production in home gardens in a difficult and short-season climate, with no machines or animals to help? Would that example suffice to show that local, small-scale, sustainable agriculture can be a proven, viable alternative to the industrial agriculture model?
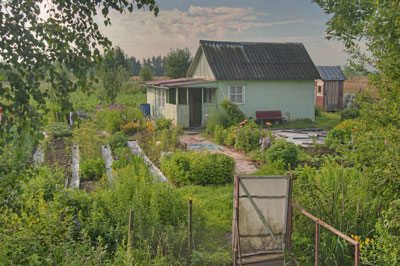
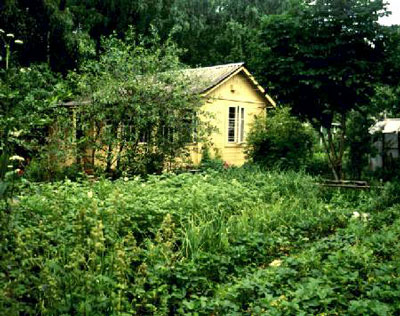
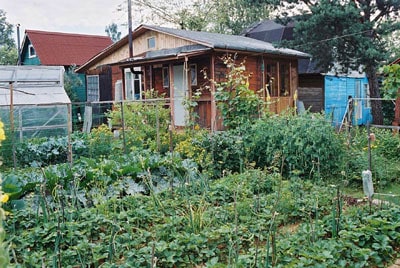 That example is Russia, and the model is called dacha gardening. It has provided food for the people of Russia for over 1,000 years, starting as mainly subsistence or survival gardening and evolving into an independent, self-provisioning model between the Bolshevik Revolution and World War II and continues into today.
The term dacha, dating back to at least the eleventh century, has had many meanings; from “a landed estate” to the rural residences of Russian cultural and political elite. Since the 1940s, the term “dacha” has been used more widely in Russia to define a garden plot of an urban citizen. This is when the urban populations began to rapidly expand their garden plots to provide food for themselves, their families and neighbors.
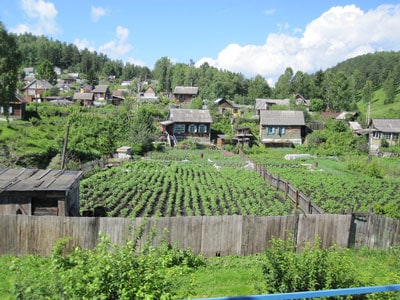
Dacha gardening accounts for about 3% of the arable land used in agriculture, but grows an astounding 50% by value of the food eaten by Russians. According to official government statistics in 2000, over 35 million families (approximately 105 million people or 71% of the population) were engaged in dacha gardening. These gardens provide 92% of Russia’s potatoes, 77% of its vegetables, 87% of the berries and fruit, 59% of its meat and 49% of the milk produced nationally. There are several studies that indicate that these figures may be underestimated, as they don’t take into account the self-provisioning efforts of wild harvesting or foraging of wild-growing plants, berries, nuts and mushrooms, as well as fishing and hunting that contributes to the local food economy.
Clearly, there is something to be acknowledged and studied here! Of note to us Americans, dacha gardening or self-provisioning gardening was the foundational reason that the Russian people did not experience a famine in the early 1990s after the USSR collapsed, and the state sponsored, heavily subsidized, industrial commercial agriculture collapsed along with it. This drew the attention of researchers seeking to find an explanation. Several attempts to explain it away as only a survival strategy have failed, especially when the extensive historical context is examined. Dacha gardening is much more than merely survival, and has always been.
This was not reported outside of Russia, as it wasn’t considered newsworthy. What is truly newsworthy today is that we as a nation aren’t in as favorable of a position if there were a similar catastrophic occurrence in our food distribution, power grid or dollar value. We are all too dependent on outside sources for our food, with most Americans tied to the grocery store and its 3 day supply of food being constantly trucked in.
 Russian household agriculture – dacha gardening – is likely the most extensive system of successful food production of any industrialized nation. This shows that highly decentralized, small-scale food production is not only possible, but practical on a national scale and in a geographically large and diverse country with a challenging climate for growing. Most of the USA has far more than the 110 days average growing season that Russia has.
Today’s dacha gardening closely resembles the peasant gardening production of the late 19th and early 20th centuries. This shows a continuation of methods and techniques that have proven effective in a small scale garden that works as well today as 200 years ago. The Russians do not use machines – tillers or tractors – or animals on their garden plots, cultivating them in much the same way as the peasants did in the 18th Century.
Dacha gardening is not and never has been simply a survival strategy – a response to poverty, famine, adverse weather or social unrest. Recent studies have shown that Russian food gardening is a highly diverse, sustainable and culturally rich method of food production. This was initially recognized almost a century ago and has been confirmed more recently.
If examined through a strictly economic lens, dacha gardening makes no sense at all. There is much more labor as a dollar value invested than is harvested, but that isn’t the point of this type of system at all. The function of dacha gardens goes well beyond their economic significance, because they serve as an important means of active leisure as well as a way to reconnect with the land. Traditional economic calculations fail to realize the true value and benefits of a dacha garden. Clearly, a wider viewpoint is needed to realize all of the benefits! Time spent in the garden is seen as relaxation, education, entertainment and exercise – all in one. Food production is a very valuable bonus.
Despite their significant contribution to the national food economy, the majority of dachas mostly function outside of the cash economy, as most dacha gardeners prefer to first share their surplus with relatives and friends after saving enough to feed them through the winter, and only then look at selling what remains. A few will sell the remainder at local markets, and move into a small market production model for extra cash.
The Russian mindset relating to the sharing of surplus food is important to examine, as it is one of the keys that ensure the success of the dacha gardening model. In dacha gardening, people will share their excess food out of a sense of abundance or plenty. It is a very positive and powerful motivator which creates an upward, positive spiral of sharing among the community.
 For example, a neighbor helps you to build a fence on your property. Instead of paying them money for their help, you give them 50 pounds of apples from your tree. These apples have little monetary value for you, as you have all of the apples you can use for the year stored up, canned, made into apple butter and jams. You are sharing your abundance. The neighbor is overwhelmed, as this is a considerable gift for a few hours of work, so he feels compelled to share some of his gardens abundance with you, for the same reason. He shares from his abundance. This process continues around the neighborhood until there is a solid network of people actively sharing food with one another. This system creates a resilient food network that is not only local and sustainable, but has many other positive benefits as well.
There are no feelings of “owing” from one person to another. When someone gives food to another, it is not “charity” or putting them under an obligation to repay. It is an exchange of excess freely given with no thought of repayment or obligation.
Economic profit is only one of the potential benefits of this type of food production. Other economic components are increased food security with a robust, decentralized and local food supply and distribution. Agricultural sustainability, conservation of bio-diversity and the preservation of heirloom varieties are some of the environmental contributions of dacha gardening. Socially, dacha gardens help create community and a connection with the land and nature.
In addressing the question of “How are we going to feed ourselves?”, we have a lot to consider in looking at the effective, proven and ongoing examples that Russian dacha gardening has to offer us. A closer study of the methods and especially the mindsets will help all of us become more resilient and self-sustaining in our food systems right here at home.
Russian Dacha Gardening Research – Dr. Leonid Sharashkin

What’s Wrong with Our Wheat?
Today’s commercial wheat – a semi-dwarf, high-yield type – is causing many people to be sick. Gluten intolerance or celiac disease has skyrocketed since the 1970s and shows no sign of slowing down. A decade ago, gluten intolerance levels were at 1 in 2,500 worldwide. Today, it’s at 1 in 133! What has happened to the grain that has fed us for thousands of years is inedible for an increasing number of people? So what has happened? Why has bread, and by extension many grains, become bad for our health?
First, let’s look at the differences between historical wheat and today’s modern hybrid. Then we’ll look at how the wheat is made into breads and the differences in how we do that today vs. historically. We need this groundwork to establish how and why wheat is not the same grain it once was.
Bread is the “staff of life”, right? Well, it used to be. In fact, archaeologists have uncovered villages that housed the workers building the great Pyramids and found clay pots used to raise and bake ancient Egyptian sourdough bread. This bread was the majority of the diet, along with meat and milk, of the workers. These weren’t office or light duty jobs; these were brutally heavy jobs – moving huge stones over log rollers up dirt ramparts to place them into the pyramid. Bread, milk and meat kept them going for years.
The grains that were used in baking the ancient sourdough are completely different than what we are eating today. Einkorn, spelt, emmer and dinkel are some of the ancient wheat cultivars that our ancestors ate. They are all “covered-wheat” grains, having thick husks around each kernel. The inedible husk must be removed by pounding or milling and then winnowing before the grains can be ground or eaten. Today’s modern wheat is considered to be a “naked-wheat” cultivar, with a much thinner husk that is easier to remove.
The move toward today’s modern wheat began with hybridizing for smaller or dwarf varieties of wheat. Shorter wheat means more of the plant’s energy is put into seed production, increasing yields. This was very successful, producing huge increases in production. Dwarf cultivars are also more resistant to “lodging” or falling over. Lodging occurs when the stalks are too long for the plant’s roots, the stalk falls over (lodges) and rots. Heavy applications of nitrogen fertilizer, common in commercial agriculture, only make the lodging problem worse. The hybrid dwarf varieties were much less susceptible to lodging, allowing excess nitrogen to be applied without losing too much of the wheat crop.
Happy with the increased production of the hybridized dwarf wheat, plant breeders began more hybridization experiments starting in the early 1960s. Extensive hybridization research, testing and experimentation went on, all with the objective of increasing the yields wheat produced. Repetitive back-crossing and crossing with foreign grass species were just two of several techniques used. What happened was a drastic increase in the production capability of the dwarf super-hybridized wheat. Unfortunately, the issue of digestibility was never examined. Another result of the hybridizations is that gluten levels increased in the new wheat, a good thing for making tall, fluffy breads that are appealing to consumers.
The experimentation didn’t stop there however. In 2003 BASF, the chemical company, introduced Clearfield wheat, which is tolerant to their proprietary herbicide Beyond, much like Roundup Ready Corn is tolerant of glyphosate. They proudly proclaim that the wheat is not the product of genetic engineering, but of “enhanced traditional plant breeding” methods. What, exactly, are these enhanced methods that allows a plant to resist a persistent herbicide?
The technique is called “chemical mutagenesis” and might be worse than GMO engineering. Using a highly toxic chemical – sodium azide – as well as gamma and x-ray radiation, the exposed wheat embryo mutates. After further experimentation, testing and development, Clearfield wheat emerges and is tolerant of the Beyond herbicide. Clearfield is now supplied in 20 varieties and nearly a million acres are planted with it in the US and Canada.
So what we are now eating is a super-hybridized, chemically and radiologically mutated wheat. It’s no wonder we are having issues with digestion and allergic reactions that are becoming more common and more severe. Not all of the wheat that is commercially available is from Clearfield wheat, but more and more is coming onto the market. The rest of the wheat is from the super-hybridized semi-dwarf varieties.
Now that we see the wheat we’ve been eating is different than what has fed us for a long time, let’s look at how bread is made today as compared to the past.
Traditionally bread was made with a slow rise sourdough method, using native yeast from the air to raise the dough. Sourdough is a partnership between specific yeast and bacteria that support each other and make bread rise and develops the unique flavors. In the Egyptian example, leftover dough from the previous batch was added into the current batch of water and whole wheat flour, mixed and kneaded well and set out to rise for a day in terra cotta pots shaped much like flower pots we are familiar with today. The next morning, the pots were put into the oven and baked into the bread which fed the pyramid workers. This pretty much describes how bread has been made for several thousands of years, all over the world.
Today’s bread is made with fast-rising yeast that has been cultured specially to raise bread dough faster and higher than any sourdough can. The wheat is milled to remove the outer layers of wheat bran and wheat germ, leaving only the starchy endosperm or white flour that we are all familiar with. Some of the nutrients that were removed with the bran and germ are added in the “enriching” process, where iron and synthetic B vitamins such as thiamin, riboflavin, niacin and folic acid are added back in. Other agents are added to the dough which keeps the bread fresh and pliable for a longer period of time. The bread dough is mixed and kneaded, then left to rise for an hour or two and baked.
The two major differences in these breads are the flour and the method of rising used. The flour in the sourdough bread is whole wheat, meaning the entire kernel of wheat is milled into flour. The white flour is stripped of most of its nutrients; with a few synthetic vitamins added back in after milling. The rising methods and times differ greatly, with the sourdough having time to break down some of the proteins and amino acids that are indigestible initially. The long ferment and rise of the sourdough, often more than 24 hours, allow the yeast and bacteria to make the resulting bread more nutritious and digestible for us.
So now what? Now that we know the commercial wheat and breads of today aren’t as healthy or nutritious for us as those our parents and grandparents ate, what are our choices? Some people are so affected by wheat that they have to avoid it altogether, while others find they feel better once they are off of it for 30 days or more, and then slowly re-introduce it back into their diets. Most find that avoiding modern wheat and sourcing ancient grains, preparing them in the older, slower methods keeps the digestive systems happy. Learning to make sourdough breads with long fermentation and rise times, along with soaking or sprouting grains will make these foods easier to digest and tastier as well.
One of the directions we have been working on is to provide the home gardener and small scale grower with grains that can be grown at home and prepared without milling equipment. The White Sonora Wheat is the grain we’ve started with, helping to re-introduce this heirloom and almost lost variety of wheat back to the Southwest, and the rest of the country. It has a papery husk that is easily hulled, has lower gluten content than today’s hybrid wheat and is well adapted to harsh climates. You can see other choices for the home grower in our Grains department.
In a story that is very much like the rise of industrial, commercial convenience foods we are seeing that the traditional grains and methods of making our daily bread is much more healthy, nutritious and tasty than the modern methods. To our surprise, many people are seeing that sourcing long fermented sourdoughs are easier to do and baking their own bread is not nearly as hard we we’ve been led to believe.
From New York to Africa, Why Food is Saving the World
Brian Halweil shares an important message about how food can and does change the world for the better. This short TED talk reminded me of my days in college and reading the same Paul Ehrlich title. Sometimes as individuals we can be overwhelmed with facts and figures, doom and gloom. In order to make positive changes in the world and home, we each need to take one step at a time. We hope this video inspires you to do just that!
Emergency Seeds – How to Feed Your Family in a Crisis
Survival seeds, emergency seeds or emergency seed banks – whatever term is used – have had a lot of attention and marketing focused on their purchase, storage and use in the recent past. The scenario usually goes something like this: buy this vacuum packed, nitrogen flushed can of emergency seeds for feeding your family in a disaster or crisis situation. The seeds are specially packaged for long life, and a single can will plant a 3/4 – 1 acre garden. These emergency seeds will be good for anywhere from 4 -5 years up to 20 – 30 years, depending on whose website you visit. One container of seeds can easily feed a family, more often a neighborhood. You can save the seeds from the harvest, ensuring a continual source of seed to grow more food for yourself. Sounds reasonable and encouraging, doesn’t it?
There are some faults with this direction of marketing and thought, though. Let’s look at a few of them to gain a somewhat different perspective on this issue. First is the quality of the emergency seeds themselves. If the seeds aren’t high quality and from an experienced, knowledgeable grower with a good germination potential and are pure and true to type, you are starting with a mixed bag and will get poor results. This rests on the seed supplier. If they are like most “Survival” supply companies they are a reseller, buying all of their inventory from wholesale companies, marking up the prices and shipping the products to you. They aren’t gardeners or growers and are not knowledgeable about agriculture or the seeds they are selling. It is worth asking some questions of them, such as where their seeds come from and how are the seeds sourced.
Another concern is how the seeds are packed. Seeds are living organisms and need certain conditions to remain alive. Vacuum packing and nitrogen flushing are very commonly used sales terms in describing why you should buy a particular brand of emergency seeds. These techniques sound great in helping to extend the shelf life of the seeds, but are really unnecessary for real-life emergency needs, as we will soon see.
The viability or lifespan of the seeds in storage is much more dependent on the temperatures and humidity levels than what gas the seeds are flushed with. Storage in high temperatures or high humidity conditions will drastically shorten the germination ability of the seeds – sometimes to just a few months – instead of the years that are advertised. Yes, the container is sealed but is not immune to outside temperatures. Besides, after the seeds are opened, how is the nitrogen flushing going to be replaced? It’s not, and it doesn’t really matter because the seeds realistically should be used in a relatively short time-frame and not stored for decades. You need the food that the seeds will grow, not just a container of seeds. Think about how humans have kept themselves alive for thousands of years, planting stored seeds from the previous couple of years, without the modern benefit of nitrogen flushing and vacuum storage, not to mention freezers or refrigerators.
Speaking of using the seeds in a relatively short time-frame, meaning planting and producing food from them, the seed stock should be rotated on a regular schedule just like the rest of your food stocks. Under normal household conditions, most seeds will be viable for 3 – 5 years. Some exceptions are the onion family – onions and leeks – as well as the hulless pumpkins. Their viability and germination really starts dropping off after the first year. They should be used regularly to grow food for the family and then replaced as the stock for a variety is used up.
Now we come to the most important point of emergency seeds in storage – their use. Unfortunately, many folks will look at the purchase of an emergency seeds source as a check to be made on a preparedness checklist. They will get their can of seeds in the mail, check the list off, and put the seeds in a safe place and move on to the next item on the list. This is analogous to that same person buying a firearm and ammunition, checking off the list and putting them in the closet. When needed, they realize that they have bought a rifle but the ammunition is for a shotgun, they’ve never tried to load the rifle and don’t know how to aim or shoot with it! Oversimplified, yes, but the point is the same. Seeds have incredible potential but their food value when sitting in the closet is pretty slim. They have to be used – planted and grown – to produce the food and realize the potential that they represent.
Gardening is a skill, much like being able to shoot accurately, clean and reload the firearm in a safe and efficient way. Other similar skill-sets are first aid, fire-starting or other bushcraft skills. These are perishable skills that must be practiced to be effective. Gardening is much more than simply scattering some seeds, watering them a bit, waiting a few days and then harvesting some food, as anyone who has practiced the art of gardening for more than a year will attest to! It takes time to make the mistakes, realize them as mistakes and learn from them. The time to start learning to grow some of your own food is today, not when the power goes out or the fuel shortages have stopped the trucks from delivering food to the local supermarket. It takes some time to learn the techniques of good gardening, and waiting until an emergency is in progress to start could be a very costly mistake in many ways.
Another mistaken assumption is being able to save seeds from the first year’s garden to continue a seed supply into the next year. This really ties into the skill of gardening in the above paragraph. Almost no-one that is inexperienced in gardening will be able to gain the skills in that first year needed to understand and maintain plant isolation, pollination and minimum population needs to ensure a viable and genetically robust supply of all of the seed varieties that they plant in the garden in that year.
First year gardeners will have their hands full learning the intimacies of their garden’s climate, soil nutrition and moisture needs along with how to keep the small and large veggie predators at bay, keep the young seedlings from freezing in a late frost or the grasshoppers or bugs from eating all of the leaves during the height of the summer. Seed production is an entirely different chapter to learn! That is why seed companies are around. Once a gardener has some experience in growing their food, then simple seed saving can be started with a much better understanding of what is needed without overwhelming them. They will then be much more successful than someone who is just starting out and trying to learn and be successful at everything in the first season.
A final thought on relying on emergency seeds as a food supply: what kind of food supply are your emergency seeds going to provide in the middle of the off season – meaning the winter in most of the country, or the middle of summer in the lower desert regions? Emergencies or disasters don’t always occur when the weather is nice and the garden can be worked. For this reason, a supply of emergency seeds needs to have a broader focus than most on the market. What can be planted that will grow quickly enough to provide nutritious fresh edibles for a family, no matter what time of year it is or what the growing conditions are?
Sprouts are an excellent example of what can be grown in any climate, at any time of year, with no soil, sunlight or space requirements. Four square inches on a countertop is all that they need. Many backpackers will continually sprout seeds for a fresh food supply when on long, multi-month treks for just this reason. A simple rinse once a day is all that they need to ensure a tasty, highly nutritious fresh food with no work.
For these and several other reasons, relying on a pre-packaged container of emergency seeds to supply the majority of your food in an emergency is probably not the best plan, especially if you are not an experienced gardener already. A seed supply can supplement an emergency food pantry with fresh greens and tasty vegetables, making the dehydrated or freeze-dried menus much more enjoyable. Let’s look at one approach to growing some of your own food based on an emergency timeline. We need to examine several assumptions that must be made before going on, as there is no possible way to anticipate every disaster or emergency scenario, or forecast in this article the range of home preparations that can and should be made. Most of these are easily prepared for well in advance.
The assumptions are these –
Starting on the day the power fails or the emergency occurs, let’s look at a timeline of what is possible, things to have in preparation and how everything can tie together to feed yourself in the short and medium term.
For the first week you should be able to eat out of your refrigerator and freezer. This is where the importance of a fairly well stocked fridge and freezer comes into play. Those that only have stale milk and coffee in the fridge won’t have the other resources to accomplish what we are talking about. The refrigerator will keep things cool for 2 – 3 days, depending on your location and temperatures outside. The freezer will become your fridge in 3 – 4 days as things thaw out but stay cool.
On the first day of the emergency, several things need to be done to start the sequence of growing that will help feed and sustain you for the next week to month or so.
As you can see from the list above, there will be a limited diet for the first three weeks to a month if you are not currently growing anything when the emergency occurs. This is why a well-stocked refrigerator, freezer and pantry are important, along with an on-going garden. Being able to use the fresh garden produce to supplement the dried, canned, freeze-dried and otherwise prepared foods will make meals much more interesting and tasty. Of course, if a garden is already in production then everything changes, as the food supply isn’t nearly as threatened.
A supply of emergency seeds can be a critical positive factor in any disaster preparedness plan. It is perhaps best to look at any seed supply as part of a “Life Assurance Plan” where the basic needs of your family are supplied without needing to run out and buy something (or everything) when an emergency happens. A Seed Assurance Plan, as part of life assurance, means investing in seed, growing knowledge and experience instead of waiting for the disaster to strike and hoping that the seed will grow into enough food to feed you.
Hope is not a plan when it comes to providing for your family, especially in a disaster or emergency. You don’t hope to find the job, business or career that will help feed, clothe and house your family in daily life. You make a plan, get education and experience, take risks and actions that move you in the direction that you want and need to go. The exact same thing applies to your seed supply!
One thing that we do hope is that this article has given you food for thought in how a good supply of heirloom seeds, along with common sense forethought, can help get you through any unforeseen emergency or disaster. Obviously, this is an introduction to some concepts that aren’t being talked about nearly enough. This is a complex topic with many branches, offshoots and directions to go that really can’t be introduced here. The next steps are up to you, but aren’t difficult. Get started today and start small. Read more, get more education, become more informed and start your garden, even if it is just a couple of 5 gallon buckets on the patio or back deck. Find what interests you and pursue that angle or direction.
Spinach Salade Lyonnaise
SPINACH: The Prince of Vegetables
For many baby-boomers, the constant refrain of “Eat your spinach, it’s good for you!” and the olive green glop of canned vegetable that accompanied the words, led to life-long spinach avoidance. Well now is the time, if you haven’t already, to overcome your spinach phobia. One nibble of a local farmer’s sweet and vibrant fresh spinach will do the trick.
The first spinach you see every spring is most likely from seeds that your farmer planted late last fall. The seeds germinate and barely start to put down roots before the frigid weather descends and they go into dormancy under the ice and snow. At the first hint of spring, however, they start growing like mad, and soon the leaves are huge, thick, juicy and sweet–unbelievably rich and meaty. You really have to taste it to believe it.
If great taste alone is not enough, remember that spinach is high in vitamins A and C, and in iron and folate. It is also a good source of fiber and magnesium, and is very low in calories. And if you’re still not convinced, wine fortified with spinach juice was the healing elixir traditionally given to injured French soldiers. And the Persians, who cultivated the leafy green from at least the 6th century, recognized spinach’s sophistication and called it “the prince of vegetables.”
The best thing to do with any fresh vegetable is almost nothing. But I confess that I have become dangerously enamored of this Fresh Spinach Salade Lyonnaise. It is quick and easy to make, yet fit for a king with the combination of meaty-leaved spinach, crisp bacon, barely cooked eggs, and warm, sharp Dijon vinaigrette. (If you want to go vegetarian or vegan, just leave out the bacon and egg, adding another few tablespoons of olive oil to the dressing.) Keep this salad in mind when fall greens like frisee, escarole, and radicchio roll around because the hot dressing will soften and sweeten those sturdy leaves.
Spinach Salade Lyonnaise from Farm Fresh Now!
Serves 4 as a side dish, or 2 as a main course.
Secrets of a Seasonal Cook
Article © Terra Brockman
Photo © Cara Cummings
Farm Fresh Now! is a project of The Land Connection, an educational nonprofit that preserves farmland, trains new farmers, and connects people with great locally-grown foods. This series is made possible with generous support from the Illinois Department of Agriculture.
Hand Packing Heirloom Seeds Video
Have you ever wondered what goes into the packets of heirloom seeds that you get in the mail? Those little paper envelopes have a lot of work, care, love and attention in them. We wanted to show you a little peek behind the scenes on how we pack our seeds here at Terroir Seeds.
Some people don’t know that we hand pack each and every one of our heirloom seeds packets, while others don’t understand why we don’t use a machine to pack them. To answer the second point first, the seed packing machines that are used in larger seed companies are prohibitively expensive, even when available used. They are fast, but require cleaning and recalibration to the new seed for each and every seed variety packed. In our company, this would mean we would spend about two thirds of our time cleaning and calibrating the machine and less than a third in packing seeds. It doesn’t make sense for us quite yet! And yes, we actually do hand pack each and every seed packet that we ship!
For quality control, we only work with one type of seed at a time. This avoids mix-ups, as all tomato or pepper seeds look the same! When a new batch of seed arrives for the season, we count the number of seeds that are supposed to be in each packet, then find the correct measure that will consistently give us the number we are looking for. This may mean we count the same seeds several times, to make sure we are putting the correct number in a packet. We try to err on the generous side. Sometimes that is the same measure as the year before, but not always. Differing weather conditions, nutrient availability, pest and disease pressures all play a part on the physical size of the seeds from year to year.
As you probably imagine, this part of our business is very important to our continued growth. It is a detail oriented, behind-the-scenes type of job that requires high levels of concentration. With our growth, keeping up with the seed packing is requiring more time and will soon be a full time job.
We hope you enjoy the video and learn a bit more about why we put so much effort and love into our seeds!
Benefits of Heirloom Seeds vs GMO Seeds Video
What’s Up with Our Seeds? Heirloom Seeds vs GMO Seeds
As a point of clarification, Wendell Berry’s excellent passage from “The Idea of a Local Economy” was read –
The point was made that we as individuals must make our own decisions for our own lives, starting with the decision to determine the quality and source of our food that we want. From there, the opportunities that are open to the individual were explored, as well as the responsibility to learn more about our food that we eat and to take action based on this new-found knowledge.
Watch the presentation to see why we believe that every person growing a garden makes the world better, one garden at a time!
GMOs and Roundup – How They Affect People, Animals, Soil and Waterways
Stephen Scott: GMOs and Round Up – Genetic Hazards to Our Children? from The Healing Grapevine Network on Vimeo.
Here is a video presentation that I did for our local Non-GMO group that shows the dangers of not only GMO seeds but how they work with Roundup (glyphosate).
I wanted to explore the implications and relationships of Genetically Modified seeds and Roundup (glyphosate) to the health of people, animals, soil and waterways.
Show how GMOs are developed to be glyphosate tolerant, able to absorb the poison without dying. They then pass this glyphosate up the food chain, creating a multitude of chronic and acute health concerns in domestic animals as well as people.
Then, taking a larger view and examining the lifecycle of glyphosate in the soil, show how it chelates minerals and nutrients needed for life, and its effects on the lifecycles in waterways it contaminates. Explore ways to tie up glyphosate in the soil through mineralization and soil building techniques.
This is a serious concern for many, and here is some knowledge to give you an edge in dealing with it!
Russian Dacha Gardening – Homescale Agriculture Feeding Everyone
There are a growing number of conversations and discussions taking place around the country, in person and online, about a highly important emerging question – how are we going to feed ourselves with a growing population, diminishing resources and a challenging climate?
We see news reports of crop devastation from droughts, floods and other weather related impacts around the world. There was a world-wide food shortage in 2008, causing a sharp spike in wheat prices that started a series of governmental overthrows in the Middle East. Clearly, food is important in a way that many have not thought about here in the United States. We didn’t experience much in the way of price spikes in 2008, but if we look, there is clear evidence that we are experiencing our own price increases; they are just in a different manner.
The prices for food, when compared to a couple of years ago, have risen significantly, even here in America. Our food system is complex, with major food companies and distributors absorbing the brunt of price increases and passing them along in increments, instead of all at once, so that we are not as aware of the increases in food prices. With a severe drought across most of the country in 2012, and winter moisture levels significantly below normal for this year (2013), more crop failures are predicted along with higher prices.
It is natural that this conversation is beginning to happen. In venues ranging from upscale coffee shops to rural diners to governmental meetings, more and more people are asking, “How are we going to feed ourselves?” The conversation more often than not becomes some form of commercial vs. small scale agriculture, with both sides speaking passionately about the benefits of their systems and judiciously pointing out the shortcomings and detriments of the other systems. It becomes an either/or argument and is a great example of false dichotomy.
We are not against large-scale farms, as there are a number of great examples of how size does not automatically mean a dependence on petro-chemical inputs, using fertilizers, herbicides, pesticides in an attempt to change a natural process into an industrialized, mechanical one to be controlled.
There is a need for a food production system of many sizes and for many reasons. We need diversity in size and scale, as it gives resiliency to our food system as a whole.
During the course of these conversations a logical disconnect often occurs. The commercial scale folks talk in solid, proven, real world terms and numbers. They should, as this is what they know. They talk about how only industrial farming can feed the world, as it will require their technology, equipment and inputs to grow twice as much food. These are terms that they are familiar with. When the alternative of small scale, local and sustainable agriculture is put forth, they begin to talk in relative and theoretical terms, partly out of ignorance as they are not experienced or familiar with this different approach to agriculture. Sometimes it will be as a dismissal of the effectiveness of sustainable agriculture.
Here is where the disconnect happens: when advocates of local and sustainable agriculture talk, they also tend to talk in theoretical and abstract terms, not in the proven, real world results based terms that the industrial ag folks use. This skews the entire conversation!
Some of this is understandable, as the definition of “local and sustainable agriculture” is completely opposite on the spectrum of commercial and industrial. It is hard to speak about total food production or capacity from the local and sustainable model as it is from the commercial one, for the simple reason that there is more documenting and reporting of figures in large scale agriculture, with almost none in the local one.
This doesn’t mean that alternative agriculture has nothing to contribute. Far from it. Sustainable agriculture, on any scale, is a highly important contributor to the conversation, and our future. There is a school of thought that states, “We will ultimately wind up in a sustainable economic and agricultural model, either by choice or by force.” I’m going to ignore the economic portion of the statement for this article, as it is beyond the scope of our focus.
The thought goes on to show how we don’t have a choice on becoming sustainable in agriculture, as we simply cannot continue our current path of mining our soils of nutrients and using petroleum as a replacement. The petroleum is used for transportation, to power the mining equipment extracting the minerals used to replace those lost in the soil, and for herbicides, pesticides and petro-chemical based fertilizers. Both the nutrients and petroleum are finite, we all know this. What we don’t know is precisely when these resources will run out. They are becoming more expensive each year, looking past short-term fluctuations.
During the conversation on feeding ourselves, several examples of sustainable agriculture that are currently being practiced are usually brought up, such as Cuba. When Cuba suffered the oil embargoes and trade restrictions, many citizens died from the catastrophic decrease in daily calories as a result of very limited food production on the island in relation to the size of the population. Everyone lost around 30 pounds as they struggled to find ways to grow all of their own food with most people having little to no gardening experience and a loss of machines to work the land. Eventually they did succeed, and today Cuba is an example of small, local and sustainable agriculture feeding the population.
This example is pooh-poohed by the industrial ag proponents, “Of course Cuba can grow their own food, they are a tropical island, they can grow anything. It’s not like that here or in the rest of the world.” They ignore the difficult history and work that it took for Cubans to be able to grow their own food.
What if there was another example; one of an industrialized, well-populated country that is larger than the USA, grows about half of its total food production in home gardens in a difficult and short-season climate, with no machines or animals to help? Would that example suffice to show that local, small-scale, sustainable agriculture can be a proven, viable alternative to the industrial agriculture model?
The term dacha, dating back to at least the eleventh century, has had many meanings; from “a landed estate” to the rural residences of Russian cultural and political elite. Since the 1940s, the term “dacha” has been used more widely in Russia to define a garden plot of an urban citizen. This is when the urban populations began to rapidly expand their garden plots to provide food for themselves, their families and neighbors.
Dacha gardening accounts for about 3% of the arable land used in agriculture, but grows an astounding 50% by value of the food eaten by Russians. According to official government statistics in 2000, over 35 million families (approximately 105 million people or 71% of the population) were engaged in dacha gardening. These gardens provide 92% of Russia’s potatoes, 77% of its vegetables, 87% of the berries and fruit, 59% of its meat and 49% of the milk produced nationally. There are several studies that indicate that these figures may be underestimated, as they don’t take into account the self-provisioning efforts of wild harvesting or foraging of wild-growing plants, berries, nuts and mushrooms, as well as fishing and hunting that contributes to the local food economy.
Clearly, there is something to be acknowledged and studied here! Of note to us Americans, dacha gardening or self-provisioning gardening was the foundational reason that the Russian people did not experience a famine in the early 1990s after the USSR collapsed, and the state sponsored, heavily subsidized, industrial commercial agriculture collapsed along with it. This drew the attention of researchers seeking to find an explanation. Several attempts to explain it away as only a survival strategy have failed, especially when the extensive historical context is examined. Dacha gardening is much more than merely survival, and has always been.
This was not reported outside of Russia, as it wasn’t considered newsworthy. What is truly newsworthy today is that we as a nation aren’t in as favorable of a position if there were a similar catastrophic occurrence in our food distribution, power grid or dollar value. We are all too dependent on outside sources for our food, with most Americans tied to the grocery store and its 3 day supply of food being constantly trucked in.
Today’s dacha gardening closely resembles the peasant gardening production of the late 19th and early 20th centuries. This shows a continuation of methods and techniques that have proven effective in a small scale garden that works as well today as 200 years ago. The Russians do not use machines – tillers or tractors – or animals on their garden plots, cultivating them in much the same way as the peasants did in the 18th Century.
Dacha gardening is not and never has been simply a survival strategy – a response to poverty, famine, adverse weather or social unrest. Recent studies have shown that Russian food gardening is a highly diverse, sustainable and culturally rich method of food production. This was initially recognized almost a century ago and has been confirmed more recently.
If examined through a strictly economic lens, dacha gardening makes no sense at all. There is much more labor as a dollar value invested than is harvested, but that isn’t the point of this type of system at all. The function of dacha gardens goes well beyond their economic significance, because they serve as an important means of active leisure as well as a way to reconnect with the land. Traditional economic calculations fail to realize the true value and benefits of a dacha garden. Clearly, a wider viewpoint is needed to realize all of the benefits! Time spent in the garden is seen as relaxation, education, entertainment and exercise – all in one. Food production is a very valuable bonus.
Despite their significant contribution to the national food economy, the majority of dachas mostly function outside of the cash economy, as most dacha gardeners prefer to first share their surplus with relatives and friends after saving enough to feed them through the winter, and only then look at selling what remains. A few will sell the remainder at local markets, and move into a small market production model for extra cash.
The Russian mindset relating to the sharing of surplus food is important to examine, as it is one of the keys that ensure the success of the dacha gardening model. In dacha gardening, people will share their excess food out of a sense of abundance or plenty. It is a very positive and powerful motivator which creates an upward, positive spiral of sharing among the community.
There are no feelings of “owing” from one person to another. When someone gives food to another, it is not “charity” or putting them under an obligation to repay. It is an exchange of excess freely given with no thought of repayment or obligation.
Economic profit is only one of the potential benefits of this type of food production. Other economic components are increased food security with a robust, decentralized and local food supply and distribution. Agricultural sustainability, conservation of bio-diversity and the preservation of heirloom varieties are some of the environmental contributions of dacha gardening. Socially, dacha gardens help create community and a connection with the land and nature.
In addressing the question of “How are we going to feed ourselves?”, we have a lot to consider in looking at the effective, proven and ongoing examples that Russian dacha gardening has to offer us. A closer study of the methods and especially the mindsets will help all of us become more resilient and self-sustaining in our food systems right here at home.
Russian Dacha Gardening Research – Dr. Leonid Sharashkin
Lavender Soothes Animals Too
Lavender Aromatherapy Soothes People, Horses and Dogs
Lavender has been used to soothe and heal people for a long time, dating back to at least the Egyptians where it was commonly used in daily life. Not only does the fragrance refresh and soothe our senses, but the scent or aroma molecules pass to the limbic area of the brain directly from the nose. The limbic area deals with instinct and emotion as well as many of the body’s autonomic systems, such as the immune system. This is one of the primary ways that inhaling lavender essential oils helps to calm us down and restore a sense of peace. This aromatherapy is also highly effective with the animals we share our lives with.
Aromatherapy is the use of specific plant essential oils to enhance physical and psychological well-being. As a therapy it has been proven with use dating back thousands of years. Essential oils are distilled from specific plants and are 100% pure aromatic oils. Some oils are especially potent and are highly valued for their benefits and concentrations of essential oils. Lavender from Provence, France is one such oil as it is grown in the high altitude and harsh climate where the lavender plants respond to the environmental stresses by producing higher than normal amounts of protective oils, which give us benefits when the flower buds are harvested and distilled. Another source of high-altitude lavender oil from the United States is Red Rock Lavender, grown outside of Concho, AZ with a climate that is very similar to Provence. The essential oils produced in Concho are the second most potent in the world behind that from Provence.
It must be noted that there is some confusion due to exceedingly clever marketing on aromatherapy oils. As a result, many people have the mistaken idea that any kind of perfumed scent is aromatherapy. This is not true. Synthetic oils, often labeled “fragrance oils,” are not the same as essential oils. There is no therapeutic effect on the body like with true distilled essential oils. If you are buying essential oils, make sure to source them from a reputable company and that the oils are true, therapeutic grade essential oils and not fragrance oils.
Another approach is to grow your own lavender. It is a hardy perennial in most parts of the United States, with several different varieties that are suited to different climates. You can buy starts and transplant them or start your own from seed. Once your lavender plants are established, you will have an abundance of lavender sprays for many uses!
Aromatherapy is a little different for animals than for humans, with the main difference being the sense of smell that most animals have over humans. Animals have a much more acute sense of scent than we do, so the amount of oil or scent will need to be reduced by 2/3 for a start to see how the response is. It is much easier to increase the amount bit by bit than to overwhelm their nostrils on the first whiff!
A word of caution is needed here, as some essential oils can be toxic to cats. Certain essential oils naturally contain phenols and should never be used with cats. Their liver does not produce the enzymes to digest these compounds allowing them to build up to toxic levels in their systems. It is safer to avoid using aromatherapy with cats, unless you are working with a skilled aromatherapist with experience and knowledge in working with cats.
Lavender is well known for its effectiveness in calming people, horses and dogs. There are many studies that show the immediate and intermediate positive effects that lavender has on sensitive, stressed, anxious animals. Both horses and dogs respond very well to the scent of lavender with decreased heart rate and respiration, a calmer posture, less shaking and pacing or other nervous behavior. Spray some essential oil on a cloth or the dog’s bed before a car trip to ease stress, just before thunderstorms and for separation anxiety. You can also put a few drops on a cloth and tie it to the dog’s collar for a longer-lasting effect. For horses, a cloth with a couple of drops to introduce the new scent to them will usually have a beneficial effect. After they are used to the aroma, it is easy to let them inhale the scent off of a cloth that is kept for that purpose. They can benefit from a cloth hung in the trailer before a trailer loading session, before and during a road trip – adding a few drops of oil if needed during fuel or rest stops.
One other benefit of lavender essential oil is it is a highly effective insect repellent for both horses and dogs. The same properties that make it a pleasing and relaxing aroma for us and our animals make it the ideal insect repellent. Just add 10 – 15 drops of lavender essential oil to a spray bottle and fill with water, shake well and apply! Make sure to avoid the eyes, but all other parts of the body are ok.
Chicken Epidemic Linked to Equine Pathogen
Free range chickens are great for the small scale grower or modern day homesteader for their eggs, bug control, funny antics and sometimes meat. One thing to be aware of is some of the dangers that face chickens, such as coyotes, dogs or hawks. Ravens are very fond of the eggs, often waiting until they know that a fresh egg is available and swooping down to carry off a tasty snack.
Another danger has recently re-surfaced on a free range chicken farm in Denmark. A pathogen that is commonly carried by horses has been shown to be the cause of a deadly outbreak of respiratory illness in the chickens. The bacteria Streptococcus equi zooepidemicus, often shortened to “Strep zoo” will colonize the skin and respiratory tracts of horses. It can cause pneumonia, strangles and other diseases, but also can be inactive in the horse, never showing signs or causing illness. These “silent carrier” horses can spread the pathogen within their area and to other animals. This is a prime reason for once or twice a year vet visits for your horses, as the vet will know what diseases are active in the immediate and surrounding areas along with what methods are best used to counteract them.
A large free-range poultry farm in Denmark had 80% of their chickens die over a four month series of outbreaks of respiratory illness. After laboratory testing at the University of Copenhagen traced the disease to the herd of horses living on the same property, researchers found that separating the horses from the chickens is one of the best methods of preventing the spread of the disease.
Outbreaks of Strep zoo in poultry have been very rare in recent decades, mainly due to the decline of the small farm with its varied populations of animals. With the increasing popularity and economic viability of the diversified small farms returning, we must be careful not to repeat the hard lessons learned by our grandparents and great-grandparents. This is just such one lesson; that of keeping the poultry separated from any direct contact with horses. The Strep zoo bacteria is a respiratory illness, so secondary contact should be fine, such as chickens pecking through the horse manure to control flies.
A Major Outbreak of Streptococcus equi subsp. zooepidemicus Infections in Free-Range Chickens Is Linked to Horses
Seeds – Getting Their Due Recognition
Seeds – The Buried Beginnings of Food
Simran Sethi is an award-winning journalist, strategist & educator who teaches & reports on sustainability, environmentalism & social media for social change. Simran is dedicated to a redefinition of environmentalism that uses innovative forms of engagement & includes voices from the prairie, urban core & global community. She recently gave an inspiring presentation at TEDx Manhattan on Seeds – The Buried Beginnings of Food where she shared how much seeds really do matter to all of us, no matter where we live or what we do as a profession.
After showing how few varieties of edible plants we cultivate for our food – about 150 out of more than 80,000 – she goes on to explain the vast majority of humankinds food comes from just about 30 species. In America, over half of our daily calories come from just 4 foods – rice, corn, wheat and potatoes! We are seeing the results of a gradual shrinking in the variety of our food supply over the past 50 years, what is known as a loss of agricultural biodiversity. This is the unintended consequence of a system that was originally intended to increase productivity and feed the world – large-scale industrialized agriculture.
Moving on, she shows the staggering loss of the cultivated foods we used to depend on – by some estimations a 75% loss of food varieties that have disappeared since 1900. Combined with this is the alarming consolidations in the ownership of seeds, essentially seed monopolies. Three corporations now account for over half of the global commercial seeds market today. This includes hybrids and GMOs, both of which can’t be saved and re-planted for the next year. With this model, seeds have become non-renewable resources, inventions created by companies that farmers are required to buy from year after year.
One company now controls the genetics of nearly 90% of the corn, cotton and soybeans grown in the United States. That same company bought the world’s largest developer and grower of vegetable seeds in 2005. As she so emphatically states,
Watch her powerful presentation, learn a few things and become inspired to take a more active part in your food!
Luther Burbank Home & Gardens
One hundred years ago, the name Luther Burbank was instantly recognized in a way that we are not familiar with today. Beginning in 1873 and continuing until 1932, 6 years after his death, more than 800 new varieties of vegetables, fruits, flowers, nuts and grains were bred, stabilized and introduced by him. He was much better known than the common term “Rock Star” today, because what he did transcended social, financial and political boundaries.
An American botanist, horticulturist and pioneering agricultural scientist, Luther’s name is often entangled with the emergence of bio-engineering and the patenting of plant life. This is truly unfair, as his work was dedicated to expanding the grower’s options, giving them improved varieties that grew, looked and tasted better and were more affordable to the consumer than what was available at the time. There were few thoughts of patenting the plants that he developed, as the Plant Patent Act was passed in 1930, 4 years after his death. He was more interested in getting the new varieties out into the world and into the hands of the growers and gardeners.
The number of varieties that he introduced is enormous, from his first discovery- the potato – to blackberries, plums, walnuts, quinces, lilies, roses, rhubarbs, daisies, dahlias, poppies, the plumcot or pluot, amaryllis, spineless cacti, peas, primroses, cherries, corn, artichokes, sunflowers, the New Burbank Early tomato, day lilies, Elephant garlic, strawberries, thornless blackberries, amaranth, zinnias, nectarines and peaches.
One of his earliest developments was the blight-resistant potato that was exported to Ireland and helped end the famine there. We know it today as the Burbank Russet that is the most commonly grown and eaten potato today.
He transformed 19th and early 20th Century California from a primarily wheat producing state to varied types of fruits. Europe changed from an exporter to a net importer of fruit, especially California fruit, due in large part to Burbank’s fruit breeding and the climate of California.
Other achievements included spineless cacti to help arid Western ranchers provide another, more reliable source of food for their cattle in harsh conditions. The stone-free plums were his and even the now-common bright crimson California poppy that is very well known was originally orange.
The Luther Burbank Home and Gardens is a museum of his home and workspaces where he did much of his thinking and plant breeding. He is buried on the property as per his final wishes to be part of the landscape where he lived. This is the first house he lived in when he moved to Santa Rosa. The second and larger house that he built with the income from an overseas seed sale is no longer standing.
We took a tour of the home and grounds last fall. The existing grounds are only a portion of the original gardens, as much of the land has been sold off in later years. It is impressive to see what was accomplished here.
We took a lot of photos during our visit and wanted to share the following photo essay with you!
Cindy and Eileen are standing at the back entrance to the home.
The home with its unique greenhouse where much of the experimental breeding was conducted. The trees are all mature and very large.
The 2 story house was considered to be large in its day, and is a very comfortable size even by today’s standards. We were able to tour the ground floor and see how it has been maintained.
The guestbook shows a number of famous and influential visitors, from Henry Ford and Thomas Edison to foreign heads of state and agricultural ambassadors from around the world.
Luther designed his greenhouse, using flat glass panels but creating a rounded structure. The panels are overlapped like shingles and held in place with wooden cross-pieces. The loose set brick floor retains heat and allows water to flow through. There is a fireplace at one end to heat it through colder winter nights. The current configuration has been changed from the original, Elizabeth shortened it after a fire.
Dwarf lemon tree with lemons in mid September.
More dwarf citrus.
Cindy with Shasta Daisies and her favorite flower, the sunflower. There are rows on rows of these beds, each with different species of flowers and most of them are marked.
Eileen in front of a trumpet bush.
There were several milkweed pods ready to burst and send their silky fine flossy seeds into the world.
This is what a handful of milkweed floss will yield, only a few seeds! This will be part of the challenge when we help to harvest the milkweed seeds at Painted Lady Vineyards Milkweed Project this fall!
And away they go! There was a breeze during our visit, so they blew away quickly.
Spineless Cacti.
Colorful Rudbeckia.
Monarch luncheon.
Bee feasting on Dahlia pollen.
A fuschia Dahlia.
Bees having a party!
Cactus Dahlia.
Grow Better Peppers with Shade
Peppers Like a Little Shade
Sweet peppers and hot chiles are an important part of almost everyone’s garden, though in different ratios for many! Some really enjoy an abundant late summer and fall harvest of sweet bell peppers while others look forward to the hot chile harvest for months ahead.
One of the main concerns with growing peppers or chiles is the drop off in both quality and production during the height of the summer heat. As the long, hot days of summer set in production drops while diseases increase such as blossom end-rot and sunscald. There are some surprisingly simple approaches that can make a big difference in this year’s harvest of your beloved sweet peppers and hot chiles!
Three Techniques to Boost Pepper Production
Mulching is one of the very first techniques that has been demonstrated as beneficial to both quality and quantity. Combined with a drip system on a timer, large improvements to the health and vitality of the plants can be seen quickly. These two factors improve the stability of the soil moisture levels, moderating the peaks and valleys from wet to dry. This reduces the stress levels on the plants as they are able to access water on a continuous basis. The mulch insulates the soil and top levels of roots from drying out too quickly and often brings the moisture level up to the surface of the soil, instead of a couple of inches down. Another benefit to mulching with at least an inch of straw type mulch is the temperature insulation of the soil. Reducing the heat gain in the upper levels of the soil improves the plant’s amount and quality of production.
Shading of the pepper plants was recently examined with experiments done in Mexico, Spain and Israel as well as by the University of Georgia. They studied different shade cloth levels impacts on pepper production from 2008 to 2010 with four different levels of shade alongside no shade as the standard. They measured the air temperatures and the soil temperatures and correlated these changes to improved or reduced quality and quantity of peppers. The amount of peppers lost to rejection for quality reasons were closely examined.
What the study has shown is a moderate amount of shade, such as a 30% shade cloth, is the ideal. More shade didn’t produce better peppers past the 30% shading. In fact, as more shade was applied, the plants grew more but produced less peppers with more defects that caused them to be rejected. The moderate shading reduced the heat stresses by lowering the air and root zone soil temperatures, while decreasing diseases such as sunscald and blossom end-rot.
Works for Tomatoes as Well
It is interesting for us to note that these exact same approaches have proven to be the key to successfully growing tomatoes through the hot summers in Phoenix and Tucson, where daytime highs can reach 110 – 115°F! The use of raised beds, drip systems on timers, thick straw mulching and shade cloth allows the pollen to be under the critical 90°F for enough of the day to continue producing tomatoes.
If you have had problems in the past with peppers, chiles or tomatoes slowing production and having disease issues with the onset of hot weather, try these growing tips to get you back on track!
The Benefits Of Shading Peppers | GrowingProduce
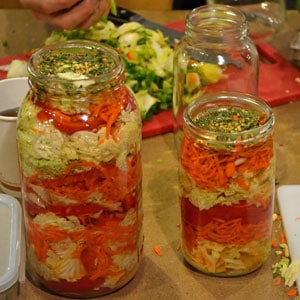
Fermented Pepper Sauce
Preserving that overly abundant harvest has been one of the major challenges that gardening and agriculture has always had. In today’s world we are much more familiar with the processes of canning, drying and freezing as acceptable methods of preserving our garden’s harvest for the winter season and longer. These methods have their own set of challenges, though. Canning requires time, experience and knowledge to be successful. Freezing is pretty simple, but has its own set of needs to ensure the garden bounty isn’t lost to freezer burn or premature thawing. Drying is also simple, but benefits from modern drying equipment that can be expensive as an initial purchase.
What if there was another way, a method of preserving the harvest that is not only simple, non-intensive for both labor and equipment and was proven safe? One that is location and temperature independent, doesn’t care if you forget the exact timing and still produces an absolutely delicious product? There is! That method is fermentation. It has been proven safe over several thousand years, with at least that many different approaches and many more recipes. Almost every culture across history has contributed something to the art of fermentation.
Fermenting vegetables is an extremely simple, effective and tasty way to start experimenting and gaining knowledge, taste and experience. In addition to being easy and quick it is also highly nutritious and beneficial to your health.
Some folks are hesitant or outright afraid of trying fermentation for fear of accidentally growing the “wrong” bacteria and sickening or even killing themselves or their families. This is completely understandable in today’s world of anti-microbial soaps, detergents and wipes.
At least in the world of raw vegetables, this fear is unfounded. “As far as I know, there has never been a documented case of food-borne illness from fermented vegetables. Risky is not a word I would use to describe vegetable fermentation. It is one of the oldest and safest technologies we have.” This is from Fred Breidt, a USDA microbiologist specializing in vegetable fermentation.
In fact, fermenting commercially available vegetables will kill any pathogens that we’ve seen in the news as contributing to food-borne illnesses, as they simply cannot survive in the lactic acid environments of fermentation!
This is going to be a slightly different recipe format than we usually do. We will give you a foundational approach to fermenting any vegetables, and then give a basic recipe for a sweet and hot fermented pepper sauce or paste. The beauty of these recipes is that they are entirely scalable. Do you have an extra quart of hot chiles, a handful of sweet peppers and some garlic or onion? Great, we can work with that! Or do you have a couple of 5 gallon buckets of hot chiles and 3 more of sweet peppers, more onions than you know what to do with and you’re worried about them all going bad? No worries, we can work with that as well – all from the same recipe! The flavors from each recipe will be different, but equally delicious and nutritious.
There is a new book on fermentation on the market, and it is most excellent. The Art of Fermentation by Sandor Katz is his newest exploration of this ancient form of preserving foods. His tagline on the book reads, “An in-depth exploration of essential concepts and processes from around the world.” The basic concepts of fermenting come right out of his book, and they are easy!
Vegetable Fermentation Made Easy
It doesn’t matter if you have one or a dozen veggies, the above recipe works. Add spices, herbs or edible flowers and experiment. You will be surprised at just how tasty almost everything comes out.
Now that we have the basics down, let’s look at how to handle that bumper crop of hot chiles and sweet peppers. These, along with tomatoes, are one of the most expensive vegetables to buy in the store, but taste so much better out of your garden. It is an absolute crying shame to let any of these go to waste!
Let’s look first at a hot fermented chile sauce, much like Sri Ra Cha or “Rooster Sauce” as it’s called after the rooster on the bottle. The only ingredient ratio to keep in mind is the chile to garlic. Don’t go crazy on the garlic, as it gains pungency as it ferments and can throw off the overall flavor.
A note on the salt – use anything but Iodized salt, as this will cloud the color of the brine and can leave a metallic aftertaste.
Homemade Fermented Sri Ra Cha Sauce
Will keep for 6 months or more, but you’ll eat it long before then!
Recipe notes: Wait until the chiles are fully ripe and red, as they will have the most complex flavor profile and yield the tastiest sauce.
Use the general ratio listed to scale up or down to suit your particular needs at the time.
Now let’s look at a larger batch with more ingredients and a completely different flavor.
Sweet and Spicy Fermented Pepper Sauce
Now you have the basic foundation of how to make some incredibly delicious chile or sweet fermented pepper sauce. You can go from mild to shockingly hot and experiment with different spices and amounts of complementary vegetables to add their flavors. You will quickly become something of a hero to your family and friends once they taste your unique sauces!
Fermented Tomato Conserve (Conserva Cruda Di Pomodoro)
As you improve the health and fertility of your soil, you should start seeing some impressive vegetable harvests. This can be a blessing as well as a curse though. Many people know the old but highly accurate joke about the neighbor that leaves a bag of zucchini on the doorstep, rings the doorbell and runs. This is all well and good, but what to do with 100 pounds of fresh plum tomatoes? Or 150 lbs., 200 lbs. or more? The old doorbell trick will only go so far, so let’s look at a delicious alternative! Tomato conserve is a perfect choice.
Drying and canning are always options, very good ones that should be used. There is another ancient method of preserving the bountiful harvest to capture the fresh flavors for the cold winter and gray early spring months when there wasn’t much of anything fresh available. Fermenting fresh vegetables opens up so many flavors and paths to storing this summer’s bounty for the coming winter. We will look at one such method that not only ferments the over-abundance of tomatoes, but concentrates their flavors as a bonus.
A word about fermenting before we begin is in order, so that you don’t come home one day and throw out the entire project due to a misconception or lack of understanding of how the process works. This particular process uses a wild fermentation, meaning the combination of wild airborne yeasts and the naturally occurring bacteria that is on the tomatoes. This wild fermentation is spontaneous; you don’t do anything to help it along. The acid in the tomatoes provide the perfect environment to support lactic acid fermentation. There will be a surface mold which is white and completely normal. Indeed, the white surface mold is needed to protect the tomatoes from rotting. You should not see any colored mold or offensive “rotting” odors.
This process has been used for several hundred years in Italy; probably the first time was shortly after the tomato made its way from America to Italy in the early 1500s. It is still being used today, all across Italy, as small scale home growers put up their harvests to have the flavor of summer to remember during the coming winter.
The beauty of this method is that it is very scalable, able to handle 20 lbs. in one batch and 100 lbs. or more the next one.
Fresh Tomatoes for Conserve
Start with all of the tomatoes washed, stems and any bad spots removed. Get a container that is larger than the amount of tomatoes, so that when all of the tomatoes are crushed there are several inches of space to the top of the container. If necessary, use more than one container.
Packing Fresh Tomatoes
Crush all of the tomatoes and add them to the container. Stir well and cover with a towel, dishcloth or such to keep insects out while allowing air circulation.
Fermenting Tomatoes
The fermentation happens within a few hours and bubbles will appear, with the solids coming to the top and a white mold forming on them. Remember, white mold is good! Stir twice a day, mixing in the mold. (Note, we did not stir the tomatoes, just let them sit for 5 days and everything turned out fine!)
Fermented Tomatoes
The fermentation will take from 4 to 5 days, depending on temperature and then stop. Remove the solids from the top and strain the mixture through a strainer. One of the best ways to do this is by using a hand cranked device that separates the skins and seeds from the pulp, called a Squeezo or Roma food strainer. The Squeezo is all metal and more expensive but will last several lifetimes!
After straining, keep the pulp and compost the seeds and skins. (As a side note, it you are wanting to save the seeds from those wonderful tomatoes, just transfer them into another bucket for a second ferment for a couple of days, scoop off the mold on top and strain out the seeds. Rinse thoroughly and dry on paper towels with the seeds spread out.)
Fermented Tomato Pulp
The pulp will still have a lot of moisture that needs to be removed. Do this by further straining the pulp in a fine mesh bag or cheese making bag over the sink or a catch bowl. Tie the bag closed, let it hang and drip liquid for a day. It may become covered with a layer of white mold again, just “shave” it off after it finishes the drip process.
Draining Tomato Pulp
The pulp will be noticeably drier and reduced in volume. If the consistency is thick enough for you, stop here. If not, put the bag between two boards or plates with a weight on top to compress it and further drain moisture out for another day or two.
Drained Tomato Pulp
When it is the consistency that you want, traditionally that of firm dough, remove any mold on the bag, open it up and peel it off of the now-firm pulp.
Fermented Tomato Conserve
The Italians add 25 percent salt to the tomato pulp, but most Americans find this to be way too salty. 10 percent is a good starting point, as it is much easier to add salt than to remove it! Mix the salt in well and let sit. After a few hours knead the mixture just like dough to develop the texture and store it in a jar. It does not need to be refrigerated and will last for several months. In Italy it is usually stored in waxed paper. If you do choose to store it in the refrigerator, it should last for a year.
Fermented Tomato Conserve
The end result will be a preserve that is about 8 – 10 percent of the amount of tomatoes you started with. The flavors will be highly concentrated, so a very small amount will add a tremendous amount of flavor to your dishes, from soups, stews and sauces to omelets, dressings and marinades.
Two Options with Vandana Shiva
We share this short video of Vandana Shiva telling her story of the struggle to preserve heirloom seeds in her native India from the wonderful folks at The Perennial Plate.
Junk Food Designed to be Unhealthy And Addictive
Engineering Salt, Sugar and Fat to Create Food Addiction
How did we reach this stage of poor health as a nation? The answer may surprise and anger you. As with most complex issues, the answer is not as simple as many talking heads in the media and nightly news would have us believe. It isn’t just a matter of willpower, or knowledge, or education, or alternatives to the junk food that is, quite literally, killing us. The answer is far deeper, wider reaching and more sinister.
Most processed foods these days are “optimized”, or engineered for better sensory perceptions that drive us to eat more. These sensory perceptions include but are not limited to the physical appearance, packaging, shape, mouth feel, taste and array of flavors, aftertaste, smell and satisfaction of a food. One of the most important factors that are considered is the strength of the urge for a second bite, sip or swallow, or a third.
Everyday people spend hours in tasting rooms where they touch, feel, sip, smell, swirl and taste whatever product is being optimized. Their opinions are fed through a very sophisticated program that not only produces an optimized formulation for the food in question, but also addresses marketing concerns such as colors and packaging. All of this is done to gain more “stomach share”- the amount of processed food that a consumer will eat from a certain company. These are not small concerns in an industry that measures stomach share in the billions of dollars annually.
The Holy Grail for food companies is what is termed the “bliss point”, that spot where consumers like a product the most, but are not satisfied enough with the flavor combination to stop eating it. Foods and drinks cannot be too flavorful, as consumers quickly get bored with them. The brain is quickly overwhelmed with big, intense and distinct flavors and shuts down the “want more” portion, thus stopping eating.
This has become one of the major guiding principles of the processed food industry. The biggest players owe their success to very complex and secret formulas that pique the taste buds but don’t have a distinct, intense flavor that shuts down the desire for more. This is the science of engineering addictive junk food at its most focused and intense.
For example, Frito-Lay employs about 500 chemists, psychologists and technicians to conduct research that cost up to $30 million a year that focuses on questions of crunch, mouth feel and aroma for each of their product lines. One of their tools simulates a chewing mouth to test and perfect their chips, like the perfect “break point”; people crave chips that crunch at about four pounds of pressure per square inch. You just can’t make stuff like this up!
With market shares reaching multiple billions of dollars, highly aggressive marketing tactics such as Coca-Cola make twisted sense. Their goal was simple; outsell every other beverage that people drink, including milk and water! From this goal they developed one question for the marketing division – “How can we drive more ounces into more bodies more often?” This explains the door-to-door sales of Coke to Brazilians living in slums and frontier shanty-towns.
With all of this high technology, psychological and physiological research running into hundreds of millions of dollars, strategic placements and extremely focused marketing campaigns all supporting highly addictive processed foods, what chance do we as everyday people have?
Somewhat surprisingly, we actually have a pretty good chance. Alternative research has shown that people can “recover” from their junk food addictions simply by abstaining from them for a period of time. Eating normal meals, eliminating or restricting snacking on junk food, or replacing that food with real, healthy food recalibrates our taste buds. Skipping meals is one of the leading causes of increased junk food intake, not by desire but simply because of convenience. Snacking on fresh vegetables such as carrots, apple slices, celery or such that provides the crunch that we have come to desire helps ease us out of the salt/sugar/fat cravings and into appreciation of new tastes and flavors that have been lost as we overload our taste buds with junk processed foods. The brain has a chance to realize that the food being eaten has nutritional content and can once again establish a reasonable signal of when the stomach is “full”. It is no longer tricked into over-eating multiple times a day.
Once a recovery period of a couple of weeks to a month had been established, most people found the tastes of the same junk food they previously had highly enjoyed were too salty, fatty or sweet and lacked the real flavors that they had re-discovered and come to appreciate. They also had pleasant side effects of increased concentration, higher energy that lasted throughout the day, decreased weight, blood pressure and headaches, among many others.
The Extraordinary Science of Addictive Junk Food – NYTimes.com
All Seeds Are Not Equal
Your Garden is Chemical-Free, Are Your Seeds?
There is a groundswell among home gardeners looking to grow their gardens in a less chemically intensive and more biologically responsible way. They spend hours reading and researching the best ways to build the health and fertility of their soils, improve the microbial communities in the soil and attract earthworms and beneficial insects and pollinators. The appearance of more earthworms, a new species of butterfly or pollinating moth is cause for celebration.
Seeds are a high priority for these gardeners. The purity, quality and provenance are paramount. After all the work and care that goes into the soil and preparation, they rightly want the best and highest quality seeds possible.
Surprisingly, this is exactly where the home gardener and small scale grower may be getting shorted on quality. Growing for seed as opposed to growing for food has its own unique challenges. For a plant to set seed it must reach full maturity, set flowers and produce seed. This takes much longer than a plant grown for food which is usually harvested at a much younger stage, succulent and tender. Producing seed exposes the plant to a whole host of insects and diseases that younger plants may not experience, due to the phytochemical changes that take place as the plant matures sexually in order to reproduce.
Margaret Roach wrote a great opinion piece in a recent New York Times Sunday Review:
Agricultural regulatory agencies allow an expanded use of petro-chemical pesticides, fungicides and fertilizers if a grower specifically grows for seed production and not food production. Many large-scale seed growers take advantage of this loophole, with the unintended consequence of creating a population of seeds that have become dependent on high-input, chemically intensive agriculture that many home gardeners are moving away from.
This has been ongoing for several decades now and is just being discovered as more and more gardeners and small scale agriculturalists are growing with less chemically intensive methods and are looking for sources of seed that are in line with their vision.
The end result of using seed grown under these conditions is that they usually don’t perform as well. They don’t germinate as strongly, are slower to put on growth, develop fewer flowers and are much more pest, disease and weather susceptible. In short, they simply aren’t as strong and resilient as those seeds grown in more biologically active soil with little to no chemical inputs.
While modern chemical agriculture initially looks very promising with better growth and increased yields, it is always discovered that plants grown with amply available macro-nutrients afforded by the chemical fertilizers become lazy and lose the ability to work for their nutrition, growing ever more dependent on the applied fertilizers for food and pesticides to control the insect populations.
The solution to these issues is to find seed sources that concentrate on growing their seed in a natural and low-input manner. These are often smaller, family-owned companies that are happy to answer questions on how their seeds are grown. They know the story of the seed they offer and willingly share it. Patronizing these companies only helps to strengthen the entire system by rewarding those that are congruent with the natural order of agriculture.
Look Carefully At Those Seeds – NYTimes.com
Chile and Pepper Growing Tips
Are they called peppers or chiles, and why? I prefer to call them chiles and here’s my reasoning: In the Aztec’s Nahuatl native language, the word is “chilli”, which was changed to “chile” by the Spanish who were looking for a new source of black pepper and discovered these fiery little treasures. For me, chile is closer to the original name and meaning.
One of the mainstays of the garden, they are often started from seed or bought and planted right along with their travelling companions from the central Americas, the tomatoes. Humans have been eating chiles for at least 7,200 years, from archaeological evidence in Mexico and have grown them for around 6,100 years. For those that aren’t chile-heads, these sweet or hot little packets of history can be either boring or scary. Some gardeners will plant the same variety of green bell pepper year after year and not think too much of what else is on offer, while others are very concerned with the amount of “fire” some hot chiles pack. There is a lot of room to explore the world of chiles without being either bored or burned.
Chiles can be grown with great success in many varied garden climates across America. They are very adaptable to different conditions and have travelled widely, establishing themselves in many different locations and cuisines around the world. With a background understanding that they are a tropical plant originating in Central America and the following growing tips as a guide, you can have the tastiest, most colorful and most productive chiles or peppers from your garden this year. Here are some tips to help you along the way!
Use these tips for a great season of chiles or peppers, however you want to call them! Let us know how yours do this year, and if you have experiences or tips listed that would help others, please share them!
Homemade Chile Coloradito Sauce
This is an incredibly versatile chile sauce with loads of flavor and just a touch of heat. It is my adaptation of the incomparable Mole Coloradito Oaxaqueno from Susanna Trilling in her “Seasons of My Heart” cookbook that we’ve featured before. (Mole is pronounced “Mole-lay”!)
This makes a sauce that is 95% of her Mole, but I prefer to make a very large batch as it is a project to do and doubling of the recipe doesn’t take much more time to make. Then you have this cache of amazing flavor that spices up any dish with no extra time but lets all of the flavor and work shine through. It is a wonderful basis for enchiladas, nachos, stews, soups, sloppy Joe’s, burritos or even spooned over eggs in the morning. I like to add about half tomato sauce by volume to make a great sauce that is smooth and mellow with the taste of the chiles but none of the bite.
Colorado means “red” in Spanish, usually referring to a deep brick type of red, so coloradito is “little red”. We’ll give you the recipe first, then walk you though the preparation in photos so you can see the stages and progression. These chiles can easily be grown in your garden for most of North America, or at a well-stocked Mexican grocer. For the Mexican chocolate, Ibarra is a well-known brand that is available almost everywhere. If you really want to take the flavor to the next level, look at Taza Chocolate. It is stone ground in the traditional Mexican village tradition and has a flavor that is absolutely to die for, not to mention being fair trade and traceable to the source. You can see all about how your batch was made by entering the batch number into their website!
Homemade Chile Coloradito Sauce
There are 3 steps to this recipe: processing the chiles, processing the spices and processing the tomatoes, onions, plantains and seasonings.
Some cooks will stem and seed the chiles while still dry, toasting the pieces. Others will toast the chiles whole, then soak them to soften the skins and remove the stems and seeds.
Makes about 8 servings.
Recipe Tip! It doesn’t take much longer to make double the recipe and freeze for an easy, delicious dish later!
This may sound complicated or a lot of work, so we will walk you through the process and show you what each step looks like. It is a good day’s worth of work, but it can be broken up into a couple of days if you don’t have the time to make it all in one day. Once you taste the results, you will immediately see why it is worth the effort to make a large batch!
In the first photo, we are toasting two of the different chiles and dry frying the onion and garlic in another pan. We have learned to save a lot of time by combining a couple of steps at once. The Ancho chiles are in the back with the Pasilla Bajio or Chilacas in front.
Roasting Chiles and Frying Onions
These are the chiles after toasting, soaking and being stemmed and seeded. Most of the work happens right here, to get to this stage. After this everything is roasting and toasting, then using a blender to puree everything into a sauce. To give a sense of scale, this bowl is over 18 inches across!
Into the blender with the chiles! We have a Vita-Mix blender that is a real blessing with big projects like this. It stands up to the thick sauce without overheating, but we still need to process all of the chiles in batches. We usually fill the blender about 1/3 full with chiles and add just enough soaking water to make a thick paste. Please notice the gloves, I use them when working with chiles for extended periods of time to keep me from itching my eyes with a chile-infused finger!
It is easy to see why the name of “colorado” is applied to this sauce – look at that beautiful rich brick red color! My mouth was watering for most of the time after we pureed the chiles as the kitchen was filled with their aroma.
There is not too much volume lost from the soaking stage to the pureed stage. This is the same bowl after we’ve finished pureeing all of the chiles.
Next up is toasting and grinding the spices and seasonings. We used a smaller cast-iron pan to toast the spices and release their aromas.
A molcajete is what we use simply because we have one. It is great for grinding spices and really working them to release their flavors and aromas. A food processor or blender can do much the same with less effort.
A few minutes later, here is what the ground spices look like, ready to be mixed into the chile mixture. At this point we’ve also pureed the onion and garlic and mixed it into the chile sauce.
Now it’s time to mix it all together! This photo helps to show the scale of everything, as the whisk is almost a foot long and I’ve got my hand completely wrapped around it to work all of the purees and spices together.
After everything is mixed together and cooked at a slow simmer, we put it up in jars to freeze for later. We use pints, as this gives a generous amount of sauce without being too much after a couple of days. We leave about an inch or little more of space at the top to allow for expansion in the freezer.
All done except the clean-up! This particular batch made 17 pints of scrumptious chile sauce, with just a bit left over for the next morning’s eggs. This will give us almost a year’s worth of chile sauce.
A close-up of the color and texture of the finished product. Well worth the work!
Starting Seeds at Home – a Deeper Look
Starting seeds at home is easy and gives more choice than the local garden center. We take a deeper look at germination and the needs of the seeds.
World Famous San Marzano Tomatoes
San Marzano tomatoes are world-famous with a long and storied history as the absolute best plum tomato for sauce and pizza. They are also excellent for canning, peeling and drying. Chefs worldwide prefer this variety to all others for making their signature sauces, and it is the only tomato that is acceptable for making true Neapolitan pizza. Many Americans are becoming fans and learning why this tomato created the peeled and sauce industry in Italy and across Europe.
San Marzano tomatoes are named for where they originate, the Campania region of southern Italy above the “toe” of the “boot”. Valle del Sarno is the valley where the recognized and protected variety is grown. The reason for this strict preference is the soil – a rich volcanic soil from Mount Vesuvius – that gives the tomato its distinct richness and depth of flavor. In fact, they are the only tomato that can be used for a true, recognized Neapolitan pizza! People who have tasted the native tomatoes grown in the volcanic soils claim that they can tell the difference between tomatoes grown there and those grown elsewhere, even if it is similar soils.
San Marzano tomatoes are thinner with a pointier end than Roma tomatoes, with a noticeably richer and mildly sweeter flavor. It has a thinner skin with fewer seeds and a meatier flesh than the Roma, with a higher pectin content that produces the thicker sauces it is famous for. This famous variety was developed from traditional breeding of three Italian tomatoes in the late 1800s; the King Umberto, Fiaschella and the Fiascona. Only the King Umberto tomato is still grown!
San Marzano tomatoes have been commercially popular since around 1875 when the first cannery was built to pack and ship these jewels across Italy and Europe. The popularity of the San Marzano declined during the 1970s as hybrids gained popularity for their thicker skins and tolerance of machine harvesting and marketability, but saw a resurgence in the late 1990s as people realized the flavor that had been lost with the original. Of 27 cultivars being grown in the Valle del Sarno area in the early 1990s, only 2 were selected as being the most representative of the traditional San Marzano. In 1996 the European Union granted Protected Designation of Origin status to the San Marzano tomato.
The San Marzano Redorta is one of the more popular cultivars of San Marzano due to its larger size and prolific production. The name creates some confusion, as this tomato comes from the Tuscany region, which is north of Campania where the tomato originated. It is supposedly named for a mountain – Pizzo Redorta – in the Lombardy region near the Italian Alps, which is much further north still. So, a larger version of the treasured San Marzano that is from Tuscany and not Campania, yet named for a mountain that is almost the length of Italy away? Stranger things have happened!
We do know that it is a great tasting and producing tomato with all of the traditional characteristics that have made the San Marzano tomatoes famous and have brought it back to being a heavyweight in the sauce tomato world. Whether you grow the traditional San Marzano or the Redorta, the flavors and production are sure to win you over.
Catalog Reading and Garden Planning Tips
Perusing the newest crop of seed catalogs while engaging in some garden planning is a favorite pastime of gardeners everywhere during the cold, short days of winter. It is an excellent way to take your mind off of the often drab and dreary days that separate the last harvest from the first plantings. Seed catalogs can be much more than a pleasant distraction and fodder for summertime daydreams. They can help you with your upcoming garden planning by helping to visualize succession and companion plantings while arranging the palette of colors in the most attractive ways possible.
You can get started in one of two ways, with neither being right or wrong. Some prefer to sort through the catalogs first, circling what interests them and what standbys are always planted. Others will use different colors for vegetables, herbs and flowers to make organizing and planning a bit easier. The other approach is to put down an initial plan of the upcoming garden on note or graph paper, using zones or areas to show what types of plants go where. Others will use different colors for different plants to determine where everything will go. These initial plans are easily changed and updated as the planning process moves forward and the new garden starts taking shape. Once the plan is solidified, our Garden Journal is an excellent tool to help keep track of your progress this year. It is free as a download.
Remember to try something new each year, while keeping the foundation of what works going in your garden. This way you can experiment with new things and see what works and fits within the framework of what you already have established without risking losing too much if the new variety doesn’t make the grade.
If you want to try saving seeds – or you already do – make that part of your plan, where to plant those items for isolation to prevent possible cross-pollination and make the seed saving process as easy as possible. Pay attention to wind patterns and think about how you will isolate them, either through time, distance or exclusion. Time isolation just means planting those varieties you’ll save seed from either earlier or later than others of its type so that blooming and pollination don’t happen at the same time. Distance is easy – how far apart are you going to plant? How much space do you have? Can you use the front or back yard on the opposite side from the garden for planting? Exclusion is a physical barrier that keeps everything out including insects, meaning you might have to hand-pollinate that item.
While working on garden planning pay attention to the number of days to maturity for a variety and how that will work in your climate. Look at where you want to locate it when reading the size and height descriptions, especially if it needs shade or full sun. Succession and companion planting can make a small or medium sized garden produce like a small scale farm, producing enormous amounts of veggies from a deceptively small space. Think about how much you or your family likes particular veggies, and plan on doing some succession planting this year. Examples of varieties that take well to succession planting are beets, carrots, lettuce, spinach and radishes, but there are others as well. Just give your plants a bit more space to accommodate succession planting alongside companion plants.
When deciding on how many plants you’ll need, seed counts are in the variety headings and in each singular variety description, as well as on the website. We are working on getting planting instructions up on the website for each variety, but each packet will have detailed instructions on the back.
Look at the colors of your garden and plan a rainbow to grow the aesthetic and nutritional benefits of different colors. Plant a few red, yellow and orange tomatoes with yellow, purple and orange carrots as companions. Use red Chicory with green Kale and rainbow Swiss chard. Pole beans in different colors partner extremely well with corn.
Plant some of the vining plants like Red Malabar spinach along the garden fence where it won’t take up space, but give you lots of great tasting heat tolerant spinach substitutes for your summer salads. Melons and squash are happy planted in corners of the garden where they can sprawl along the fence or even over and out without being in the way. Another approach is planting them in containers outside the garden where they have all the room needed and are out of danger of being stepped on.
Look at the hot and long season varieties or cold and short season ones on the website for more ideas of what works well for your climate. Use these as a start and experiment to refine into a basis of what, exactly, really works in your garden. This will take time if you are just starting out, but you might be surprised at how much you have figured out if you’ve been growing a bit, even if you haven’t thought about it just this way! Read the descriptions carefully, as we’ve worked hard to try and get good information into them to help you.
Flowers are an often overlooked, but essential component of any serious vegetable and food garden. They don’t just belong in the realm of the flower or landscape gardener! Flowers attract pollinators (not just bees) that greatly improve production in the garden; are nursemaid plants for smaller, more tender ones; are core ingredients for some incredible teas and bring a delightful aroma that soothes and grounds you. Our flowers are notated by Annual, Perennial, Biennial which depends a lot on climate zones but will allow you to do some accurate planning for where they fit in best. Some of the best ways to get started using more flowers in and around your garden is with one of our mixes, especially created for drylands, humid climates or to spread some serious fragrance in your garden.
You should have some good ideas starting about your garden this year. Spending some time during the colder times in planning will help you to create a masterpiece that will grow some incredibly tasty treats to enjoy with your family and share with some lucky friends and neighbors.
Can the FDA be Trusted with Our Food Safety?
By all accounts, the FDA is a miserable failure for food safety.
Many of us remember the national food safety nightmare – a listeria outbreak in cantaloupes from around Rocky Ford, CO – in the summer of 2011. All in all, there were 147 illnesses and 33 deaths, making this incident the most deadly outbreak of food-borne illness in our country since 1924. The farms owners declared bankruptcy later that fall. All of this occurred because of jerry-rigged potato cleaning equipment had been adapted to wash melons in conditions that heavily favored bacterial growth. There were no anti-microbial solutions – such as chlorine – used to kill the bacteria, only water.
As bad as this sounds, it is only the tip of the iceberg. The real tragedy, or crime, depending on how you view it is that not once in its 20-year history had the farm been inspected by the the Food and Drug Administration (FDA), tasked with the oversight of the safety of our food supply. A third-party inspection company was used by the farm, and accepted by the FDA as certifying the safety of the equipment and processes used in its handling systems. In fact, the company had one of its auditors at the farm at the time the first people were being sickened, and gave the processing facility a “superior” rating of 96 percent after a four hour visit.
This, sadly, is not an isolated major food safety incident. There are about 48 million cases of food poisoning each year, according to the Center for Disease Control. These result in more than 3,000 deaths. Affected foods include fresh vegetables and fruits, eggs, meat and cheeses – just about everything we eat! The rate of outbreaks and food recalls has been steadily rising since 2007. In a nutshell, our national food safety record sucks.
Why have these outbreaks increased in numbers and severity? What can be done about it? Let’s address the first question, then we will look at the second one. The Government Accountability Office (GAO) has found that the FDA is riddled with shortcomings, both in the administration and regulation areas. The process it uses for product recalls is ineffective and confusing, it has waffled with the blatent overuse of antibiotics in animal feeding operations, and lacks the manpower to perform the scientific studies required to do its basic job of food and drug safety. When enforcement is attempted it only occurs about half the time and is half-hearted, with fines rarely imposed. It also accepts third-party inspections, which often have serious conflict-of-interest issues alongside questions of the quality of inspections, as shown by the cantaloupe fiasco. Another example is the Iowa based salmonella based recall of over 550 million eggs that led to the first (and only) inspection performed by the FDA, followed by a warning letter threatening “regulatory action”. A month later the company was allowed to resume selling eggs, with no corrective action being confirmed or other inspections performed. Yet another example was the salmonella outbreak in peanut butter in 2007. A plant was missed after an “intensive round of inspections” that was the cause of a second, more deadly salmonella outbreak. When that plant was finally inspected, it was found to have mold on the walls and slime covering the processing equipment.
One of the main reasons for the increased number of outbreaks is the amount of control the food industry has over the FDA. When an industry has enough political power, it uses that power to determine what the FDA will do in response to an issue. Unfortunately, that response is all too often to “do nothing” unless there are enough deaths to attract enough public attention to the issue. In addition to political pull, there is a “revolving door” policy where top industry people go to work at the FDA, sometimes while still drawing a paycheck from their “former” employers. Conflict of interest, anyone? One of the prime examples of this is Michael Taylor, a Monsanto attorney who prepared research on the constitutionality of states determining labeling laws for Monsanto’s bovine growth hormone rBGH. Then, once he had become the FDA’s deputy commissioner for policy, he wrote the guidelines for rBGH labeling policy for the FDA. Not surprisingly, they were in agreement with the research memo he worked on while at Monsanto. This is not an isolated case, either. There are many former and current employees of Federal regulatory agencies who are or were industry executives and vice versa.
Now to address the question of what can be done? Surprisingly, there are several possible movements afoot that might have a positive impact on the state of food safety. The Food Safety Modernization Act of 2011, a very controversial plan that was opposed by many smaller producers and supported by larger ones, may have some keys to this puzzle. It has been delayed with budget issues and has not gone into effect, but grants the FDA the power to prevent repeat offender from continuing to sell their product by revoking their registration. Another proposal by a Connecticut congresswoman would sever the ties of the food industry to inspection agencies. Third-party inspections can be effective if the inspector is not bing paid directly by the company they are inspecting. Some inspection companies have board members who are executives in client companies they monitor. Again, what conflict of interest?
These are all well and good, but can the average person trust them to be effective? Will they measurably improve the quality of the safety of our food? That remains to be seen. In the meantime you can do what has been proven to be extremely effective so many times before. If you are concerned with the safety of your food, do something about it. Take a personal interest and responsibility for what you eat. This means doing some reading and research, asking questions and listening to the answers. You will establish your own “approved list” of food suppliers that you trust and those to stay away from. This will take some work, but probably much less than you think and for a shorter time period than you would initially expect. Once you establish a safe list, you won’t have to research each and every food item you buy, just the new ones that you aren’t familiar with.
Not surprisingly, you will quickly find that the majority of food producers you come to trust are the ones you can get to know. They will be local or regional, with small to medium sized operations. They will answer your questions and your phone calls, not minding that you need some answers. They will offer farm or facility tours, which you should accept. There are already several organizations that help with finding just these sort of companies. We’ve written about several of these, one is FarmPlate, another is Horsepower and yet another is Local Harvest. All of these are online tools to help you do what I just described, find quality and trustworthy sources of good, clean and fair food.
By taking responsibility for your food, you ensure that what you eat is to your standards. You also take that decision process out of the hands and control of a corporation and put it firmly in your grasp. You might be surprised at how the quality and safety of your food improves with much less cost than you expected.
The FDA Is Out to Lunch
The Amazing Revolving Door – Monsanto, FDA & EPA
New Heirloom Seed Arriving!
The holidays come early when you work with heirloom seeds, as shipments from growers start arriving in early November and continue as the seeds are harvested, cleaned, dried and shipped to us for packing.
Some of our seeds arrive in cloth bags with hand-written variety descriptions on them, others arrive in large paper bags tied shut and yet all of them clearly show the care and love put into their growing and production. We wanted to give you a short tour of what it is like when seed arrives!
This particular shipment is always accompanied with high anticipation, as it comes to us from one of our growers who is incredibly talented and experienced. Their advice has been invaluable, whether it is in recommending new varieties to offer or catalog suggestions.
Bags of Heirloom Seeds
Each variety is in its own cloth bag with the variety name handwritten on it. They are wrapped in plastic to protect them from possible moisture in shipping. This particular box was a bit smaller this year, as we brought home almost this same amount when we visited our grower this past September.
Heirloom Seed Treasure
When we received the very first shipment of seeds, we were talking about how they resembled bags of treasure. Cindy remarked that this is very much just that- treasure from the past that has been kept alive by people before us that valued these seeds enough to save and preserve them for the future.
That future is now, and we are the recipients of that treasure of knowledge and hard work. This Katanya watermelon is from a woman named Katanya who brought its seeds with her when she immigrated from Russia. It is humbling and thrilling at the same time to hold more than a hundred years of history in a bag in your hands, along with who knows how much future!
Papalo Seed!
Some of the seed is just fun to handle and play with. Papalo is one such variety; an ancient Mexican herb that was largely replaced by Cilantro, a Chinese herb. It is extremely light and feathery, resembling a dandelion seed with its “parachute”. Papalo requires special handling and packaging, as if the seed is broken off of its parachute, the germination suffers drastically. The bag Cindy is holding weighs a couple of pounds at the most.
Handful of Papalo
This handful of Papalo has about a hundred seeds, which have to be packed and shipped in small boxes to prevent them being broken in transit. When we do bulk sales on this it is by the number of plants needed, not by weight!
Bag of Heirloom Corn
This package was a new treat for us. It is Oaxan Green Dent corn from one of our newest growers. Oaxan Green Dent makes green corn tamales for the Zapotecs of southern Mexico and a very tasty green masa. They produce everything by hand, even the shucking of the cobs and shelling of the corn kernals.
First Peek of Oaxan Green Dent Corn
Here is what we saw on our first peek into the bag! Very colorful and striking. Very unlike what we are used to seeing as bulk corn.
Oaxan Green Dent Corn
A closer look at its colors. Heirloom corn glamor shot!
Hand Packing Melrose Pepper Seed
Of course, all of this new seed arriving means there is work to do. Everything we sell is hand packed, every single packet! As each new shipment of seed arrives we re-verify the number of seeds to a packet, then count that number and find a measurement that corresponds to it. We always try to give a bit more seed than advertised, as each packet is packed by measurement, not individually counted. A new shipment of Melrose Pepper is ready to be packed here.
Thanks for joining us, we hope you enjoyed a brief look at what happens when we receive new shipments of heirloom seed!
The Seed Underground – A Revolution to Save Food
“The Seed Underground – A Revolution to Save Food” by Janisse Ray is an amazing book that belongs in everyone’s library and needs to be read at least once a year, whether you are a gardener, seed saver, foodie or not. I am not usually one to make such statements, as I realize that everyone’s literary preferences are diverse. This book is an exception, and does deserve this attention.
The Seed Underground was introduced to us by one of our book suppliers – Chelsea Green who is the publisher for Janisse. We were familiar with her writing from reading Orion magazine over a number of years, but had not heard of her newest book. On our rep’s recommendation, we ordered a copy with our regular gardening book order.
I fell in love with this book within the first couple of pages of the introduction. Her writing and words moved me so much that I wrote an article based on a short couple of paragraphs that she wrote in the introduction. She has a way of writing that brings out deeply held feelings and unspoken beliefs that have circulated deep underground, not really ever having been named or recognized in a physical way, only glimpsed as they moved past my mind’s eye, shadows behind other thoughts.
Reading this book, I immediately felt as though I knew the writer or that she knew me; the words spoke directly to me, seemingly written for my mind and way of thinking. What she said and the concepts she talked about just made sense on a gut-instinct level. She knows and writes about several of the same people I know, admire and have a tremendous respect for. One of them I am fortunate enough to call my mentor – John F. Swenson. Another we met on our travels to Slow Food Terra Madre – Holli Cederholm of Proud Peasant Farm. I hadn’t read quite that far in the book at that point, but read about her just after we returned. Others that she writes about I want to get to know and build relationships with.
This is a book about hope, love, patience, endurance, excitement, revolution and a newly rediscovered, sustainable way of living that is all embodied and contained in seed. Not just any seed, either. Those seeds of home gardeners, seed savers, small heirloom seed companies that work and strive to preserve heirlooms, those diverse multitude of seeds that have fed our ancestors for long years and have become cherished in so many ways; their stories, adaptability, flavors, productivity and history of keeping us alive for so long.
What is amazing is that Janisse wraps a story about such a sprawling subject as heirloom seeds, seed saving and the importance of both. She not only makes sense of it all, but makes it entertaining and educational at the same time; a testament to her writing and researching skills. The story comes to the reader in an intriguing way, not shying away from difficulties but not overplaying the importance to each of us in our daily life. A thoroughly enjoyable, enlightening and educational book that deserves more than just one read.
Fun At Slow Food Terra Madre
The Slow Food Terra Madre and Salone del Gusto events are world-famous for their sights, tastes and smells of top-shelf quality foods made in a traditional way. It is exciting to see, taste and contrast flavors from different regions of Italy and across the world with just a few steps and a couple of minutes of your time. Much of this is serious business as artisanal food producers showcase their hard work and experience in creating classical foods.
Not everything and everyone is all about work with no play, however. There is much to see and hear that is fun, unusual and surprising to see amongst the booths that is light hearted and enjoys a laugh with friends, new and old. There were an abundance of children soaking up the sights, aromas and flavors of the Salone with their parents or in groups doing tastings, cooking or creating spice mixes.
Our presentation showcases some of the fun sights we came across during our visit to Slow Food Terra Madre and Salone del Gusto. Enjoy!
Slow Food Terra Madre Opening Ceremony
We are pleased to present our experiences of the opening ceremony of the 2012 Slow Food Terra Madre conference in Turin, Italy. It was held the evening of October 24 at the Palasport Olimpico, also known as the Palaisozaki, after the Japanese architect’s name – Arata Isozaki. This is in the Santa Rita district of Turin, just east of the Olympic stadium. It was built for the 2006 Olympics and hosted the ice hockey events. With seating for over 12,000, it is an impressive venue!
We arrived early after registering at the main Slow Food event center and waited for the gates to open. We quickly learned to make use of these periods of waiting and not be impatient that things didn’t run on an American schedule. Introducing ourselves, we quickly made some new friends and were once again impressed with the dedication, creativity and just plain genius with which so many people were applying themselves in their search of how to answer Slow Food’s directive of “Good, clean and fair” food for all. This opening ceremony was for and about the international delegates but was open to the public.
Once the gates opened, we checked our luggage into the baggage claim area and made a line for the latest in a long line of cappuccinos (cappuccini in Italian!), as we had been awake for the better part of 30 hours at this point. We had arrived in Milan at 7:30am that day after a combined flight of almost 13 hours, and wouldn’t check into our hotel until after the opening ceremony. A long but exhilarating day!
People were encouraged to dress in their native clothing, and it was a grand sight to see, with the entrance being made coming down the long stairs into the delegates seating area. The surrounding stands were soon filled almost to capacity with the public, who was very enthusiastic. The energy and excitement was contagious and had the whole arena buzzing.
After the opening welcome speech by the Mayor of Turin, the parade of flags commenced. A delegate from each nation present presented their native flag and was seated in honor above the podium. 95 countries were present this year! Afterwards there were many presentations and speeches about the different directions Slow Food has moved, as well as live poetry acted out by Nobel literature prizewinner and playwright Dario Fo, live music by Italian trumpeter, singer, composer and arranger Roy Paci. Both Vandana Shiva and Alice Waters presented their thoughts to thunderous acclaim. The United Nation’s FAO Director-General José Graziano Da Silva gave praise and strength to the Slow Food movement, acknowledging the impact it has had worldwide and noting that governments and advocates for sustainable food are turning to Slow Food for help in writing proposals and drafting legislation.
This was a fine promise of things to come, that was more than fulfilled in the next 4 days!
US Government Backs Down From Big Ag
For more than half of 2010 members of the Department of Justice and Department of Agriculture held investigative hearings around the country on the impacts that Big Ag – industrialized, commercial agriculture – had on the producers that supplied them or used their products. For many of the farmers working under contract to national companies, this was potentially great news. This was a unique opportunity to talk directly with some of the highest-ranking officials in agriculture and justice to tell their story and get some help. The message from Washington seemed to be pretty clear – they were interested to hear how the independent farmers of America were being used and pushed around by Big Ag, and they were not going to allow these practices to continue.
During their tour of more than seven months of 2010, the officials heard from many farmers, ranchers and other producers around the country. They learned of the power and technology concentrations in the seed, pork, cattle, dairy and poultry industries. They looked at the discrepancy between the price consumers pay for food and the price farmers receive for producing it.
Very similar stories were told over and over again from many separate parts of the country of abusive practices across the board in all of the different industries. No matter the industry or what part of the country the meetings were held in, it seemed that the story rarely changed. Contracts, terms and conditions that would make rural Southern sharecropping look pretty reasonable by comparison were the norm. Preferential treatment, grudge punishment for questioning the system and constantly rising costs and tightening requirements are all part and parcel of doing business with Big Ag these days. That doesn’t even begin to take into account the threats of lawsuits or financial punishment that accompanies much of these systems of contracts. In the seed industry, for example, it is common for farmers to have to sign a binding agreement in order to purchase corn, cotton or soy to plant in their fields. They must agree to use only the specified fertilizers, herbicides, pesticides and seeds. They cannot save any of their seeds. Pamphlets are routinely mailed to all of the farmers in a region offering “gifts” as rewards for reporting their neighbors for “breaking contract”. Neighbors are suspicious of each other, even those who have farmed next to each other for several generations.
So, what resulted from all of that travel, all those meetings, all that planning that we, the taxpayers, paid for? Going on two years down the road – not much. The USDA developed legislation that revised and updated the regulation of livestock industries that would prevent the destructive practices that are now common. The Department of Justice initiated an anti-trust investigation into Monsanto and DuPont about their “possible anti-competitive practices in the seed industry.” Monsanto was targeted for its business practices surrounding its Roundup Ready soybean. Information on the DuPont investigation was not released.
The USDA legislation was met with heavy criticism and attack from the House of Representatives, the House Agriculture Committee, the National Cattlemen’s Beef Association and the National Chicken Council, all of which was to be expected as they are funded by special interest groups of the very industries that would be affected by the revised laws. The final straw to the whole process was a rider in the June 2011 House Appropriations Committee funding bill that was was designed to strip the USDA of the funds it needed to finalize and implement the strongest of the proposed rules. By late 2011 the Dept. of Justice, Dept. of Agriculture, the USDA and the administration was in full retreat from the corporate livestock, seed, dairy and poultry lobbies.
The rider passed in November 2011, effectively killing the revisions. Very recently, the Dept. of Justice closed the antitrust investigation into the U.S. seed industry, absolving Monsanto and DuPont of any wrong-doing. The damage done to the very people that the hearings were trying to protect – the producers – is unknown at this point. From the Washington Monthly –
Where do we go from here? Several things have been shown to us from these events and actions. One: industry controls government in this country, regardless of what anyone says to the contrary. Sure, there may be examples; they only serve to point out the minute exceptions, not the mainstream. Two: getting away from industry and corporate control of food is in all of our best interests. How do we do that? By continuing to support and actively participate in local, sustainable methods of growing and producing our food. Buy from the farmer’s market, join a CSA from a local grower, get to know who grows your food and how it is produced. Yes, this takes work. The alternative is the recent headline – “To Find Antibiotic Resistant Bacteria, Look to Commercial Pork.” Is that the food system we want and support?
U.S. Closes Antitrust Investigation Into Seed Industry, Monsanto
Risotto alla Veronese
Risotto is a wonderful Italian dish made from rice. Some of the best Italian rice is harvested at the beginning of October around Verona, in the north-east of Italy. One of the most famous areas is Isola della Scala, just south of Verona. Isola della Scala is often called “Città del Riso” (city of rice) because it is surrounded by large rice fields.
It has been a center of rice production in the Veneto region since the 17th century. You can imagine the wealth and history of risotto dishes from this area! Once a year immediately after the rice harvest the Fiera del Riso (Festival of Rice) takes place during the months of September into October. This event features many culinary contests and historical exhibitions that inspire visitors. The rice festival is, of course, not only an event for education and watching but also for tasting – hundreds of thousands of different risotto recipes are served during the event. This past event was the 44th annual festival with just over 500,000 people visiting!
Here is a representative risotto recipe from the region. Many variations can be made from this simple basis; a vegetarian status is achieved by omitting the ham, the flavors of different cheeses will make the dish entirely different and a different selection of herbs will change the direction yet again. Start with the basis to get a feel for what flavors you like and branch out from there. Soon you will have a comfortable “feel” for how to make this, and start to make your own “family recipe”.
Risotto Alla Veronese
For the broth:
For the rice:
Serves 6-8
Recipe Tip! This can easily be made vegetarian by simply omitting the ham at the end, or reserving a portion without the ham.
Asparagus with Tomato Pesto Dressing
Asparagus adds a creamy foundation to the rich, flavorful and slightly spicy tomato pesto sauce in this unusual side dish. It is easy to make and adds taste and presence next to a hearty frittata or fresh spring dinner.
To cut the amount of time needed, make the pesto ahead of time. The flavor and heat can be adjusted by adding more chipotle and garlic to the pesto sauce. Make extra, as this is a hit once people taste the mixing of flavors!
Asparagus with Tomato Pesto Dressing
Recipe Tip! If using pliable sun-dried tomatoes and Chipotle pepper in adobo sauce, only soak in boiling water for 2 – 5 minutes.
Makes 4 servings
Slow Food Prescott Potluck and Fermentation Workshop
Our local Slow Food Prescott chapter held its almost-monthly meeting and potluck, along with a fermentation workshop hosted by Allison Jack, Agroecology faculty at Prescott College and Molly Beverly, Chef at Crossroads Café of Prescott College. This workshop was a reprisal of the fermentation workshop and book-signing that Sandor Katz presented on October 24th. Unfortunately, we were in Italy, tasting our way through Turin and missed his presentation and workshop.
The evening got its usual tasty Slow Food start with a potluck of home-made, home-grown or locally sourced dishes. It has been remarkable to see the growth of this chapter in the past couple of years in respect to its palate, understanding of quality ingredients and love for truly locally made foods. It is pretty common to hear of someone describing their dish as having the majority of the ingredients from their own garden, or proudly naming who grew or raised them from the area. The array of dishes from almost 40 people was inspiring! Not only was the number of people attending impressive, the quality and flavor of the dishes would be at home in a high-end restaurant or supper club. There was a fermented section, with fermented tomato paste, beets, carrots and sourdough bread all adding their unique flavors to the dining.
After dinner was finished the main event was then opened, with Allison presenting some tried and true recipes for a quick kim chee and Hungarian sauerkraut. Everyone brought assorted vegetables that they wanted to ferment, and the fun began! After a short presentation by Allison, everyone got to grating, chopping and slicing their veggies and putting them into jars to start the fermentation. People got to see some new techniques of vegetable processing, new combinations to ferment and generally had a lot of fun learning from each other.
We recorded a short video to help bring the experience and flavors to you. Enjoy!
Pumpkin-Orange Cheesecake
This pumpkin-orange cheesecake is a centerpiece dessert with multiple layers of rich flavors that roll across your tongue, surprising you with each new taste. Rich and complex, this cheesecake is to be savored and enjoyed with friends and family. The orange is the first surprise, coming in soon after the pumpkin announces itself. Then the caramel, toasted nuts and salt crystals come into play, creating an entirely new experience than most have had with cheesecake.
There are several variations that can easily be done here, depending on your skill level and time. First, making the caramel sauce in advance is important because the flavors you will have with home-made caramel sauce are much richer and fuller than the preservative laden sauce from a store. Second, using local pumpkin will give another flavor dimension that is impossible with store bought canned pumpkin. Third, the choice of salt is important. I really prefer FalkSalt, a handmade sea salt from Cyprus by a Swedish company that is dried into pyramid shaped crystals. They have an incredible visual appearance, great flavor and a satisfying crunch that just really completes the whole experience. My personal favorite is the Chipotle, as the slight hint of spiciness combined with the saltiness really complements all of the different sweet flavors. You should be able to find FalkSalt at a well-stocked grocery or specialty food store near you.
Both Thanksgiving and Christmas are top-shelf culinary times, and this cheesecake will set itself apart at either one. It will disappear almost as fast as the compliments roll in! We have adapted this recipe from one we tried and loved last Thanksgiving from Sunset magazine. Give it a try and enjoy!
Pumpkin-Orange Cheesecake
CRUST
FILLING
TOPPING
Note: Caramel topping can be store-bought or made youself in advance. Home-made caramel is much more tasty and doesn’t take too much time.
Flaked salt crystals make a great garnish to the edge and add a depth of flavor. I prefer FalkSalt, the Chipotle flavor adds a spicy note to the sweetness!
Recipe Tip! For a crack-free cheesecake, mix the filling just until it’s smooth and blended–no more. (Too much air in the mixture will make it deflate, and then crack, in the oven.)
Makes about 16 small servings
Pumpkin-Orange Cheesecake
Radicchio di Treviso Salad
Fresh, seasonal salads are an excellent starter for great meals and showcases for creativity, and here we have the famous red radicchio from Treviso partnering nicely with pine nuts and alici, the smallest, most delicate members of the sardine family.
Radicchio di Treviso Salad
Note: Alici are the smallest and most delicate of the sardine family. They are traditionally pickled fresh with a mild onion, then chopped fine and used in antipasto dishes. As a substitute, use half the amount of sardines in salt that have been rinsed and soaked a couple of times to remove the overly strong salt flavor.
Recipe Tip! This traditional antipasto goes extremely well with a moderate white wine.
Makes 3 to 4 servings
A World of Taste – Slow Food Terra Madre and Salone del Gusto 2012
Slow Food International’s premier worldwide event – Terra Madre and Salone del Gusto – happens every two years in Turin, Italy. Terra Madre is educational workshops, culinary tastings, speeches and panel discussions with 130 countries represented this year. Salone del Gusto is a world’s fair of food, with 4 huge halls devoted entirely to food of all kinds from around the world. We were fortunate enough to be chosen as US delegates, along with about 230 other people. We had been somewhat prepared by others that had attended before so the scale didn’t overwhelm us. The quality and diversity of what was presented, both edible and educational, was astounding. At some points in the day, there were over 15 different workshops, panel discussions, regional tasting events and special culinary projects showcasing a specific regional treasure all happening at the same time! This was in addition to the Salone which occupied more than double the space of both buildings of the Las Vegas convention center. One of our delegates responded to the question of what it was like with “Tasty and tiring.”
It will take several other articles and videos to give a more rounded overview of the event, as it is really several events all rolled up into one. We were chosen as International Congress delegates, which was a completely separate event that is held only once every four years and is attended by those chosen for their work in advancing the core tenants of Slow Food – “Good, clean and fair.” To say we were honored to be among the likes of Alice Waters, Vandana Shiva, Carlo Petrini and 650 others is a monumental understatement. On two separate occasions we felt we were in hallowed company. The first was the opening ceremony for the 230 Slow Food USA delegates where Carlo had some remarks that were amazing. I walked up to the front of the room just before the opening ceremony started to get a photo and stood there for a minute looking at everyone getting settled and chatting with their new neighbors. It was both humbling and inspiring to be in the same room with so many talented, dedicated, passionate and brilliant people who are all working at the same goal from so many different angles – good food that is real and honors all who are involved with it. The second time was in the gorgeous theatre that housed the opening ceremony for the International Congress. This theatre was in the renovated Fiat factory that has its own test track on the roof, a huge building in itself. The theatre was red velvet and oak, with all 650 delegates sprinkled throughout. It was the same feelings as with the USA delegates, but on a larger scale; especially when we heard several of the speeches of what other countries were working on or had accomplished.
With that teaser, we present for your enjoyment “A World of Taste – Slow Food Terra Madre/ Salone del Gusto 2012.” This is a short overview of photos and some short video we took while attending the event. This is only a small sampling, so stay tuned for more to come!
Carlo Petrini’s Speech to Slow Food USA Delegates
The co-founder of Slow Food International, Carlo Petrini took the stage after the opening ceremonies at the Slow Food USA delegate meeting during the 2012 Slow Food Terra Madre and Salone del Gusto conference in Turin, Italy this past October. He gave his remarks to about 230 delegates from all across the USA who are working daily on the core tenants of “Good, clean and fair” food for everyone. It was impressive to see the amount of passion, dedication, talent and genius gathered together in that room, all for the sake of one of our most important yet overlooked foundations of life; food.
Carlo seemed to be impressed as well, with comments like “What you’ve done in America is extraordinary, not just for the USA but for the rest of the world. A Slow Revolution toward respecting food, a deeper appreciation of food that serves as an example for the entire world.” He went on to say that we’ve helped “Achieve the most important thing that Slow Food needs to achieve – given back a holistic sense of food.” We’ve started to show that food is not and never can be a commodity, merchandise, just a price point.
Its story is important – the memory, the people and its history. By reducing food and everything about it to its commodity values of productivity and profit, we are approaching a brink. That brink is the loss of diversity, not only of the varieties of foods that have nourished us for thousands of years, but the loss of human and cultural diversity as well. Those different types of diversities have enabled us to withstand and overcome many different challenges over the millennia, adapting and growing stronger in the process. Without all of those diversities, we are all weakened and more vulnerable to changes, whether expected or unexpected, human or natural caused.
Carlo closed by saying that the people of Slow Food have the holistic vision of the path back to the healthy diversity that will make our food and our communities whole again. Slow Food delegates practice that vision daily, working to strengthen our food connection everywhere we are, every day. Watch the video and see Carlo’s thoughts for yourself!
Local Food Movement Feeds Commercial Customers
The Local Food Movement Gets A New Prescription
The local food economy is entering a completely new chapter with such seemingly unlikely partners as St. Joseph Mercy Hospital of Ann Arbor, Michigan. Leading edge, innovative hospitals such as St. Joseph’s are working to incorporate more local, sustainably grown produce into their menus and food systems. Things quickly become complicated due to the sheer amount of food that is prepared and the time needed for prepping. For instance the soup du jour for 600 people is 65 gallons. The ingredients needed in one just day’s vegetable soup would require hours of prepping and chopping, but is supplied by the current food distribution system already pre-washed, sliced, diced or cubed and ready for the cooking process. As an example, the green beans sourced from a local grower – 200 pounds of them – required 8 hours of washing, snipping, stringing and slicing to prep for that day’s evening meal. Even though the food was sustainable, the processing wasn’t as the kitchen isn’t equipped to handle that amount of prep work on a continuous, daily basis.
There is a tremendous enthusiasm and pressure from consumers of all sizes for more local food. These consumers aren’t just the mom and dad at the farmer’s market on Saturday, but are increasingly including the large scale commercial consumers such as hospitals, universities and large businesses that are looking to satisfy their customers and employees desire for better tasting, more healthy, local food. This is a good, or possibly great thing, if it can be handled to benefit everyone in the equation. One of the biggest challenges for local food economies is that the commercial consumers have been set up to take advantage of the industrial food distributors efficiency and convenience. They are the keystones as to why and how large distributors reign supreme in this market. Everything shows up prepped and ready to use – something that isn’t even thought of in the local food model. Granted, there can be some improvements in the commercial consumers kitchens, as most of them do not have any facilities set up for any prepping whatsoever. This can be remedied, but takes dollars, forethought, planning, construction and time to accomplish.
Farmer’s markets are an important piece of building the local food system, but they are still such a small part of the entire US food production – less than 1 percent for the just over 7,000 markets across the country- that significant growth and positive impacts for the legion of local growers can be realized by connecting small and mid-sized local farms with these institutional, commercial consumers in their local communities. Even very small changes in the purchasing patterns of these consumers can have major changes in the local food system, as an average sized hospital’s food budget can easily top $4 million annually. Just 1% of that is $40,000 that would stay in the local food system, making a huge positive impact. A more realistic figure of 2 – 3% purchasing change means $80,000 – $120,000 going into the local grower’s systems. What benefits and opportunities can you see $80,000 having on your local farmer’s market and local food network?
There are a couple of workable solutions to the questions of efficient local food distribution to make life easier for these larger customers. One is a regional food distribution hub, which some models have proven successful and others have failed in different regions of the country. Another is a co-operative system that partners with a smaller, regional food distribution system that is already in place, effectively adding a “local, sustainable food” section to it’s inventory of supplies and services. There are still others that bear examining and evaluating to see if they would work for a particular need or application.
There are a growing number of institutions just like St. Joseph’s who are responding to their customer’s desires and needs by putting their not inconsiderable moral, ethical and financial weight behind new local food initiatives. The market is there, it just needs some evaluating, adjustments and planning to make it happen, with hugely beneficial results for both the growers who can create the relationships and supply the needs as well as the institutional consumers that can broadcast the triumphs of inter-weaving local, healthy, sustainable food into their menus.
A New Prescription For the Local Food Movement
Terra Madre, Salone del Gusto and International Congress
Slow Food Terra Madre 2012
Terra Madre Salone del Gusto 2012Here is where we will document our trip to Turin, Italy to attend Slow Food Terra Madre 2012, so watch this Topic/Category for updates. We are International Congress delegates, which is a separate conference at the end of Terra Madre for Slow Food leaders worldwide to discuss the direction of Slow Food globally. It is held every 5 years. This is the first year the International Congress is being held concurrently with Terra Madre.
We are honored to have been selected, especially as International Congress delegates. We will be meeting with local, sustainable food leaders from across the world to exchange ideas, challenges and successes and plan a way forward for a sustainable food economy based on the Slow Food precepts of “good, clean and fair”. This is some truly ground-breaking, leading edge work and we are excited to be a part of it. We will be attending the full Terra Madre event before the Congress starts.
There are a couple of distinctions for this event:
Terra Madre is the place where workshops, meetings, demonstrations and panel discussions take place. There are over 100 Taste Workshops and Meet the Maker events where people are guided through regional tastings by international experts. There is also many different Theatres of Taste where chefs prepare their signature dishes in front of the audience, demonstrating their unique approaches and discussing influences. Internationally acclaimed chefs from around the world put on special Dinner Dates where they prepare their specialties for a very small group of people. You can watch a short YouTube clip of the 2009 Terra Madre.
Salone del Gusto is an international market and showcase for food communities from around the world. Three pavilions of the Lingotto Exhibition Center will be dedicated to Italy, while the adjacent Oval Olympic Arena will host producers from all five continents. Special areas will be serving Italian regional dishes, while Terra Madre cooks will be preparing ethnic specialties and street food that will highlight the diversity of gastronomic heritages from around the world. The area will host around 1,000 exhibitors from 100 countries. Arriving from Africa, North America, South America, Europe and Asia, local food producers will once again be the stars of the event, offering cheeses, cured meats, fish, breads, sweets, grains, honeys, fruits and vegetables from 50 different countries.
2012 marks the first time that Terra Madre and Salone del Gusto have been hosted in the same place and are also the first time the events are open to the public. In previous years, only Slow Food members were invited. This is also the first time that the International Congress is occurring at the same time, as it meets once every 5 years. This year will truly be a special event! There are estimates of around 200,000 people will attend one of the events, so we will be busy.
Food Justice and Security Starts at Home
Food is at the forefront of many people’s minds today, with daily news channels reporting on foods to avoid for health reasons, food safety recalls almost daily, foods that a new study has shown will fight this or that disease, the growth of farmer’s markets and endless debates on local, sustainable food. Some articles and organizations trumpet the dire need to “feed the world”, while others are talking about feeding ourselves. There is ample evidence that food waste is a serious problem and that distribution systems are the culprit. Food has become noticeably more expensive over the past couple of years, with higher prices expected due to this year’s hard drought across much of the Midwestern US.
What’s a person to do today about sourcing and eating real, good and healthy food? One excellent example is that of Hnin W. Hnin, or more specifically, her mom. That’s right, her mom – a local, sustainable, cultural food hero to her family and an example of what is possible for everyone. Hnin’s family immigrated to New York over 25 years ago, but her mom has faithfully kept their cultural food traditions alive by cooking daily. She shops at the local farmer’s markets when she can, and the supermarket or discount stores when she can’t. She doesn’t cook every day to be hip, trendy or because some article in some magazine said it was the thing to do. She does it because that’s how she has been able to keep her family fed all these years on a shoestring budget. They have cooked their traditional, cultural foods that have helped them keep their identities intact in a world that wants to assimilate and homogenize everyone and everything. We could learn some serious lessons from them. Americans have the blessings and simultaneous curse of having a melting pot culture. Many of us have no strong cultural identity to ground us today, and so are swayed by corporate advertising that promises us a better life or to make us feel better about ourselves if we eat this or drink that. We are lead to believe that healthy food is more expensive, when the exact opposite is more often the case.
Eating real, good and healthy food everyday is not just the realm of the wealthy or famous, as is sometimes thought when we see the prices of organic produce in a Whole Foods market. It is possible to eat well and not spend a fortune doing so. That is where food justice and local and sustainable agriculture comes in. Everyone is more engaged with a local agricultural community, from the producers to the consumers. There is much more transparency, so everyone has a higher stake in the process, with resulting higher overall quality. The Slow Food organization mission statement is for food that is “good, clean and fair”. There are no modifiers in that statement, so it applies to everyone, everywhere. By bringing together a focus on good food – healthy, tasty, chemical free with clean food such as organic, local and sustainable along with fair food that brings sovereignty, food access and fair wage and labor into the mix there is a community of diversity that has not been seen yet on the world stage that is food. There is some real potential here, a nationwide community that is as diverse as it is engaged, committed and passionate about “good, clean and fair” food for everyone. It is surprising to some to see the growth in decentralized, independent food communities and pathways that have appeared across the nation. It is of no surprise to others who have worked to make it happen, a little at a time.
Sustainable food is how we will eventually feed ourselves on this planet, either by choice or by force. The current system is patently unsustainable and will continue to create more damages than benefits as it grows and continues, until it collapses. By definition, we will arrive at a sustainable food system or we won’t arrive at all. Exactly how this sustainable system functions is very much a work and dialogue in progress, with everyone having a say in it. Good, clean and fair are excellent starting points to found this new paradigm, and continue the work of building a network of diverse local food communities that nourish all of us.
Mom knows best: How food justice starts at home
Caretakers of the Seeds
We do not own the seeds we sell; we are simply caretakers of the seedstock, maintaining genetic purity, quality and viability while they are in our care. These seeds – all of them – belong to humanity. They are what have kept us alive for the past 12,000 to 15,000 years once the human race transitioned from hunter-gatherers into a more agricultural society, growing and saving the seeds from year to year, putting aside the very best seeds for planting the next year.
It is impossible to our way of thinking for anyone to “own” or “patent” seeds, as they are the very lifeblood of our race.
This is our full-time job as well as our consuming passion, not just a passing fancy or whimsical interest. This, our life’s calling, demands every bit of education, experience, creativity, energy and enthusiasm that we have. Everyday. We see, looking back, that every single thing that we’ve done in our life has led us up to this point and has been a preparation for this work that has selected us.
We have come to realize that the more knowledge and experience that we gain, the more that have yet to gain. Our road ahead is full of learning and we welcome that. We are eternally grateful for the mentors that have most graciously taken us under their wing, educating us and showing us the best possible ways to move forward with moral and ethical integrity, as well as seed purity, vitality and quality. Thank you ever so much! We are in your debt.
There are those who want to put seed companies out of business, advocating for everyone to save their own seeds and maintain their own seed banks and seedstocks. This is a noble proposition, but we don’t believe it to be feasible. We have almost 20 years of growing and soil building knowledge and experience behind us, yet we feel in so many ways that we are just beginning our journey into deeper knowledge. This is our commitment, to bringing out the best varieties and maintaining the highest quality of seeds and it takes all of our time and then some. We don’t see everyone as being interested or able to make this commitment over the long term. This is one of the main reasons why viable, family owned and run seed companies are so critically important today. It is human scale agriculture in the purest form, at the very beginning of the cycle of food.
We see diversified, decentralized and local human scale agriculture as being the answer to how we are going to feed ourselves in the long term. It starts with the absolute best seeds possible, which is in turn made possible by individual seed companies that have a commitment and passion to constant, careful observation and maintenance of the highest quality seeds, correcting genetic drift, anomalies and other problems as they arise in partnerships with highly dedicated and experienced seed growers who are experts in their fields.
This doesn’t and can’t happen overnight or in a short time frame; it takes years and years. We are often looking 3 – 5 years into the future in order to introduce a new variety of seed from the time it arrives in our hands. We do the initial evaluation grow-out, and if we like it one of our growers will do another grow-out for observation of any variability, drift or evidence of possible cross breeding. The subsequent grow-outs ensure that each new generation is growing true to the previous one and the established standard for that variety. Each grow-out requires a full season. If there are problems, they are evaluated to see what is required to correct them, and if it is worth the time or if it would be better to start with another variety that looks more promising. After the evaluations the production grow-out begins taking place. This in itself may take 2 or more years, depending on how much seed we have to start with. Some seed production takes 3 or more years just to reach a genetically viable starting population. From there the seed production growing takes place, and we can offer that seed variety for sale.
This level of dedication is labor and resource intensive, one of the reasons that diverse family seed companies are needed to provide the quality of seed we need to grow our food. Individual gardeners can participate in saving and preserving seeds and diversity as well, learning to save a smaller number of particularly tasty varieties on a smaller scale. We strongly encourage everyone to try saving at least a small portion of their seeds. It is a wonderful education into the miracle that is seed, along with the irrepressible adaptability of the seed. The humble strength of life is clearly shown each spring when moist warm soil breaks the dormancy of a seed, giving it another chance to express its full genetic encoding and potential. As with gardening, saving seeds will make you a better observer, a better gardener and a better steward of your part of the earth.
We feel that it is through a collaborative effort between small family run seed companies, seed saving exchanges and dedicated individual gardeners that the strength of the seed future is the strongest. Independent, decentralized yet cooperative seed production and distribution is the most robust and resilient model that offers the best protection against the loss of seed varieties to a patent or consolidation effort.
Best Homemade Fish Emulsion
Fish Emulsion Feeds Your Plants
Fish emulsion has been a go-to product for the organic and natural home gardener for years now, as it has proven its effectiveness in feeding the soil and plants with biologically available nutrients while increasing soil and microbe health. The main drawback to commercial fish emulsion is the cost and the smell. While we can’t do anything to help you with the fishy smell, we can help you make your own fish emulsion that will not only save you a lot of money in product and shipping costs, but just might make a better product than you can buy! This homemade fish emulsion will almost always supply more nutrients than commercially available, but also supplies much more beneficial bacteria from the brewing process. In order to ship, commercial emulsions have little to no active bacteria, because they make containers swell as they continue to grow!
All fish emulsions are good organic nitrogen sources, but they also supply phosphorus, potassium, amino acids, proteins and trace elements or micro-nutrients that are really needed to provide deep nutrition to your soil community and plants. One of the benefits of fish emulsion is that they provide a slower release of nutrients into the soil without over-feeding all at once. It is usually applied as a soil drench, but some gardeners swear by using it as a foliar fertilizer as well.
Adding seaweed or kelp to the brewing process adds about 60 trace elements and natural growth hormones to the mix, really boosting the effectiveness of the fish emulsion. The seaweed or kelp transforms the emulsion into a complete biological fertilizer. Beneficial soil fungi love seaweed. Dried seaweed is available at most oriental grocery stores. The amount you need to add will depend entirely on your soil needs. If you are just getting started in improving your soil, add up to a cup of dried seaweed or 2 – 3 cups fresh. If your soil is doing pretty good then add about 1/4 to 1/2 cup of dried seaweed and up to 1 – 2 cups fresh.
Making Your Own Fish Emulsion
To make your own, obtain a dedicated 5 gallon bucket for this project. Trust me; you won’t want to use it for anything else once you’re done! Buy 10 cans of herring type fish such as sardines, mackerel or anchovies. Sourcing these from a dollar store or scratch and dent store makes perfect sense, as you don’t care about the can and aren’t going to eat them.
Rich, well-aged compost is a key ingredient to great fish emulsion, as it has lots of active microbes and other biological life which will help kick-start the fermentation of the fish. A good compost hunting dog is not required, but really helps. We’ve found the Doberman breed to be very helpful in finding just the right compost! Dalmatians do a pretty good job as well.
Fill the bucket half full of well-aged compost, aged sawdust or leaves, or a combination of all three. You are looking for the dark brown, crumbly compost that smells like rich earth.
Add water to about 2 inches from the top…
add in the cans of fish, rinsing the cans with the water to make sure you get every last drop of the “good stuff”. The juices or oils in the can will breed beneficial microbes and supply extra proteins.
To supercharge the brew, add 1/4 to 1/2 cup of blackstrap molasses to provide sugars and minerals to the fermenting process. The sugars also help control odors. Next, add the chopped or powdered seaweed to the mix. If you need extra sulfur and magnesium, add 1 Tbs Epsom salts.
Stir well and cover with a lid to control the odor, but not tightly as it will build pressure as it brews.
Be Careful!
NOTE – Make sure that flies do not get into the bucket or you will have a marvelous breeding ground for maggots! One solution is to drill several holes in the lid for the bucket and glue screen mesh on the inside of the lid, allowing air flow but keeping those pesky flies out. Remember, you are brewing the most delicious aromas the flies have ever smelled!
Let it Ferment
Let it brew for at least 2 weeks, a month is better. Give the contents a good stir every couple of days.
Once it has brewed for a month, it is ready for use!
There are a lot of ways to use this brew, so be creative. Some folks will strain off the solids, put them in the compost pile and use the liquid as a concentrated “tea” to be diluted with water. Others keep everything together and stir the mix well before taking what they need. What you have is a supply of bio-available nutrients in a soluble form.
Use as a Soil Drench and Foliar Fertilizer
For a soil drench, use 2 – 3 Tbs per gallon of water and apply to the roots on a monthly basis during the growing season. 1 Tbs per gallon of water makes a good foliar fertilizer. Just make sure to apply it by misting during the cooler parts of the day, not drenching the leaves in the heat. Half a cup per gallon will give your compost pile a kick start.
This brew will keep for at least a year, but you might want to make fresh each season. If you need less than 5 gallons, halve or quarter the recipe. It will smell, so store it where the odor won’t knock you out. I don’t trust the “deodorized” fish emulsions, as to remove the odor, some component of the fish product was removed either physically or chemically and is no longer available as a nutrient.
Rough Service Lightbulbs Can Kill Your Chickens
Backyard chicken owners looking for an alternative to heat lamp bulbs to keep coops and water warm in the winter should beware of “rough service” bulbs that have a coating that makes them shatter resistant. That coating is Teflon or PTFE, and is deadly to your chicken flock. There have been a number of people experiencing this problem, but there remains a lot of folks who have not heard of this yet.
The Teflon gives off toxic gasses when heated. Birds (such as chickens or other poultry) are very sensitive to airborne toxins and can die from the exposure to such fumes. This can happen quickly. There have been a number of reports of small flock owners finding their entire flock dead in the morning after installing this type of light. A large scale poultry research facility has experienced the death of all 2400 birds over the course of a few days following the changing out of regular heat bulbs for the rough service lightbulbs. Sylvania and GE both make these rough service lightbulbs and are readily available, often close to the heat lamps in stores. GE has no warning labels on their bulbs, but Sylvania does have a sticker warning that the bulb can be harmful to poultry.
The Teflon starts to off gas as low as 325F and possibly lower. Many light bulbs will reach better than 500F, creating a lot of initial off gassing when first turned on. This cloud of toxic gas is what kills the chickens and other poultry in their coops on a cold night.
On a side note, this is the same Teflon used to coat the common household pans, with the same off gassing into your kitchen where you and your family are breathing the air!
A Banker Bets on Sustainable Agriculture
These words were written by none other than an investment strategist who looks at what is or will be profitable in the future and he is betting that sustainable agriculture is one of them. Jeremy Grantham has also talked about the finite resources that are becoming apparent to all but those in government, industry and economists. He believes that our most pressing issue we are facing today is not energy or one of many other crises that we are facing, but food. Food, the third most important ingredient for life is, or soon will become center stage of the world’s attention.
Why the focus on food? Won’t GMOs and industrial agriculture feed us all? The fact of the matter is that system is completely unsustainable. It requires massive amounts of petrochemicals and petroleum just to keep it moving, much less expanding. As the cost of those petrochemicals and fuel continue to rise it will simply become much too expensive to grow food in that system, despite any and all subsidies, price protections or trade restrictions. Right now the foundation of the food system is in crises. The farmers are being squeezed while the corporate food manufacturers are still profitable. It is very easy to see the declining grain production (even before the drought of the past 2 years), across the board increases in resource costs and plummeting crop yields from petrochemical fertilizers. The future of industrial scale farming isn’t looking too rosy right now. What happens when the farmers can’t afford to farm? When they can’t afford the costs to run the tractors, buy the seeds, fertilizers, insecticides and pesticides that are required to grow the industrial crops? Who will do the growing then?
From his quarterly letter –
• Grain productivity has fallen decade by decade since 1970 from 3.5% to 1.5%. Quite probably, the most efficient grain producers are approaching a “glass ceiling” where further increases in productivity per acre approach zero at the grain species’ limit (just as race horses do not run materially faster now than in the 1920s). Remarkably, investment in agricultural research has steadily fallen globally, as a percent of GDP.
• Water problems will increase to a point where gains from increased irrigation will be offset by the loss of underground water and the salination of the soil.
• Persistent bad farming practices perpetuate land degradation, which will continue to undermine our long-term sustainable productive capacity.
• Incremental returns from increasing fertilizer use will steadily decline on the margin for fertilizer use has increased five-fold in the last 50 years and the easy pickings are behind us.
• There will be increased weather instability, notably floods and droughts, but also steadily increasing heat. The last three years of global weather were so bad that to draw three such years randomly would have been a remote possibility. The climate is changing.
• The costs of fertilizer and fuel will rise rapidly.
Grantham believes that we will transition to a more or less to a sustainable, organic and largely regional food system in the foreseeable future. This, coincidentally, is almost the exact same argument that organic and sustainable farming folks have been talking about for several years now, although for somewhat different reasons. His thoughts are that we have a choice – we can voluntarily create and adapt the above mentioned sustainable food production model, or we will be forced to do so. Not by any government or corporation, but by scarcity. When industrial, chemical agriculture finally proves that it really can’t feed the world, what then? Organic, sustainable agriculture may be the only player left at the table.
He has bet on organic and sustainable agriculture by establishing foundations that finance research into better organic agriculture methods. Once the best practices and highest productivity methods are known, he wants to directly finance those organic farms. This will take some time, as there is no current infrastructure, training or experience on this scale to draw from and must be created. Current models need to be scaled up and tested to be able to dovetail into an overall system that not only helps to maintain itself, but grows itself as organically as the food it produces.
A Banker Bets on Organic Farming
Help Build a Better World
We need to build a better world, you and I. There has never been more of a need than there is today. There has also never been a better time. There is an old saying, “The best time to plant a tree was 20 years ago. The second best time is today.”
A better world where our lives make sense, where we stop working longer hours in jobs we detest to buy things that fill our homes but don’t and can’t make us happy. Where we realize that we – not things and not money – make ourselves and each other happy. Our lives are better when we work with others, helping them while helping ourselves at the same time. A world where what we do engages us and what we love, and that work fulfills us and gives us and the world meaning. Where both parties in each and every transaction benefit, and the first thought isn’t “what profit is there for me?” and the dollar isn’t the sole measure of benefit, profit and satisfaction.
There are many critical systems that are in decline or are breaking, but do not give up. Depending on where you look and what you read the world is on the brink of catastrophic collapse in many areas; finance, food, energy, water and populations are all at risk. There are dire predictions of dark and difficult times ahead, but do not give up.
These circumstances are precisely why you and I must build a better world. We must begin today. Very few people have a positive outlook for the next 5 to 10 years, but we can change that. When questioned, those same people give the reason for their pessimistic outlook as due to the state of the world and to circumstances created by governments and corporations. In other words, they are afraid of external circumstances beyond their control.
We start building a better world by realizing, recognizing and taking responsibility for the only thing that we truly have control over in our lives – our choices. We always have the power of choice. We constantly choose, for better or for worse. Several hundred times a day we make a choice. Our choices affect not only us, but those around us and multitudes of others we will never meet. There are those that say that one person cannot make a difference. This is untrue. One person, alone, will have a difficult time making a difference. However, we are very rarely truly alone – especially in our choices. Our lives are the direct results of our choices, made throughout the years that have lead us to this place in time where we are today. Who we are, what our character is, what we do in life, where we live are all the results of choices we have made.
Our most powerful choice to build a better world may be one that we make with little thought every day. Our choice of how and what to spend our money on is one of those paradoxes that goes largely unnoticed and unexamined in our lives. Both Joel Salatin and Michael Pollan have said that we vote with our forks three times a day. Many of us have heard the “Buy local” and “Know your farmer” mantra, but what does that mean?
What it really comes down to is taking the responsibility of who you support with your dollars. Every time you make a purchase, you are financially helping that company, along with endorsing the way it does business. For better or worse, this is what happens. Do you love the eggs, greens and tomatoes from the young farmer at the Saturday Farmer’s market? Wonderful! Buy them and you directly help that company stay in business and grow. Are you upset at how many jobs have been sent to China, and the newly introduced GMO sweet corn in Wal-Mart? Good! Do you buy anything from them? If so, despite your disagreement, you are helping them to stay in business and grow. It really is that simple.
Realize, though, that simple almost never means easy. It can be tough to make good choices. This is one of the reasons we are so passionate about small business and human scale living. Our individual purchases means very little to a large international corporation, but means a lot to a small family owned farm or business. There is a quote that sums this up nicely –
This can seem daunting at first. There are so many choices about so many things that we don’t want to get wrong, we don’t know where to start. There is also so much negativity around, it can seem to be simply too much. Start small, start by focusing on and emphasizing the positive choices that we can make today. We won’t build a better world by getting rid of the negatives; we will build it by focusing on and increasing the positives. When more of a positive nature is added to a system, it will naturally and automatically become better as the positive displaces the negative. What we focus on – positive or negative – think about, talk about and act on will grow. Help grow the good in our lives. Find good, positive ideas, thoughts and directions, and then incorporate them into your life. It takes some work to concentrate on the good and beneficial, but once those habits are started they will continue to help.
Do not make the mistake of thinking that you cannot make a difference. Never underestimate the power of change inherent in a small effort, movement or idea. Committed people make the difference on a large and small scale every day. As the famous quote from Margaret Mead goes –
Start by finding and working on what you can do, not what can’t be done. Build a better life, starting with your life. Plant a garden at home, no matter how small. Container gardens are great, they are simple to set up and use and can grow some good food. Help out at the community garden, with or without a plot of your own. Share your veggies with a neighbor, family or friends. Help out at the food bank, Meals on Wheels, or your local soup kitchen with donated veggies or your time.
Be on the lookout for opportunities to enrich and improve your life. Stop thinking about the dollar value in each opportunity, and make the decision to take it or not based on how much positive or good it will bring to your life and others. Read more. Read to learn and not just for entertainment. Study your environment and habitat where you live. Get to know what grows wild there. Find out what is edible and what is not. Learn what edibles will grow well with little care and plant some. Start a food forest in your yard or neighborhood and share with those around you. Make a point of getting to know someone new at the Farmer’s market, or going to the Farmer’s market if you don’t already go. Learn what is made in your community or town. You might be surprised at what you don’t know about where you live. Once you start getting to know more about where you live, you just might find that you like it more than you initially thought.
These are some of the ways you and I can build a better world. We can start today.
Old Time Green Chile Stew
I grew up eating this green chile stew, or as we simply called it – green chile. Mention green chile in most places in the Southwest, and people will understand that you are talking about a bowl of stew, made with green chiles, herbs, sesonings and usually pork. We would make a huge batch of it in the fall, roasting, peeling, seeding and chopping upwards of 50 pounds of the Hatch New Mexican green chiles on the first day. The next day we would make the recipe in huge kettles on the stove to serve at Thanksgiving, Christmas and celebrations at the end of the year. What we didn’t eat immediately we would freeze for the coming year. Thanksgiving just wasn’t really complete without a bowl of green chile on the table, to be ladled over the turkey, mashed potatoes or in a bowl on the side to be savored all by itself. Christmas was much the same. That green chile was something to be looked forward to each time we took it out of the freezer for that night’s dinner.
We learned the foundation of this recipe from an old family friend from a small town in the state of Chihuahua in Northern Mexico. She grew up poor, so her family grew and raised almost all of their own food, including chiles that were used in almost all of their cooking. The flour and oil is used to make a roux, or thickening sauce that gives the dish a nutty flavor as a backdrop for the chiles and meat to take center stage. It takes a bit of time to make, so make a lot to freeze for later. It doesn’t take any extra time to make more, especially if you aren’t roasting, peeling, seeding and chopping the chiles yourself. You can order them directly from companies such as Biad Chile Company and get them delivered to your door, or go to your local farmer’s market where there will probably be a propane powered chile roaster spinning away, creating fresh roasted chiles right before your eyes.
This recipe will give you highly tasty, mild green chile. You can spice it up with hotter green chiles, or with some varieties of hot red chiles as you like. Green chile is ubiquitous in the Southwest, every family has their own take or twist on the basics, so no two are alike. In Santa Fe, you can go from one restaurant to another directly across the street and the tastes will be noticeably different, but delicious.
Here’s where the story takes a little jag. Last year we raised Navajo Churro sheep for the first time. After we got them back in little white packages, we tried them in this recipe, as we had run out of pork. It turned out to be one the best tasting green chiles that I had ever eaten. The Churro has just the right flavoring that pairs beautifully with the chiles to make an outstanding dish. Home or locally raised pork is also excellent, as it has much more flavor than commercially raised supermarket pork.
Serve with a garnish of chopped cilantro and a swirl of sour cream if you want to dress it up a bit. Warm tortillas are a great accompaniment. Give it a try and let us know what you think!
Old Time Green Chile Stew
Makes plenty for a large dinner and enough to freeze 6 – 8 quarts.
Recipe Tip! This is a very mild “heat” with great flavor, but can be modified by using hotter chiles to suit your spice tolerance.
Real Food Reaches Critical Mass
Real Food Challenge
Is the logic of the chattel slave plantation the foundation of today’s industrial food system? There are some compelling parallels here. The logic of prioritizing profits over human, animal and environmental well-being for one. The complete disregard for the quality or health of the food produced is another. It is becoming increasingly clear that the industrial food system just simply doesn’t work for those that are involved with it, the notable exception being the shareholders. The workers in the system have no health or financial security, the teenagers and young people have serious health issues – diabetes the lead concern- and the farmers and food producers are getting pushed off the land as superfarms continue their consolidations. So where does real food enter the picture?
There is another logic, however. The logic of the Real Food Challenge, founded on respect and balance. Profits that are shared fairly with the workers and producers bringing the food to our tables. This project is one aspect of a much larger movement seeking a just and sustainable food economy. College students are driving real, healthy, measurable change in campus cafeterias. They work with administration in the existing budgets and spending programs to shift the dollars spent into a more sustainable, responsible and local direction. This becomes an investment in a real food economy. After all, students are paying customers of their respective schools, so they should have a say in the foods that they are served.
In three years, the Real Food Challenge has built a network of over 5,000 students at more than 350 schools across the country. They have won more than $45 million in real food purchasing commitments, including the entire University of California system. They predict that in the next 10 years, that number can exceed $1 billion. That’s starting to get into some real money!
One of the biggest successes isn’t just the dollars that have been re-directed, but the small scale, local producers that are able to stay in business and even thrive with the Real Food Challenge. Students are advocating for local producers, then using their examples and farms as studies in classes that help to close the circle. Instead of a negative action of avoiding or boycotting an industrial food producer, this project takes a positive action by redirecting existing dollars in a positive direction while improving several parts of the cycle at the same time. School food is improved, students and faculty health improves, energy and money is saved on shipping and storage costs and the producers are able to make a liveable wage while seeing where the results of their hard work goes.
This is a prime example of thinking outside of the box while engaging the existing system, to the benefit of many of the participants in the food system. We see more and more of these ground-breaking examples happening, a very promising light being shined in an otherwise uncertain time.
A Critical Mass for Real Food by Anim Steel
Why School Gardens Matter
NYC School Garden
Starting small, sophisticated New York City school kids are reconnecting with their food. From a small rooftop school garden that has grown into a 1/10 acre lot, Columbia Secondary School kids are eagerly spending time working, weeding and growing in the garden. The garden is proving its sustainable concepts in not only education and gardening, but life skills and social lessons that present themselves in the most unhurried and real ways, sometimes without the students realizing the enormity of the education they are receiving every day.
The students started with a neglected lot, clearing, weeding, planning and constructing the garden long before the first seed was sown. Building their soil with a compost project that they designed themselves, they are seeing success with the garden producing fresh vegetables that supply Garden to Cafe lunches in the school. The careful use of observations and expected harvest dates help drive the garden planning and succession planting that moves the school garden forward. Business plans are created to help maximize the Thanksgiving herb sales fundraising event. Leadership skill, teamwork lessons, community engagement and food and garden activism are all being ingrained into the fibers of these budding student gardeners. These lessons, learned in a natural and involved way while engaged in the garden will have life-long benefits that will continue to enrich the students lives long after they are adults in this complex and connected world.
These young people are our future. They will make critically important decisions to their own lives and others as they grow and make their way through life. I can’t help but be encouraged when I learn of these school garden programs, and all that they are doing to prepare young people to make a profound and lasting connection to the world through the simple act of gardening and growing food. This is one of the major reasons we support school and community gardens through our Membership Program, where seeds, advice and knowledge are given to help further these experiences and lessons.
Why School Gardens Matter
Urban Farming Examined Part II
What if urban farming isn’t just about feeding the hungry? There are many other crops – tangible and intangible – that are cultivated, raised, protected, harvested and shared from the soil of an urban garden or farm. The immediately obvious ones are the foods produced, but there are others such as education in many different directions, from how food is grown to ideals of peace and justice grown from your own backyard soil. Connections are planted, grown and strengthened as well. People get to know each other and can learn to accept other viewpoints and ideologies without the need to be right or win a discussion. Skills and growing techniques are passed on and strengthened.
One of the biggest crops that urban farming and indeed all human scaled agriculture is planting today is hope and reconnection. Hope that there is a way to provide food for ourselves and those that need a little extra without all of the destruction and isolation that is the norm for today’s industrial corporate agricultural model. Hope that we can heal the land that has fed us for multiple generations but has been so severely disrupted and damaged by chemical agriculture in the name of more production. The reconnection comes when ordinary everyday folks see how food is grown and can be grown in a simple, approachable and honorable manner. One that restores and improves the soil and landscape with each successive crop instead of weakening it.
By many indications, urban farming and human scale agriculture is on the rise and has been proven a success in many major cities across the United States. Burlington, Philadelphia, Detroit, Milwaukee, Chicago, Oakland, Los Angeles, San Francisco, and dozens of other American cities are showing that sustainable urban agriculture is not only possible, but effective in growing many more crops than just food. There is a saying, “If you want to change the world, plant a garden.” How does that work, exactly? Some of the produce is understanding, community, social transformation, and catalytic action along with the tomatoes and kale. Food connects people to economics, justice, pleasure, work, health and the future. The lessons learned and shared that are grown and harvested in the garden have far reaching effects, feeding minds as well as bodies.
Revolutionary Plots | Urban agriculture is producing a lot more than food
Urban Farming Examined Part I
Can Urban Farming Really Work?
Today we are going to look at a couple of opposing viewpoints on urban farming- that being the practice of growing food in an urban environment, more of a food producer than a hobby gardener with a windowsill box of daisies. Urban farming has become hip, cool and somewhat radical in mainstream America over the past few years, with Patti Moreno showcasing the Garden Girl TV that helped lead the way for growing food in the city to become acceptable. Long before that, Will Allen started Growing Power in Milwaukee, WI growing food in an urban landscape and teaching others how to do the same.
Our first article comes via AG Professional, an industrial farming magazine. The author – Maurice Hladik – is from a farming background with a degree in ag economics and was an ag diplomat to several countries. He says that he is a gardener and really enjoys it, but that urban farming in no way can make any measurable positive impact on our food supply, or feed any significant number of people in cities. He uses national land use figures and statistics to prove that the urban landscape is entirely unsuited to growing food. Um, really? What gave you that idea? He cites the fact that his house is built on a rocky outcropping and had to have many truckloads of soil brought in to create the lawn and gardening spaces.
The desire and skillsets of urban dwellers is brought into question next, with the comment of “hype and encouragement” for city folks to get out and grow a garden, with little visible results “given the lack of enthusiastic and capable gardeners” according to him. He challenges the sustainability of urban farming with the lack of suitable soil for growing that has to be trucked in. That soil was once farmland that has been removed from productivity, he states. Apparently he has never heard of the French intensive growing method that fed 90% of the city of Paris with 6 – 7% of the land inside the city limits. For over 350 years.
Water availability is addressed next, saying that rooftop gardens are water guzzlers in a water distribution system that has little excess capacity for irrigation. No mention of drip systems, gray water useage, rainwater collections, mulching or any of the other myriad approaches to reducing the amount of water needed. Urban farming on rooftops is a “thin layer of soil on a cement surface” that needs much more water than a conventional garden. Again, really? He cites a city of Toronto bylaw that states any buildings with flat roofs over 2,000 square feet are required to have some sort of garden. He goes on to say that because of the water issue, food production is out of the question and drought tolerant sedums are used almost exclusively there.
The two most disturbing and concerning points that he makes are at the end of the article. The first is that gardeners should enjoy their hobby and not worry their pretty little heads about feeding the world. Leave that burden to those who can. How @$#!* condescending! The second is that “someone” has a responsibility to feed the world. That “someone”, obviously, is industrial agrobusiness and not anyone else. Why does there have to be one entity that acts as the world’s supermarket? Is there really that need, or is this mantra another construct that has been promoted and pushed for so long that many now believe it? What about improving the capacity of each community and nation to feed itself and get away from the extractive export model? Look at Cuba and Russia as examples of how small, human scale agriculture can, in a real world situation, feed itself.
The article is worth reading, especially the reader comments!
Urban farming is an urban myth
Here is a great rebuttal written by Devon G. Peña, a professor of agroecology, ethnoecology, and the anthropology of food in Seattle.
history shows urban farms can feed cities
Herbed Marinated Dried Tomatoes
Here’s a recipe that will take a little preparation, but you will be thanking me for it later! Make a lot more of these dried tomatoes than you think that you will ever need, as once folks catch on to just how incredibly tasty these little jewels are, you will run out. You might want to hide some just for yourself!
These make beautifully presented, incredibly thoughtful gifts for the chef or serious home cook in your life. You cannot buy the flavor of these herbed tomatoes, anywhere, at any price. These will take a bit of time, but doesn’t require much hands-on time to make.
First, the tomatoes. Only heirloom tomatoes can really be considered, as the flavor is what you are after. The beauty of this process is that almost any tomato can be used, as the drying intensifies the flavors already present. Obviously, a paste tomato will give you a more substantial result. Good ones to look for are the plum and pear sizes with meaty walls, few seeds and a ton of flavor. If you don’t have these already growing in your garden, plan to plant some next year and look at your local farmer’s market. You will need a lot of fresh tomatoes, as they lose a lot of weight during drying. Plan on about 3 times the fresh volume as what you will get dried.
Drying them is the easy part. Wash them, slice and place on cookie sheets to dry. The oven is a great choice, as most gas fired ovens with a pilot light stay at around 90F or so. A consistently warm, sunny location is also good. If drying outside, cover with cheesecloth to prevent flies from snacking on your treats. Let them dry to a leather-like stage, then collect and start the marinating.
There are several different directions you can go with the herbs. A traditional approach is to use basil, oregano and garlic. A French approach would include lavender buds, Herbes de Provence with garlic. The strong punch of Mexican oregano accompanied by some smoked Jalapeno chiles, cumin and marjoram would be out of this world as well. Be creative, look at some herb combinations you enjoy and do some experimenting. The results will most likely be quite tasty!
We will start with the most basic recipe and then give you some alternatives to try. Use as you would sun-dried tomatoes – in soups, sauces, stews, bruschetta, pizza, spreads, salads or anywhere else the flavors would work well.
Herb Marinated Dried Tomatoes
Use these following recipes as the herb ingredients for the basic recipe above.
Herbes de Provence Marinated Dried Tomatoes
Mexican Herbed Marinated Dried Tomatoes
Italian Herbed Marinated Dried Tomatoes
Recipe Tip! Pickling salt is -simply put- fine, pure granulated salt. Grocery stores label it “canning and pickling salt”, health food stores call it “sea salt”. It is not table salt, which contains iodine and several other stabilizers and anti-caking agents that can ruin your pickles appearance.