
Build Your Own Seed Starting Station

A seed starting station gives you advantages
One of the best ways to grow a bigger or better garden is to start with robust, healthy seedlings and transplants. Starting them yourself allows you to select and control the conditions, which often means needing a seed starting station. Gardeners and growers looking to improve their seed germination rates and have stronger, healthier transplants that produce earlier and longer need this tool!
A seed starting station can be almost any size—from a single seedling tray to a full commercial table system. Most gardeners use a moveable wire restaurant rack as the frame, but there are many other ways to set one up.
A major advantage is that placement is not limited to a sunny and warm location because the light and heat are on the station itself. This gives you flexibility in placing it in your house, workshop, or garage—anywhere that remains above 50°F at night.
We’re sharing what we’ve learned from building and using our seed starting station for almost 25 years – what works, what doesn’t, and how to save some money!
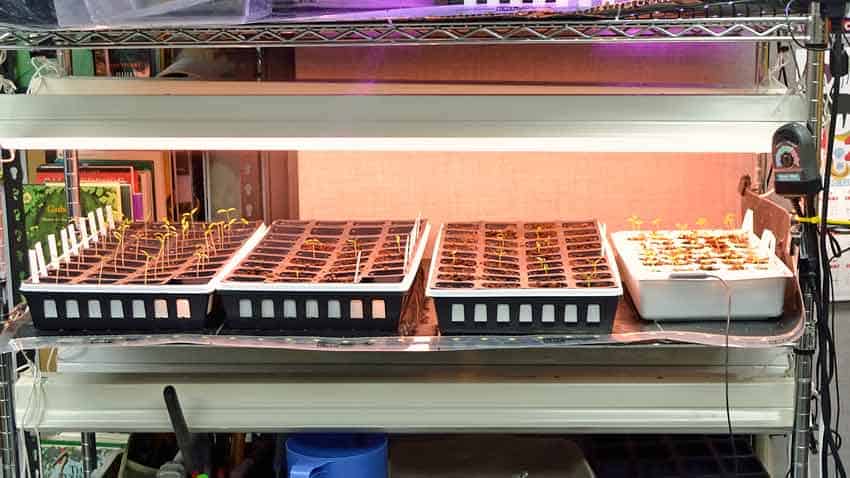
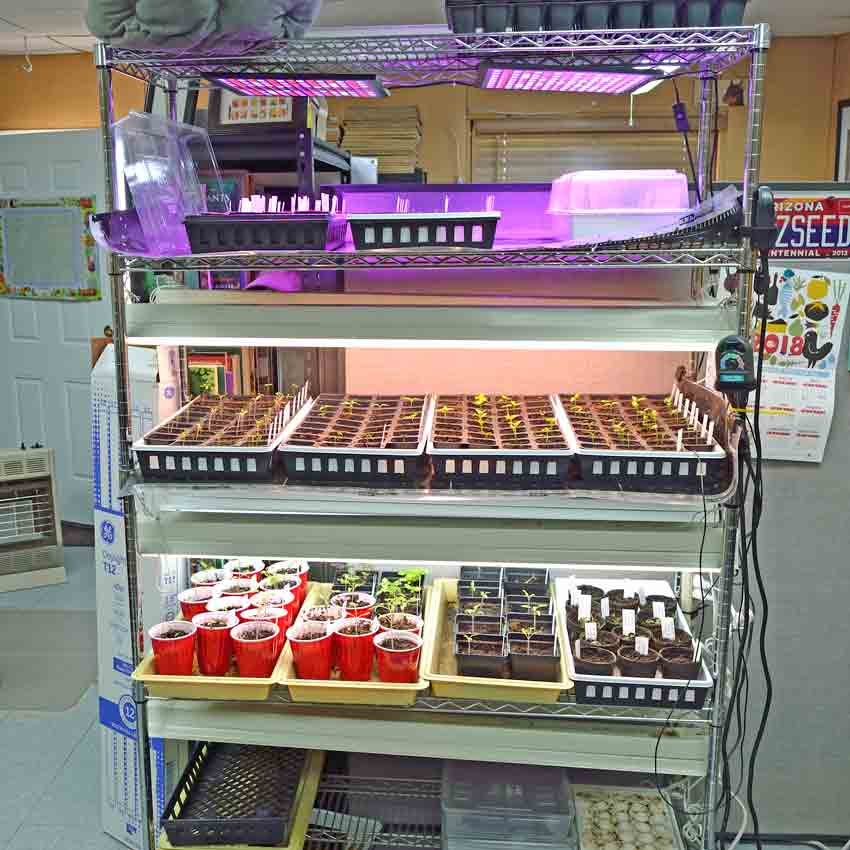
Seed starting station with seedling trays on top of heat mats with lights and thermostat.
Grow like a pro with your own seed starting station
A dedicated seed-starting platform isn’t required for a great garden, but it helps! A good seed starting station is self-contained, creates the perfect conditions for seed germination, and adjusts those conditions as the seedlings grow and develop. You easily control the warmth, moisture, and light in just the right amounts.
We invested in our initial seed rack almost 25 years ago; it still has most of its original parts, and we use it every season. A few parts have been replaced or upgraded as needed, but the money spent two decades ago is still paying out – every season – and will for the next couple of decades. That is money well spent!
Here are three more reasons to seriously consider your system –
1- Get a head-start on your season
Starting seeds like tomatoes, peppers, and eggplant earlier gives you bigger and stronger transplants than with a seed flat in the window. Instead of having a 4 – 6-inch tall seedling, you can have a 10-inch tall transplant, as you see at the garden center, which is robust and more resilient to weather fluctuations. An added benefit is earlier harvests as they go to work sooner than smaller seedlings – as much as a month earlier! In very short-season climates, a seed starting station is almost required to have vegetables like tomatoes, peppers, and squash that need longer to mature.
A seed starting station has adjustable lighting, so seedlings grow stronger and more compact instead of spindly and weak ones that struggle toward the light in a window. The protected environment keeps your young, tender, and delicious seedlings from becoming snacks for critters and insects looking for an easy meal outdoors.
The station works for spring, fall, or winter gardening—we start our spring seeds in mid-to-late February and the fall crops in August for transplanting in early September.
2- Dramatically improve your seed germination rates
The seed starting station has light and heat, and you provide moisture using germination trays with lids, adjusting as needed. Dial in heat and add moisture after planting your seeds, then add light when they sprout while reducing the moisture and heat to grow stronger, more robust seedlings than ever before.
Starting seeds becomes so easy that you can start transplants for your friends and neighbors with almost no additional effort, becoming the local garden hero.
3- Grow salad greens or microgreens indoors year-round
Lettuce, spinach, baby Swiss chard, and mustard are greens that grow well in little soil and cooler temperatures – making your seed rack the perfect location. Just dial the heat down – or turn it off in warmer climates – and keep the lights on with sufficient moisture. You’ll have fresh salads in January, even in Alaska.
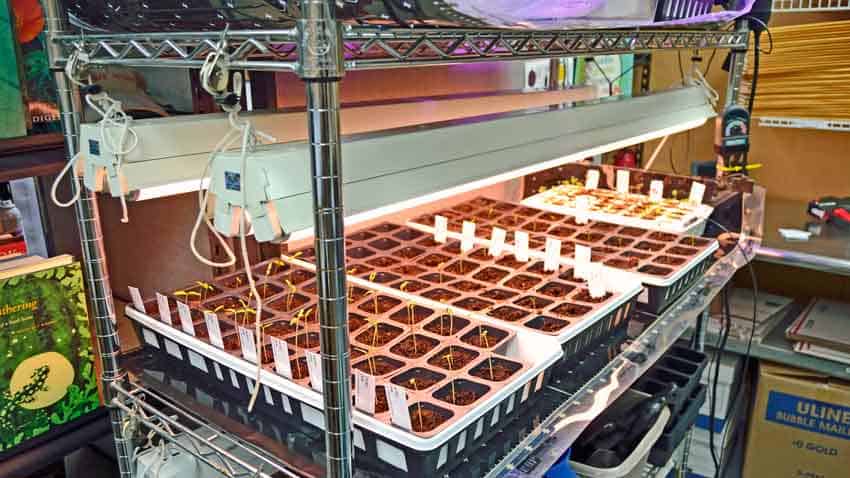
Another view of the grow rack with seedling trays, heat mats, thermostat, and adjustable lighting.
What is a grow rack?
A growing station, grow rack, or seed starting station is any setup that provides light, heat, and moisture in a controlled environment and can be easily changed as needed.
Often made from commercially available wire racks on wheels, they can be as simple as a couple of hoops made from PVC tubing supporting lights over seed starting trays with lids and a heat mat or heating pad underneath.
They are usually very space efficient, only needing a couple to a few square feet, and can be tucked away in little-used areas because they provide their own light and heat. A spare room, unfinished basement, or even a garage will work to start your seeds, as long as the minimum nightly temperature is above 50°F.
Who needs a seed starting station?
A growing station – simply stated -helps you start seeds better and grow stronger transplants.
It really is that simple.
Anyone starting their own seeds gains an immediate advantage using a grow station. You have complete control over the specific conditions that seeds need to germinate – light, water, and heat. This means you provide the perfect environment at the perfect time for faster seed germination, then decrease the moisture and heat while increasing the light to grow stronger seedlings than ever before.
Advantages of a seed starting station
- It is relatively inexpensive and usually pays for itself in a single growing season
- Can be built in stages as budget permits
- Is easy to set up and quickly converts to storage of seed starting equipment in the off-season
- Is made with parts that are easily found locally at Lowes or Home Depot
- Once built, parts are rarely replaced – giving a very long return on your initial investment
- Is adjustable to raise or lower each shelf or each light individually
How to build your seed starting station
The foundation of any seed-starting system is the support structure that holds the lights above the seed trays, allowing them to move up and down over the young seedlings as they grow. Larger stations support the seed trays and heating mats, while simpler systems suspend the lights over any level surface.
If you have space, investing in a restaurant-style wire rack on wheels gives you a lifetime of use—and possibly more! Our rack is almost 25 years old and is still functioning just as well as the first day we assembled it. We’ve moved its location about 8 – 10 times and reconfigured the lighting system a few times as we tried different ways to hang and adjust the lights over the seed trays.
We easily see another 25 years of use from it because there isn’t much stress on the rack. We’ve removed two original shelves to give us more vertical space for growing seedlings and provide light above each shelf.
The five-shelf system that we use (74-in Tallx 48-in Wide x 18-in Deep) is ideal if you’re growing a larger garden or want to start and transplant several dozen seedlings indoors simultaneously. Depending on your needs, you have the flexibility in how many shelves are in use at once – from one to all of them. Here’s a materials list with sample pricing from Home Depot:
Materials List for Five-Shelf Seed Starting System:
- (1) 48″³ Wide Multi-Tier Steel Shelving Unit:
- A 72″ high steel unit with 5 adjustable tiers and wheels – $99.97.
- (3) 6-Outlet Power Strip – $3.97 ea.
- 3 Ft Nylon Cord – $3.92. P
- (16) Small Pulleys – $2.36 ea. P
- (16) Cord Locks (optional)
- Zip Ties or Tie Wire – $7.32.
- (8) 48″³ Fluorescent Shop Light Housing – $13.30 ea.
- (8) 48″³ Plant and Aquarium Fluorescent Bulbs – $10.97 ea.
- OR
- (8) 48″ Daylight Fluorescent Bulbs – $9.97/ 2 pack.
- OR
- (10) 48″Daylight Fluorescent Bulbs- $27.98/ 10 pack.
- *see Choosing the Right Bulbs below
Costs –
- Shelving unit – $99.97
- Power Strips – 3 x $3.97 = $11.91
- Nylon Cord – $3.92
- Small Pulleys – 16 x $2.36 = $37.76
- Zip Ties – $7.32
- Shop Light Housing – 8 x $13.30 = $106.40
- Plant and Aquarium Bulbs – 8 x $10.97 = $87.76
- 10 pack Daylight Bulbs = $27.98
TOTAL COST: $355.04with Plant and Aquarium bulbs from Home Depot
OR
TOTAL COST: $295.26 with Daylight bulbs
Once you see the cost of a professional seedling cart (without heat mats), you’ll see what a difference building it yourself makes!
The consumables—items that are reasonably expected to wear out—are the power strips and bulbs. The power strips should last 3 – 5 years, possibly more, while the bulbs have an average lifespan of 20,000 hours. Using them 14 hours per day gives almost four years of continual use, but normal use is about four months for both spring and fall transplants, giving a potential 12 years. In our experience, we usually see about 8 – 10 years of use.
Building on a budget
The pricing example above is for purchasing brand-new equipment simultaneously, but it doesn’t have to be built this way. Your local Craiglist is an excellent option, and you can set alerts for keywords—”wire shelving,” for example—to avoid having to search every day. Yard or garage sales, used equipment, or restaurant supply companies in your area are other choices. If you get creative, you’ll find several ways to save money over buying new.
Even if you buy new, you can build a shelf or two at a time as needed – nothing says you have to build it all at once!
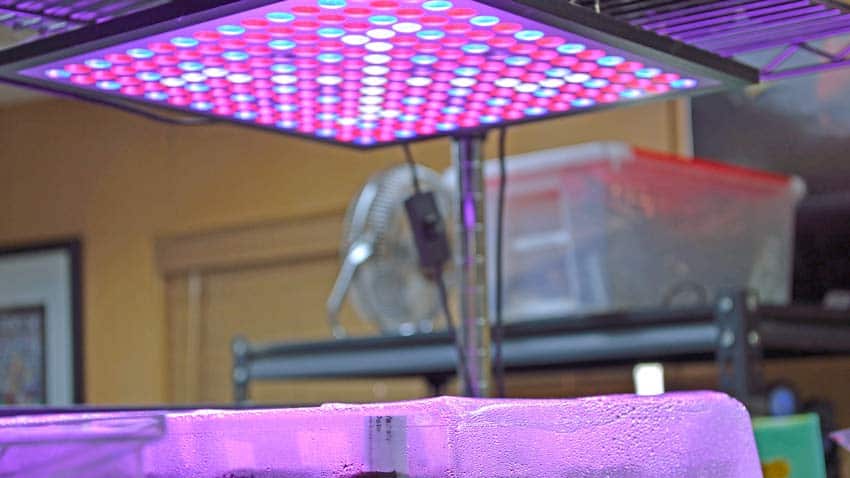
Spectrum-tuned LED grow light – good idea, but it doesn’t last long enough for the price.
Choosing the right bulbs
You’ll see two different choices in bulbs in the materials list – Plant and Aquarium bulbs vs. Daylight bulbs. Both are fluorescent and will last 20,000 hours, but they emit a different spectrum of light. Red and blue are the two most important colors that plants use, as most of the photosynthetic activity of chlorophyll is in the blue and red frequencies. In simple terms, blue wavelengths encourage vegetative growth, while red is best for flowering and fruiting.
The Plant and Aquarium bulbs are tuned toward the red end of the spectrum, while the Daylight bulbs are more blue. If you are using the grow station exclusively to start seedlings for transplanting, then use the Daylight bulbs. For those using the grow rack for growing greens for harvesting, choose one of each type of bulb for each fixture, giving you better coverage of the spectrum.
LED lights are available, and we are testing some, but we aren’t ready to recommend any particular brands yet. The advertised advantages are a longer-lasting light that uses less power than fluorescent bulbs. The disadvantages are usually higher initial costs and less than optimum real-world lifespan. For example, one light we tested cost $30—which is good—but started to fail in the second year of use, which is bad.
Commercial LED lighting is extremely expensive and has not – yet – lived up to all of its claims. Research is ongoing, and we expect to see a large shift to more affordable and better LEDs soon.
How much light is needed?
Most vegetable seeds don’t require light to germinate, but some herbs and flowers do. When we start vegetable seedlings, we don’t turn the lights on until they have popped up and opened their cotyledon leaves. This is when they switch from living off the stored food and energy in the seed to making their own through photosynthesis. 10 – 12 hours of light is good to start. The lights are lowered to about 3 – 6 inches above the seedlings or moisture domes to give them the strongest light possible.
Monitor the soil moisture levels, as the warmth from the lights can sometimes dry out the soil.
You can’t hurt the seedlings with too much light – they will not use what they don’t need. In photosynthesis, there are two cycles – a “light” and a “dark” cycle. The light cycle depends on light to function because it’s based on photosynthesis, but the dark cycle doesn’t require light. That doesn’t mean it needs to be dark for the “dark” cycle to function – it happens after a certain amount of energy is built up from photosynthesis during the light cycle, which then switches to the dark cycle to store that energy. This switching happens continuously, so don’t worry about giving your plants too much light!
Providing lots of light builds strong plants because they have lots of light energy to capture and store for future growth.
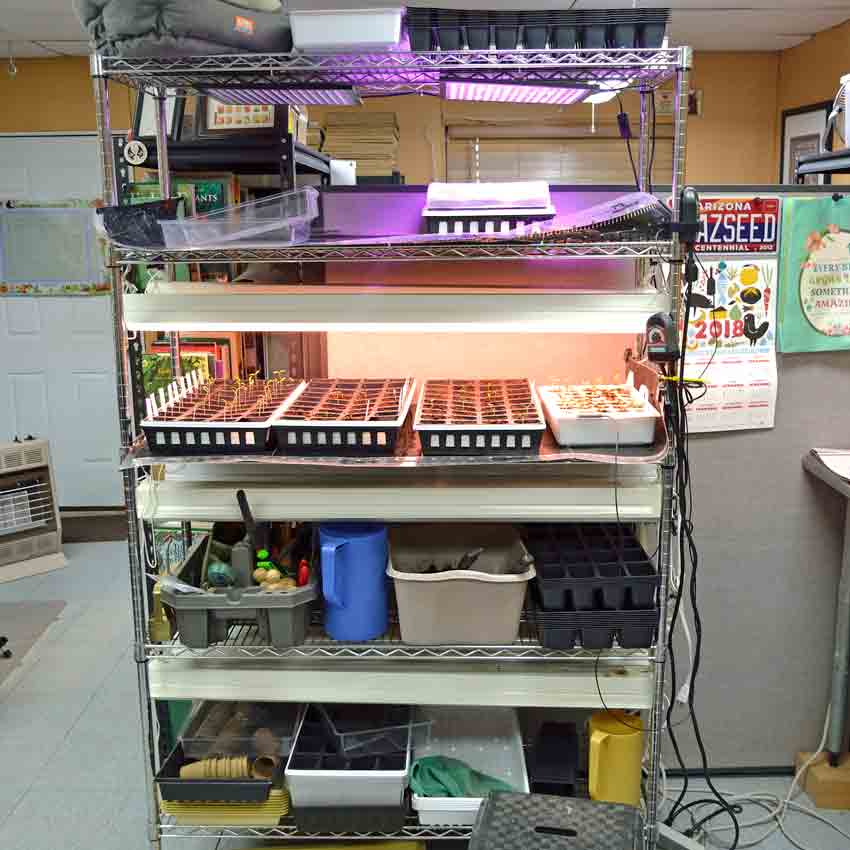
Early season view of our grow rack with two shelves for starting seeds.
Setting up your station
Now that you know what you need, let’s walk through how to set it up and start your first batch of seeds!
Wire Rack
Start with the wire rack – this is the foundation for everything else. Use the instructions and carefully assemble the rack, installing the rollers on the bottom. Moving the rack to install or adjust heating or lighting makes it much easier.
We allow about 18 inches between each shelf, installing the top at the very top and the bottom at the bottom to give us the most room possible. The top rack is used for storage and to support the top level of lights. This gives room to move the light, keeping it 3 – 5 inches above the seedlings.
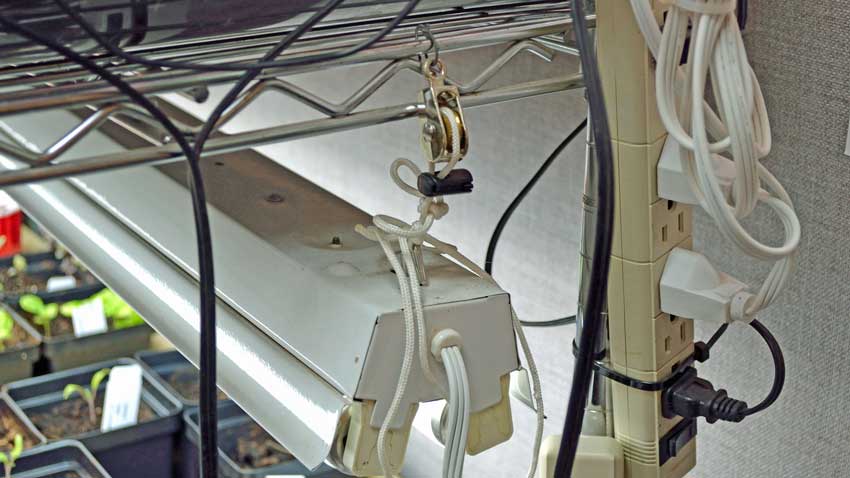
Lighting and electrical connections, showing pulley and cord on the light fixture.
Electrical
Using the Zip ties, fasten the power strips to one of the wire shelves within easy reach. We use one set for the lights and another set for the heating mats—this way, we can turn all of the lights on with the flip of one switch.
Lighting
Cut two pieces of the nylon cord into 24-inch sections and securely tie one end onto the provided hooks for the shop light housing. Then, install the hooks into the housing. Zip-tie the small pulleys onto the end of the shelves to support the shop lights, run the cord through the pulleys, and tie them off. If you aren’t confident with your knots, the optional cord locks might come in handy. Finally, install the bulbs into the fixtures and plug the cord into the appropriate power strip.

Heat mat and thermostat with temperature probe.
Heating
We use commercial heat mats on two wire shelves, setting the seedling trays directly on top to keep the soil warm. Thermostats with temperature probes keep the soil at a pre-set temperature range and are adjustable according to the needs of the seed or seedling. Both are commercial quality and last many years, but they are an investment as they are somewhat costly. We set them at 80-85°F after sowing, then reduced them to 75°F once the seedlings were up and lowered them to 70°F as they matured. Providing heat to the roots keeps the plants healthier and allows them to tolerate air temperatures as low as 50°F overnight with no adverse effects.
Gardeners in warmer climates may not need heat mats, as the fluorescent bulbs provide heat to the shelf above. If you are in a milder climate, experiment with this before investing in heat mats and thermometers!
Mid-season growing station configuration with larger seedlings on non-heated shelves (click to see larger photo).
Once the seedlings are transplanted into larger cups, they are moved off the heating mats onto lower shelves, allowing them to grow in cooler conditions closer to those they will experience in the garden. We only have two shelves with heat mats for this exact reason.
Get creative
Even if you have little (or no) extra space, you can get creative in setting up your seed starting station. A longtime friend lives in an apartment with little extra space and gardens in a community garden, so she has come up with a remarkably inventive method to start her transplants.

Starting seedlings under a table.
She uses the underside of a table to support the lights for her seed-starting station! Her apartment is naturally warm, so combined with the warmth of the lights, there is enough heat for the seedlings to thrive.

Larger seedlings mature before being transplanted. The heat mat is turned off.
Now it’s your turn
We’ve provided you with lots of information and details on building your own seed starting station. Use this article as a checklist, and you’ll soon see the strongest and healthiest seedlings ready for transplanting into your garden!
As you progress, we’d love to see photos of your creativity and how you solved particular challenges with your climate or situation. We will share them with everyone to help others overcome similar issues!


Leave a Reply
Want to join the discussion?Feel free to contribute!