
Building a Recycled Growing Bed
A growing bed can be made from many materials, but when you factor in the ability to make a growing bed from recycled components, then the opportunities become almost limitless. It makes sense in so many ways to make your raised beds from an already-used materials. You will often save a significant amount of money while contributing less to the growing landfills. In addition, you reduce the amount of raw resources used to make new building materials. Often you will find your options are much broader when looking at recycled stock, as the solution can more easily present itself when your mind is more open and relaxed, without a fixed design idea.
This is exactly what led to our finding and choosing this particular metal from our local salvage yard. We know we needed a structurally sound, ecologically friendly and long lasting substance for our raised beds in our garden. The pricing on new lumber which could be in contact with soil for long periods of time was not realistic for the amount of beds we needed to make. One by one, every other reasonably available construction material and method fell out as being much too costly, much too labor intensive or not suitable for our climate.
All of this led us to our local salvage yard. When we let the person know what we were looking to do, he immediately pointed us in the direction of some large-scale roofing they had recently recovered. After looking at a couple of different options, we came across these 3 foot wide and 20 foot long sections of really heavy galvanized steel with most of their avocado green paint still attached. They were heavy enough that it was hard to turn one section over to look at the other side.
When we turned a smaller section over and saw how well it dove-tailed into the long section, we knew we had a custom-made solution to our raised beds. All at a price that was pennies on the dollar of other solutions we had looked at, with a much longer lifespan as a bonus.
We have now used these as raised beds in our garden for almost a decade, with no problems. We recently moved the two smaller beds in our greenhouse and discovered photos of when we made the beds initially and wanted to share the process with you.
Please use this as a guiding hand, suggesting what can be done; don’t go out and expect to find this exact material waiting for you. If you go with an open mind, you just might be surprised at just how well what you find works in your particular garden!
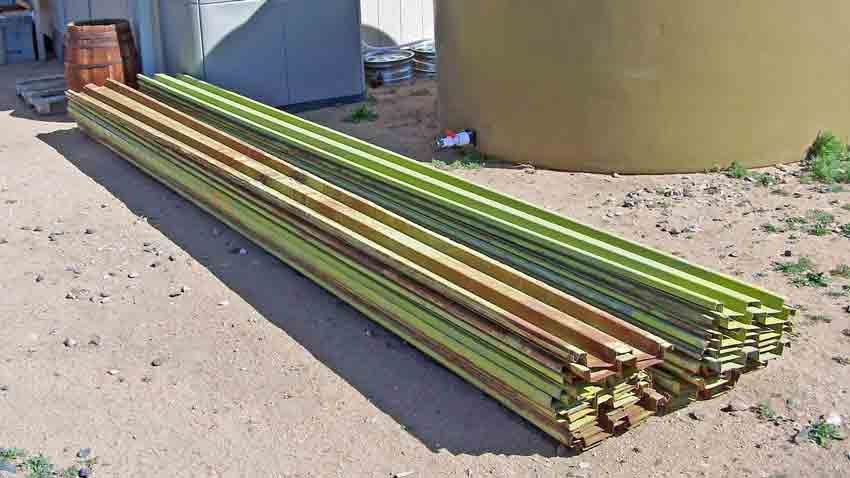
The project started out with our finding some really heavy duty galvanized steel corrugated roofing at our local salvage yard. We then rented an electric nibbler tool to split them lengthwise, as they were too wide or deep to use by themselves.
This is the pile after getting it home, splitting it on the flatbed trailer and then unloading them. A full day’s work!
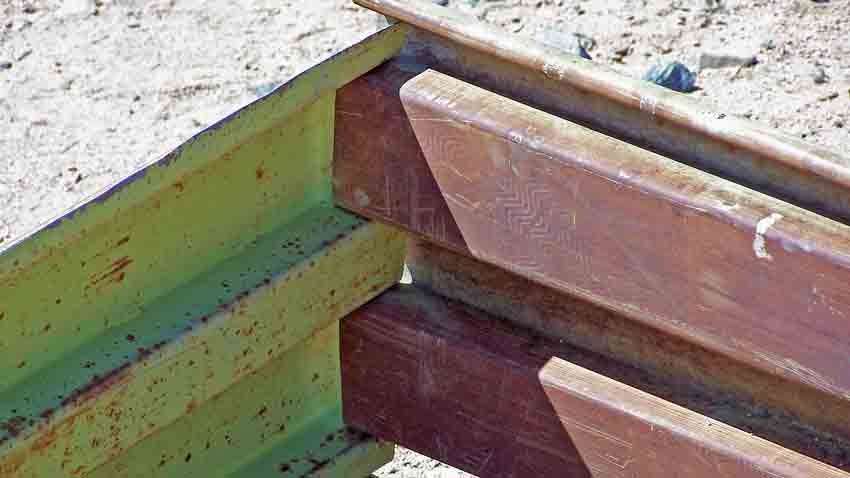
The unusually large corrugations worked perfectly for us, as we flipped the ends over so they would mate with the sides, creating interlocking tabs. The material is heavy enough for us to just screw together, without needing extra supporting material.

The outside view shows the middle tab already cut, bent over and screwed together. These are strong enough to stand on the top of the sides, once the box is constructed!
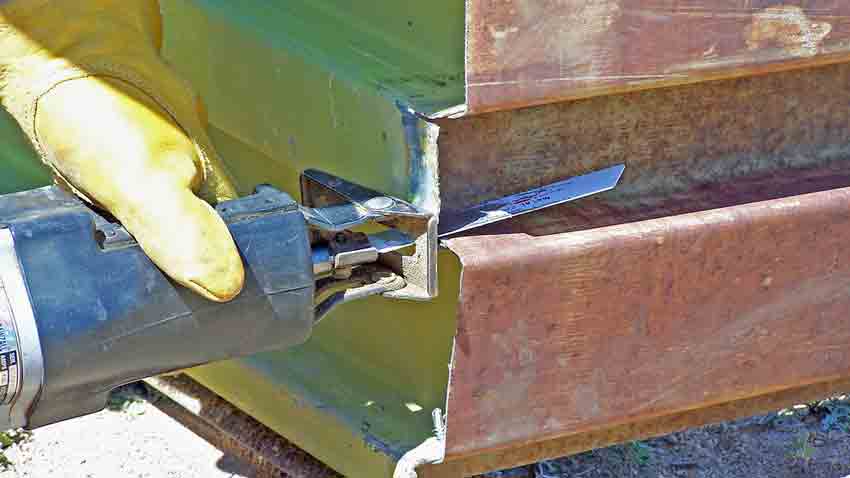
Using a Sawzall – an electric reciprocating saw – the tabs are cut. There are top and bottom screws in addition to the middle ones.
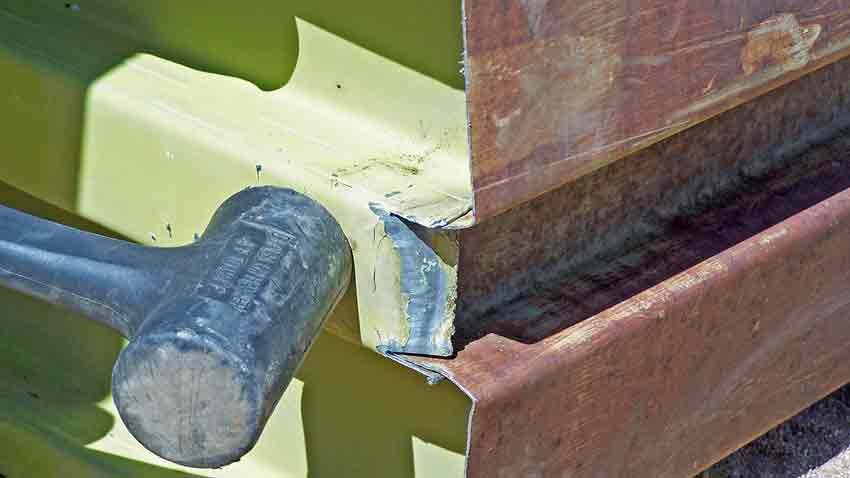
After cutting, they are bent over into the channel to be screwed together, making a very strong joint or connection.
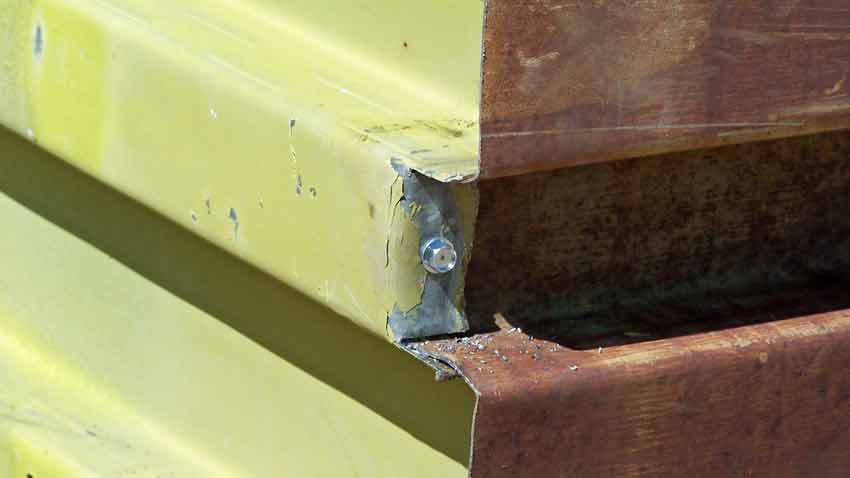
A close-up look at the finished middle tab. We used self-tapping screws to eliminate the need to drill a starter hole.
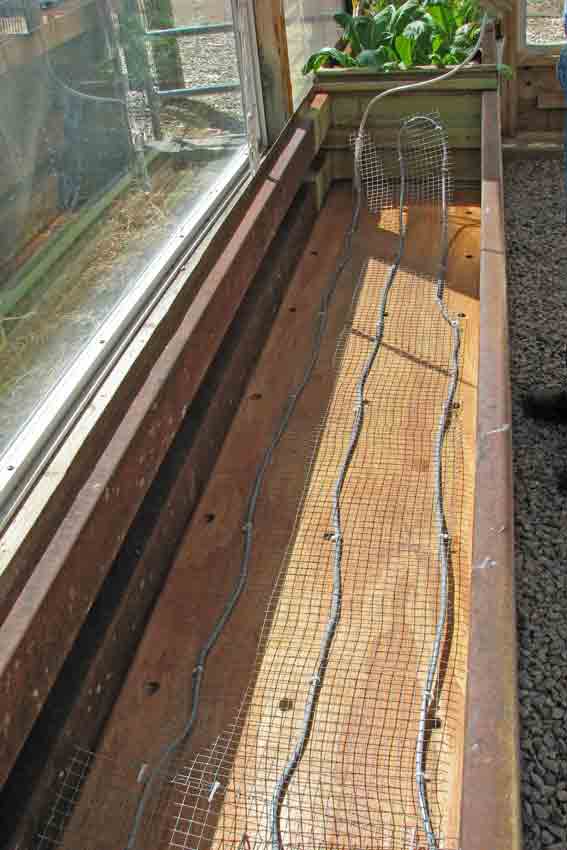
Another feature of the unique corrugations is the channel in the bottom of the side panels which perfectly fits a ¾ inch sheet of marine grade plywood that had been previously waterproofed and drainage holes drilled. After installing the plywood and securing it into the channels, we added a heat cable and hardware cloth on top to protect it from damage from gardening tools. The heating cable is desigened and made specifically for this use and is waterproof with an internal thermostat which shuts off at 70°F.
You can see the channels in the steel in the second and third photos from the top.

For the first few years, we used the bottom heated growing bed in our greenhouse. We made two of them and grew cool season salad greens during the fall, through the winter and into the following spring in the unheated greenhouse.
We used overstock cinder blocks from the local block maker to support the beds.

After installing the beds on the cinder blocks, we put in a bottom layer of sand about two inches deep. The sand keeps the heating cable out of contact with decomposing soil and provides a better heat transfer to the soil on top when the moisture seeps down.
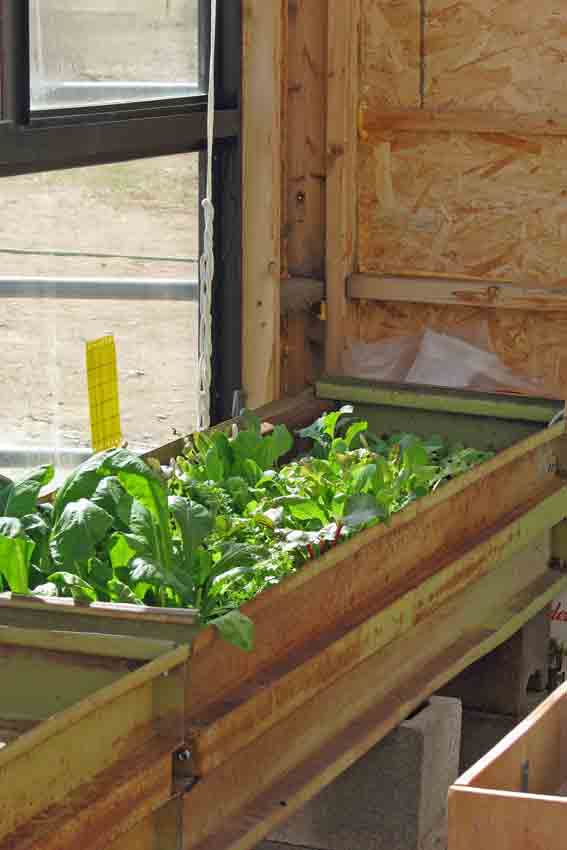
Both growing beds were very successful in growing lots of greens throughout the winter. We often found we couldn’t keep up with all of the greens from just one bed!
The greenhouse is being updated and changed a bit to a grow room, with a solid roof as it gets way too hot in the spring and summer to grow anything, so the growing beds needed to be moved to be more useful and functional.
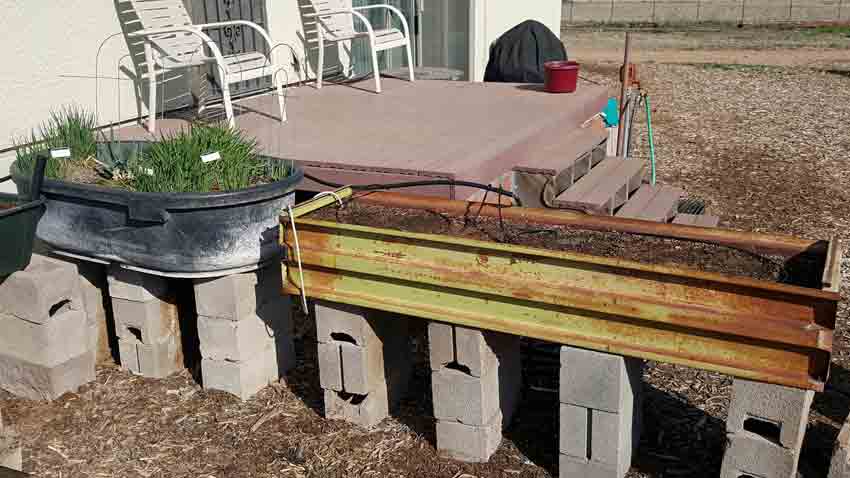
We experimented with a very simple container garden just off of our back deck last year – with great success. It was very close and convenient for fresh herbs and often used fresh greens – just a step out the back door! The containers were all recycled plastic – from old horse water tubs to industrial food shipping barrels cut in half. They were simply put on top of a base of cinder blocks three high for less bending and ease of gardening. Everything was arranged in a “U” shape, with access to standing on all sides.
They worked very well, so we expanded the container gardening space with adding the two growing beds on each long side of the “U”.
The slightly shorter growing bed is next to an old 100 gallon horse water tub, containing garlic chives and I’itoi onions, both acting as perennials in our climate. This photo is from the very beginning of March, after a cold and wet winter that turned warm in early spring.
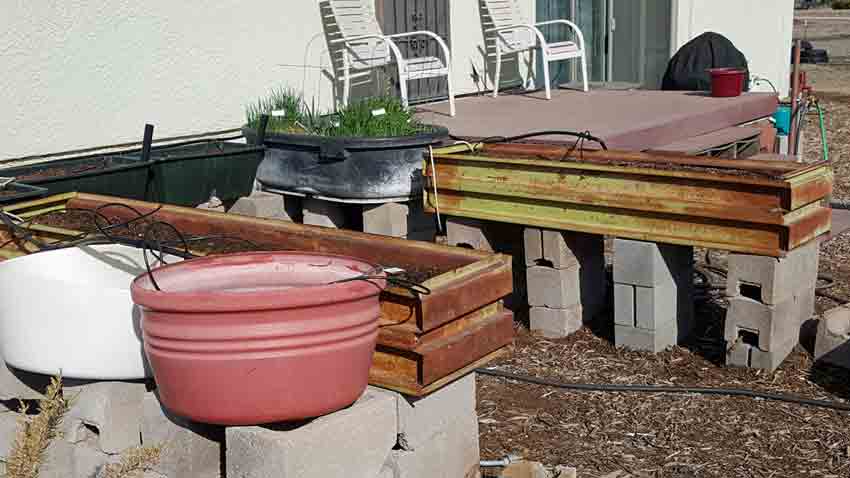
Here’s a look at the updated container garden, just after moving the second growing bed. The two large plastic containers in the foreground were what we used last season and were moved to make room for the larger growing bed.


 2019 Terroir Seeds | Underwood Gardens
try discarded/used overhead garage door panels [metal], free from any G. Door company – strong, light, paintable, 6+ buried keeps out any/all, and eliminates a need for intermediate bracing… it works :-}
Good thoughts Robert – thanks for sharing them! Metal garage doors are sturdy and should last a good long time.