Successful Heirloom Seed Starting for the Home Gardener
When it comes to starting their own heirloom seeds, home gardeners seem to be in two distinct camps- those that are really positive about the process and results, and those that aren’t. The folks that aren’t too excited about starting their own seeds usually have a good reason- they’ve had some failures with die-off and had to scramble to buy starts at the local garden center and wound up with something that they didn’t really want. Others haven’t tried their own starts, but feel that it is complicated or difficult. There are some very compelling reasons to start your own seedlings, but there are some challenges to overcome as well. We will look at several items to consider in making the decision of whether or not to do your own starts, along with some tips to get you started successfully.
Why start your own seeds? What advantages/disadvantages are there?
- You have a much greater range of choice on what to grow as you are not limited to what’s available at the local garden center, hardware store or Farmer’s Market.
- Gives a great creative outlet to “cabin fever” that sets in before the garden can be worked, allows you to be “growing something” early on.
- There is greater flexibility on timing to get them started. You can start them to work with your schedule, or to take advantage of getting bigger, earlier producing plants in the garden sooner.
- Starting your own seeds gives earlier veggies from the garden, as you start on your schedule, not depending on a regional greenhouse schedule. For example- here in AZ, most starts come from the central valley of CA, where timing is completely different, sometimes by a factor of several weeks.
- Home gardeners can usually grow bigger, healthier plants than a commercial greenhouse, as there is more attention per plant. Less diseases/issues than from large scale grower.
- Seed starting does require some planning and effort, not as easy as going down and picking out what seedling to buy.
- Does require some set up and equipment, but not much to get started. Will require some space, but not much on start-up.
- Transplants give you a head start on weeds and the weather. A tomato or pepper that is 2 feet tall will have little to no competition from weeds that are just getting started.
Now that you know the pro’s and con’s of starting your own seeds, how does one go about actually doing it? As with just about anything, there is some planning and preparation involved, but not too much. Remember how we talk about getting started in the garden- start small, start simply, but get started? The same thought process applies here as well. Set yourself up for success, not frustration, headaches and failure. Take the time to do some initial planning and set up and you’ll be off to a great start.
Plan and arrange the seed starting area
- Start simply and easily, you may have most of the items on hand.
- A key factor for successful germination is a warm area to sprout seeds- can be the top of a refrigerator, freezer, window sill in south-facing room. etc. Most of the calls we receive about seeds not germinating is traced to this factor. When the temperature of the soil is optimum- seeds can and will “pop” in 5 days, no matter if they are tomatoes, peppers or eggplant! When the soil temperature is less than 70F, it can take 2 weeks to sprout- there is that much of a difference!
- Supplemental heat may be needed. Soil temperatures need to be above 80F for faster germination. The ideal soil temperature for tomatoes, peppers and eggplant is 85F. Rarely are people comfortable at that temperature! Air temperature may be 5-10F different than soil temperature due to evaporative effects of moist soil. Heating pads, germination heat mats, old electric blankets, etc can work to raise soil temperature to where it needs to be. Monitor soil temperatures to avoid over-heating. A heat mat will work even if the air temperature is 60-65F.
- Supplemental lighting may be needed after seeds sprout and develop true leaves. This can range from specific grow lights to common fluorescent fixtures with grow bulbs. Lights need to be moveable to keep about 2-4 inches above plants. Seedlings need 14-18 hours of light per day.
- Humidity levels need to be high when seeds are sprouting, then less so as they develop and continue to grow. Domed lids on grow trays are great and have adjustable vents to maintain humidity levels. Plastic sheeting, such as painter’s drop cloth, will work just as well. Make sure to inspect the seedlings for mold or fungus growth on top of the soil, which is an indication of too much humidity and too little air circulation. After the seedlings grow their second set of true leaves, humidity is less important. Of course, in areas of high humidity, often nothing else is needed.
Once the area is planned and prepared, the equipment is all that is left and you’re ready to start some seedlings! The equipment can be very basic of pretty involved, but again- start small and simple. It is amazing how well seeds sprout in a soil block that is free or paper pot that is next to free! Sometimes they sprout better than in much more expensive and complex equipment.
Gather the equipment needed
See our Seed Starting Department for books and tools to help you be more successful in starting your seeds.
- Plastic trays for seedling sets and containers for individual seedlings. Domed lids or plastic sheeting may be needed in low humidity areas.
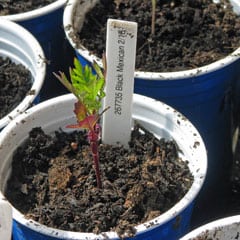
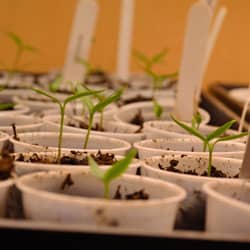
- Seed cups or containers. These can range from peat pots to homemade paper pots to handmade soil blocks to recycled yogurt/dixie cups. What is needed is something that will support the individual seedlings and feed them until they are ready for transplanting.
- Soil or seed starting mix. These range from several readily available commercial ready to use seed starting mixes that have no soil and are sterile to lessen the chance of fungus and diseases, to a number of ingredients that make for a great homemade seed starting mix. We will cover some of these in more depth in another article.
- Misters or sprayers. A small squirt bottle sprayer or mister works great to apply very small amounts of water to the seedlings. A small hand pump sprayer can be valuable as well to give a bit more water without having to pump constantly, especially for larger amounts of seed trays.
- Soil thermometer. This gives you an accurate indication of what the soil temperature is, regardless of the air temperature.
Introduction to Seed Starting video with Terroir Seeds
We have created a short video showing how we have started seeds for several years now. This is the result of many experiments and really works well for us. By no means is this is the only way to do it, as we know of several different but equally effective ways to get seedlings started at home. This is just what works for us, and the expense didn’t break the bank. We constructed this in stages after experience and experiments taught us what works in our situation. This takes up little space and produces a lot of seedlings for our trial garden. Take a look and please let us know your thoughts, ideas and experiences that we can share with everyone else!



This is a very informative video. Thanks for sharing and making it all so clear and simple!
Thank you, Nichole!
I am new to seed starting and this video was very helpful. Being that I am starting small & this is my first year, how do you feel about a household heating mat as a heat source if it is not directly touching? I also heard that direct sunlight is not good. Is this true? I have the perfect southeast facing window that my flower seeds have had great success in but after reading I’m hesitant to put veggies there? After talking to you this morning my kids & I are crafting paper pots on Thursday. Perfect activity for them! Thank you for the wealth of information.
Hello April!
A heat pad that has no automatic shutoff and at least a couple of heat levels is a good heat source. You will need to monitor the soil temperature to make sure you are in the best range for seed starting. Take a look at our Germination Guide under the Resources section to see the range of temperatures for germination for the different veggies. It is best to put the seedling cups into a plastic tray that will allow watering of the seedlings without getting water on the heat mat.
During the process of sprouting most seeds do not need sunlight. It is only after they sprout and start to put on leaves that light is needed. Sunlight is the best source of light (free) but you may need to supplement the natural light if you see the seedlings not growing very quickly. Seedlings will grow faster with longer periods of light, and a simple fluorescent lamp fixture like in the seed starting video is easy to set up. Having 16-18 hours of light on the seedlings helps them grow pretty quickly!
Stephen,
Thank you for explaining the light issue. I would have messed that part up for sure without guidance.
We had a wonderful planting day today; making paper pots & planting the seeds. It’s amazing how handy 4 & 5 year old size fingers are when it comes to putting those tiny seeds in the pots! I explained to them that we were planting little babies (I’m expecting #3 so they are very excited about any baby stuff) and that we had to handle with care. I think my mom thought I was acting a little too Type A & she would be right but I wanted to use it as a learning experience for the kids as well.
We also potted far more than I planned so I have a huge margin of error if things don’t work out.
I would love to send you pictures of our day & set up for your “approval” :) I need all the help I can get being a first timer.
Hello April-
Great to hear that you are making progress! If everything grows, you’ll have plenty of starts to give to friends and neighbors. If not, then you’re covered anyway!
We would love to see photos of your set up and seed starting efforts!
Thanks so much for sharing this info! I just had baby #4 and we already started many of our seeds when she was only 2 weeks old. I should have read this first. Its been a month and our peppers haven’t sprouted yet :( though some of our tomatoes have. Maybe over easter I’ll see if I can borrow a heating pad from my mother in law to help keep things warmer. We love your seeds. Last summer was my first garden and I actually sowed everything directly into the soil and had pretty good results. We’re hoping that by starting many things we’ll have an even better harvest. :)
Glad to hear, Jennifer!
Every year is an experiment and an increase in experience. Make sure to download our Garden Journal to help you keep track of your successes and challenges. It will really come in handy in a couple of years when you forget what you did, or planted and why!