Tag Archive for: Cumin

Spiced Cauliflower Soup

Spiced cauliflower soup is an easy and delicious dish – a warming winter’s dinner but is also a cool and creamy summer’s lunch entreé or appetizer. I had a smoked and roasted potato from roasting a chicken in the wood fired clay BBQ, so that added an extra dimension to the flavors. 

The flavors are very engaging with more depth than would be anticipated from such simple ingredients. Use the coconut cream for a milder, richer and creamy soup, with the yogurt adding a tangy counterpoint.

Here’s what you could grow in your garden for this recipe –

Spiced Cauliflower Soup
Light and tasty no matter the time of year, this creamy, mildly spicy vegetable soup is multi-purpose. Excellent as a warming first course, an appetizing quick meal or when served chilled, delicious in a summer menu.
Servings: 4
Ingredients
  • 1 large potato diced
  • 1 medium cauliflower head chopped
  • 1 medium onion chopped
  • 1 tbsp oil
  • 3 cloves garlic finely diced or crushed
  • 1 tbsp grated fresh root ginger
  • 2 tsp ground turmeric
  • 1 tsp cumin seeds
  • 1 tsp black mustard seeds
  • 2 tsp ground coriander
  • 4 cups vegetable stock
  • 1 1/2 cups coconut cream or yogurt
  • salt and freshly ground black pepper to taste
  • fresh cilantro or parsley to garnish
Instructions
  1. Add potato, onion and cauliflower to a large heavy bottomed pot or deep saucepan with the oil and 1/4 cup water. Heat until bubbling then cover and lower heat to simmer for about 10 minutes.
  2. Add the garlic, ginger and spices. Cook for 2 minutes, stirring occasionally, then add stock, salt and black pepper.
  3. Increase heat and bring to just before a boil, then lower heat and simmer for about 20 minutes.
  4. Stir in coconut cream or yogurt, taste and adjust salt and black pepper and serve with a generous pinch of freshly chopped cilantro or parsley.
Recipe Notes

Makes excellent and super easy leftovers for the following day's lunch. It is surprisingly satisfying on a cold winter night, but is light and cool on a summer's day.


This is extremely easy to make and doesn’t need you to watch or stir it the entire time, freeing you up for other things for most of the cooking time. 

Cauliflower Soup Ingredients

Starting with the main ingredients, I chopped them into appropriate sized pieces. I left the skin on the potato for the extra smoky flavor, but also because lots of nutrients are in the skin that I didn’t want to lose. Same thing with the ginger, I just thinly sliced it and then diced it finely so that it would cook down into the texture of the soup. 

Turneric in Potatoes and Cauliflower

The cooked vegetables after adding the spices but just before adding the vegetable stock. Turmeric is highly beneficial to health, especially when activated by ground black pepper and teamed up with a healthy fat like coconut oil. Much more of the nutrients and benefits are delivered to the body this way, so this soup is the perfect, delicious delivery method!

Spiced Cauliflower Soup

Ready for enjoyment! The potato cooks down, thickening the consistency and the cauliflower almost completely cooks into the soup. If you want, transfer the finished soup to a blender for a quick spin to make it smoother before serving. The fresh chopped cilantro adds a bright, lively note!

Smoked Yogurt Marinated Beef Roast

This smoked, yogurt marinated beef roast was served for Cindy’s birthday dinner, where I wanted to do something very tasty, a bit unusual and didn’t require hovering over the stove in the kitchen for a long time, as we were busy with catching up in the office after two successive weekends presenting at gardening shows.

We are fortunate to have some locally raised beef that is delicious in its own right, so that made a perfect base on which to build. I was perusing one of the newer issues of Saveur magazine and came across the dessert idea – a baked yogurt tart –  and saw the recipe for grilled yogurt marinated lamb chops. This is our version, slow roasted and smoked over mesquite charcoal in a Kamado, or Japanese ceramic grill. I roasted this at about 300°F for just a bit over 2 hours, as grass-fed beef shouldn’t be cooked as long as conventionally raised beef roast.

The results were fabulous – the beef roast had a rich, smoky beef flavor that is missing in store bought beef, followed by the tangy, complex flavors of the marinade. Prepare this in the morning and roast it in the afternoon, planning about 2 – 3 hours for the roasting, depending on the size of your roast. 

 This is the perfect centerpiece for an impressive and delicious dinner that won’t take all of your day to prepare!

Scroll down after the recipe for photos showing the process.

Here’s what could come out of your garden for this recipe –  Onion and Cumin, along with garlic you’ve grown!

Smoked Yogurt Marinated Beef Roast
Servings: 4
Ingredients
  • 1 large beef roast about 4 - 6 lbs
  • 1 large red onion finely chopped
  • Sea salt and freshly ground black pepper to taste
  • 1 cup plain full-fat yogurt
  • tsp. ground cumin
  • 2 tsp. ground green cardamom
  • 1/2 section star anise
  • 1 tsp. ground caraway seeds
  • 8 cloves garlic mashed into a paste
  • Zest and juice of 1 lemon
Instructions
  1. Grind cumin, green cardamom, caraway, star anise in a mortar and pestle. Add to mixing bowl with yogurt.
  2. Peel and crush garlic into a paste in mortar and pestle.
  3. Stir yogurt, freshly ground spices, garlic paste, zest and lemon juice in a bowl.
  4. Butterfly beef roast in a circular cut about 1 inch thick, lay open and spoon yogurt marinade over, leaving a small amount for the outside.
  5. Roll up and tie with butcher's twine, spoon remainder of marinade on outside.
  6. Cover with foil, marinade for 4 hours in refrigerator.
  7. Heat charcoal or covered gas grill to medium. 300°F is target temperature. Once temperature is stabilized, roast beef for 2 - 2 1/2 hours, turning once each hour.
  8. Roast until desired doneness, then remove and let sit on platter for 5 - 10 minutes. Slice and serve.
Recipe Notes

Grass-fed beef will be tough and chewy if cooked to the usual USDA temperatures most of us are used to. The USDA recommends the beef be cooked to 145 - 170°F, while 120 - 140°F is best for pastured or grass-fed beef. Shannon Hayes at www.grassfedcooking.com has taught me the most about bringing the rich and delicious flavors from these meats!

Adapted from Saveur Magazine #163

We assembled all of the ingredients to start.


Smoked Yogurt Marinated Beef

A close-up view of the spices. I actually didn’t use all of them, but had gathered them when doing the brainstorming and adaptation of the original recipe.


Spices for Yogurt Marinated Beef

I prefer to hand grind my spices when I have the time, the flavor is much better, more defined and richer than with a blender or mechanical spice grinder. The crushing and twisting motion really does make a difference. We also found this applies to the flavors of pesto!

There is green cardamom, star anise, caraway and cumin seeds in there.


Grinding Spices

During the grinding process, the most amazing aromas drift up. Cindy had come in and commented on how wonderful it smelled already, and I was only grinding the spices! I ground the cardamom pods whole to begin with, then pulled the shells out after crushing them a bit to release their flavors.


Ground Spices for Marinade

Next up was the garlic. I used the “Peel Garlic in 10 Seconds” trick, this time for the whole head. It still only took me maybe 15 seconds! The reason for grinding it instead of dicing or chopping it is to release the oils and flavors that only crushing or grinding will achieve.


Crushed garlic

After mixing the marinade and butterflying the roast into about an inch thick roll, I applied the marinade and wrapped it back up.


Yogurt marinade on beef

After liberally spooning the marinade on the inside and rolling it back up, I tied it with butcher’s twine, spooned the remainder of the marinade on the outside, put it into a bowl and then into the refrigerator for 4 – 5 hours to do it’s magic!


Yogurt marinade on roast

That afternoon I fired the Kamado up and once the temperature stabilized, the roast went on. I had spread the coals to the outside and put a small round cast iron griddle underneath to divert the heat to be more indirect. Once the internal temperature was 125°F in the center, it was ready to let rest and then slice.  Beautiful and mouthwateringly aromatic!

It was hard to walk down wind of the smoker without popping the lid every time to check on it!


Smoked Yogurt Marinated Beef Roast

Once it had rested for 5 – 10 minutes, I sliced it and we dug in. Of the 4 – 6 pound roast, 3 of us ate only about 1/4 of it, so there will be a number of other tasty dishes that result from this one.


Smoked Yogurt Marinated Beef Roast

Oaxacan Poblano Chicken

Pechugas in Salsa de Poblano Gratinadas

This Mexican poblano chicken dish from the Oaxacan region is another one of our family’s favorite dishes, partially because it is easy to make, is absolutely delicious and makes fantastic leftovers for lunch the next day or so. The flavors combine the mild richness of the roasted poblano chiles with the smooth creaminess of the cream and cheese in typical Oaxacan style. Add into this the smoky, roasted and seasoned chicken and you’ve got a memorable dish! We usually serve this on a bed of Mexican rice with a salad on the side. It never fails to impress our guests, with most asking for the recipe or for a second serving.

You can make this ahead of time, either in stages or in full to be served when it is convenient for your schedule. The sauce can be made up to 2 days ahead of time and the chicken can be roasted the day before, so all that is needed is to add the sauce to the chicken and pop it in the oven for 30 minutes or until everything is hot. This is best when roasted on the grill outside for that incomparable smoky flavor, but is very good when done entirely inside with the chicken browned in a heavy bottomed pot first.

Oaxacan Chicken in Poblano Sauce

Ingredients

1 lb. chicken parts cut up – can use breasts or thighs
3 – 5 large poblano chiles
1 large onion, diced
2 cloves garlic, diced
1 1/2 cup half and half
1/4 lb. grated Monterey Jack cheese
Freshly ground salt and pepper

Seasoning for the chicken

1 Tbs. ground cumin
2 Tsp. ground coriander
1 Tsp. garlic powder
1 Tbs. dried Mexican oregano, crushed
1 Tsp. freshly ground pepper
1 Tsp. sea salt

Mix the chicken seasonings well and then sprinkle onto chicken pieces, covering moderately. Grill on a medium heat for 5 – 7 minutes a side, to cook about 1/2 way or more. Remove from grill.

Grill onion and poblano peppers for 7 – 10 minutes or until starting to soften. Remove from grill and remove the stem, seeds and membranes from the peppers, then dice into medium sized pieces. Alternately, sauté in a heavy bottomed pot for 7 -10 minutes after cutting up peppers.

Puree pepper and onion mixture in a blender with half and half. The texture can be smooth or slightly chunky, depending on your preference. Pour poblano sauce into a heavy pot, and then add chicken pieces one at a time, coating them well with the sauce.

Either bake in preheated oven at 350F for 20 – 25 minutes or until sauce is bubbly, or simmer on stovetop. Once sauce is bubbling, turn off heat and add grated cheese. Let sit for 3 – 5 minutes to melt cheese, then serve hot.

Serves 4 – 6

We did a photo essay for you to see how easy it is!

Poblano PeppersStarting with fresh Poblano peppers, we roasted them for a few minutes to soften them up, then removed the seeds, stems and membranes.

Poblano Peppers and OnionThen we sauteed them for a few minutes to mingle their flavors.

Poblano Peppers MixtureAfter they were ready, they went into the blender with some half and half and were pureed to a chunky texture. You can make it as smooth or chunky as you like.

Poblano SauceThe poblano sauce was added back to the pot…

Roasted ChickenThen the roasted chicken pieces were ready to be added.

Oaxan Poblano ChickenAfter adding the chicken pieces, the sauce was simmered for about 20 minutes until it was hot and bubbly, then the Monterey Jack cheese was added and melted with the heat off.

Oaxacan Poblano ChickenServed on a bed of Mexican rice, it was both beautiful and delicious!

Chile Coloradito Sauce

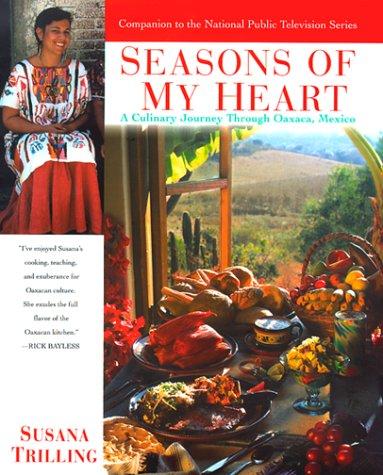
This is an incredibly versatile chile sauce with loads of flavor and just a touch of heat. It is my adaptation of the incomparable Mole Coloradito Oaxaqueno from Susanna Trilling in her “Seasons of My Heart” cookbook that we’ve featured before. (Mole is pronounced “Mole-lay”!)

This makes a sauce that is 95% of her Mole, but I prefer to make a very large batch as it is a project to do and doubling of the recipe doesn’t take much more time to make. Then you have this cache of amazing flavor that spices up any dish with no extra time but lets all of the flavor and work shine through. It is a wonderful basis for enchiladas, nachos, stews, soups, sloppy Joe’s, burritos or even spooned over eggs in the morning. I like to add about half tomato sauce by volume to make a great sauce that is smooth and mellow with the taste of the chiles but none of the bite.

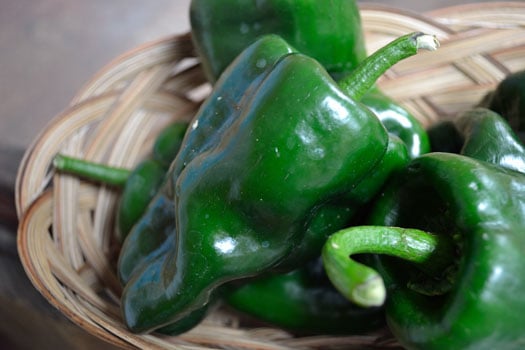
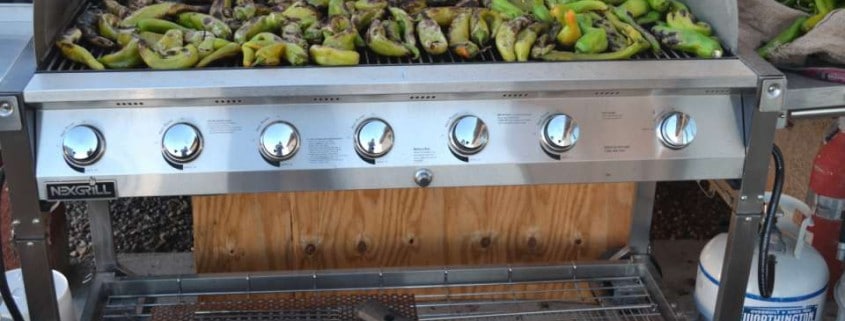
Colorado means “red” in Spanish, usually referring to a deep brick type of red, so coloradito is “little red”. We’ll give you the recipe first, then walk you though the preparation in photos so you can see the stages and progression. These chiles can easily be grown in your garden for most of North America, or at a well-stocked Mexican grocer. For the Mexican chocolate, Ibarra is a well-known brand that is available almost everywhere. If you really want to take the flavor to the next level, look at Taza Chocolate. It is stone ground in the traditional Mexican village tradition and has a flavor that is absolutely to die for, not to mention being fair trade and traceable to the source. You can see all about how your batch was made by entering the batch number into their website!

Homemade Chile Coloradito Sauce

  • 18 Ancho chiles
  • 21 Guajillo chiles
  • 25 Pasilla Bajio/Chilaca chiles
  • 10 Concho chiles
  • 1 Chipotle chile en adobo
  • 5 Black peppercorns, whole
  • 2 Cloves, whole
  • 1 Star anise, whole
  • 1 Allspice, whole
  • 1 Piece Mexican cinnamon, about 1 inch long
  • 1/2 Tsp Cumin, whole
  • 1/4 Tsp Coriander, whole
  • 1 Head garlic, cloves separated
  • 1 Medium onion
  • 1 Lb ripe tomatoes, quartered
  • 1/2 Tsp Mexican oregano, dried (Can substitute Marjoram if needed)
  • 1 Plantain, ripe
  • 1 Tbs raisins
  • 5 Almonds, whole and unpeeled
  • 1/2 Cup sesame seeds
  • 2 Bars Mexican chocolate – 6 oz total
  • 3 Tbs Coconut oil or sunflower oil
  • 1 1/2 Qt homemade chicken stock
  • Salt to taste

There are 3 steps to this recipe: processing the chiles, processing the spices and processing the tomatoes, onions, plantains and seasonings.

Some cooks will stem and seed the chiles while still dry, toasting the pieces. Others will toast the chiles whole, then soak them to soften the skins and remove the stems and seeds.

  1. Bring 2 quarts of water to a boil. Meanwhile, heat a dry comal, griddle or a cast-iron frying pan over low heat and toast the chiles on both sides for about 5 minutes. Toast the Anchos a bit slower and on a lower heat because of their thicker skins. Toasting them blisters and loosens the skins and gives off a rich chile aroma. It may be best to toast them in smaller batches so the pan or comal is not crowded. You need room to move and turn the chiles in the pan.
  2. Remove the chiles, place them in a large bowl with the hot water. Cover or weight the bowl with a plate to keep the chiles submerged. Soak for about 20 minutes to fully soften the dried skins. If chiles have been stemmed and seeded, puree in a blender using as little of the chile water as possible to make a thick paste, usually about a cup. If chiles have not been stemmed and seeded, do this first, then puree in blender. It is best to do this in small batches to not overload and overheat the blender, as the chile puree is quite thick. Depending on your blender, you may have a smooth paste at this point, or you may have some small pieces of skin. If skin pieces are present, pass the puree through a food mill or sieve to remove the skin pieces. Set aside.
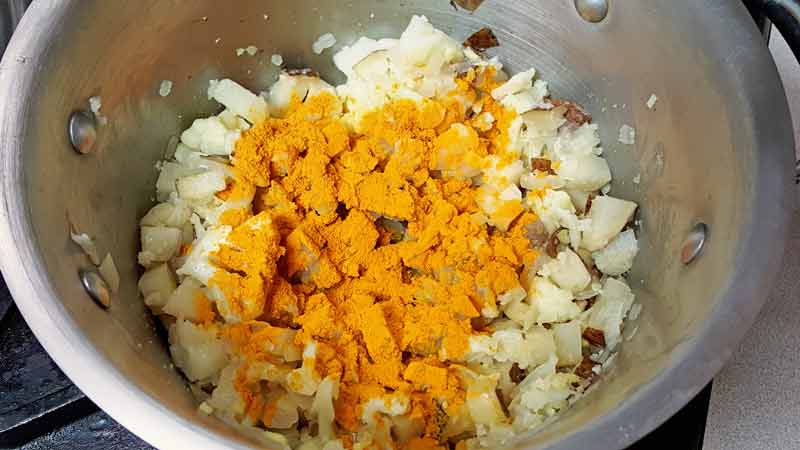
  3. After processing the chiles, heat the dry comal, griddle or cast-iron frying pan over medium heat and toast the peppercorns, cloves, allspice, cinnamon stick, cumin and coriander until they release their aroma. Stir the spices constantly to prevent burning and to monitor the toasting process. Set the spices aside.
  4. Grill the garlic and onion on the dry frying pan, turning often until they become translucent. They may stick a bit, but keep turning. Puree the spices, onion and garlic with 1/2 cup of the chicken stock. Set aside.
  5. Heat the cast-iron frying pan to medium and cook the tomatoes and oregano with no oil until the condense, usually about 10 – 15 minutes. They will give off their juices, then start to condense as the juices evaporate. Once condensed, set aside.
  6. Heat 2 Tbs of the oil over a medium heat in a cast-iron frypan and fry the plantain until brown, about 10 – 12 minutes. Remove from the pan, add raisins and fry until plump, about 3 minutes. Remove and set aside with plantain. Fry the almonds until light brown, about 4 minutes. If needed add a little additional oil, but the amount should decrease with each ingredient until the almonds are almost being dry-fried.
  7. Puree the plantain, raisins and almonds in a blender with 1 1/2 cups chicken stock until smooth.
  8. Heat frying pan over low heat, add 1 Tsp of oil and gently fry the sesame seeds until just turning brown, about 6 – 8 minutes, stirring constantly. Remove, cool and grind in a spice grinder or food processor.
  9. In a heavy stockpot, at least 6 quart capacity, heat 1 Tsp of oil until almost smoking on medium-high heat. Add chile puree and cook, stirring constantly. It will splatter, but keep stirring until heated through. Once heated, lower heat to medium-low and cook for about 20 minutes, stirring frequently. When chile puree starts to thicken add tomato mixture, lower heat to low and cook another 15 minutes, stirring to keep from sticking or burning. Then add onion and spice mixture and stir well. Add pureed plantain and sesame mixture and stir well. Cook a further 10 minutes, stirring constantly to keep from sticking.
  10. If you are making a larger batch and freezing some, add 2 cups of chicken stock, stir in well then add the chocolate and stir constantly. Once the chocolate has dissolved, add the salt, stir in well. Reduce heat to a slow simmer and let cook for 10 – 15 minutes, stirring frequently to avoid sticking. It will be a thick sauce, ready for freezing in jars. Let cool, then ladle into mason jars leaving an inch gap at the top. Will keep in the freezer for up to a year.
  11. If you are making the batch to use fresh, add 5 cups of chicken stock to thin the sauce, then add the chocolate, stirring constantly. Once the chocolate has dissolved, add the salt. Lower the heat to a slow simmer and let it cook down for at least 30 minutes, stirring occasionally. It should coat the back of a spoon, but not be much thicker when done.

Makes about 8 servings.

Recipe Tip! It doesn’t take much longer to make double the recipe and freeze for an easy, delicious dish later!

This may sound complicated or a lot of work, so we will walk you through the process and show you what each step looks like. It is a good day’s worth of work, but it can be broken up into a couple of days if you don’t have the time to make it all in one day. Once you taste the results, you will immediately see why it is worth the effort to make a large batch!

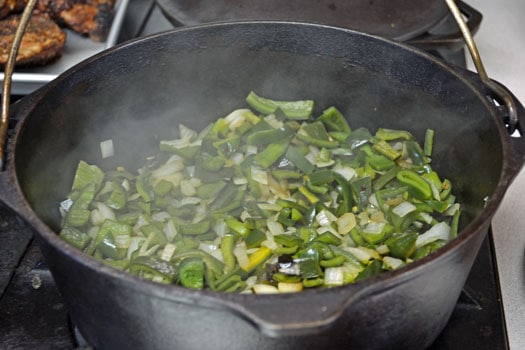
In the first photo, we are toasting two of the different chiles and dry frying the onion and garlic in another pan. We have learned to save a lot of time by combining a couple of steps at once. The Ancho chiles are in the back with the Pasilla Bajio or Chilacas in front.

Roasting Chiles

Roasting Chiles and Frying Onions

These are the chiles after toasting, soaking and being stemmed and seeded. Most of the work happens right here, to get to this stage. After this everything is roasting and toasting, then using a blender to puree everything into a sauce. To give a sense of scale, this bowl is over 18 inches across!

Soaked, Seeded and Stemmed Chiles

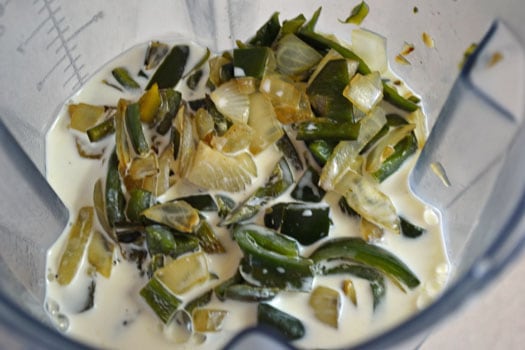
Into the blender with the chiles! We have a Vita-Mix blender that is a real blessing with big projects like this. It stands up to the thick sauce without overheating, but we still need to process all of the chiles in batches. We usually fill the blender about 1/3 full with chiles and add just enough soaking water to make a thick paste. Please notice the gloves, I use them when working with chiles for extended periods of time to keep me from itching my eyes with a chile-infused finger!

Pureeing the Chiles

It is easy to see why the name of “colorado” is applied to this sauce – look at that beautiful rich brick red color! My mouth was watering for most of the time after we pureed the chiles as the kitchen was filled with their aroma.

Finished Pureeing

There is not too much volume lost from the soaking stage to the pureed stage. This is the same bowl after we’ve finished pureeing all of the chiles.

Lots of Chile Sauce

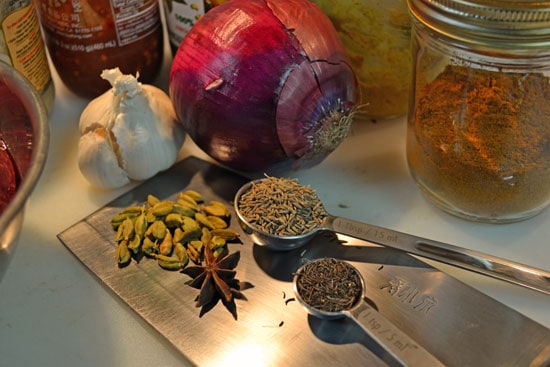
Next up is toasting and grinding the spices and seasonings. We used a smaller cast-iron pan to toast the spices and release their aromas.

Toasting Spices

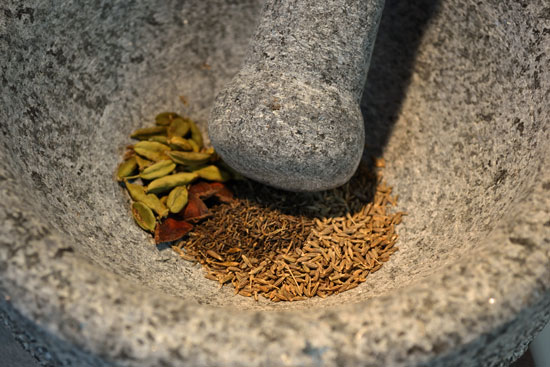
A molcajete is what we use simply because we have one. It is great for grinding spices and really working them to release their flavors and aromas. A food processor or blender can do much the same with less effort.

Grinding Spices

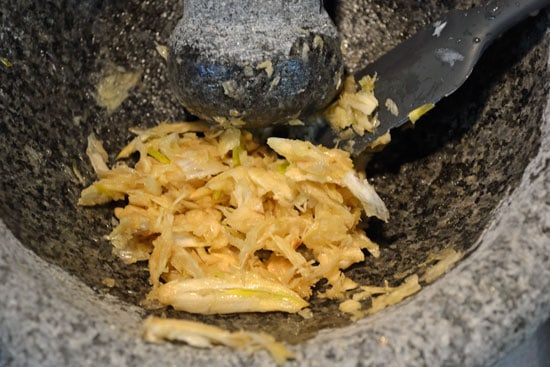
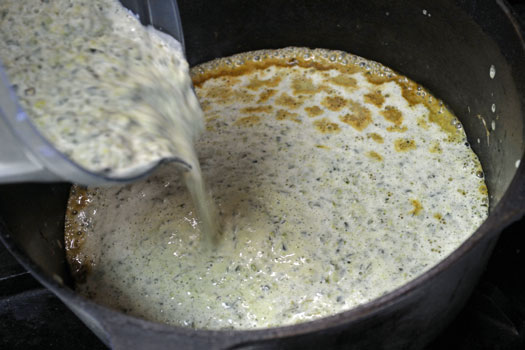
A few minutes later, here is what the ground spices look like, ready to be mixed into the chile mixture. At this point we’ve also pureed the onion and garlic and mixed it into the chile sauce.

Ground Spices

Now it’s time to mix it all together! This photo helps to show the scale of everything, as the whisk is almost a foot long and I’ve got my hand completely wrapped around it to work all of the purees and spices together.

Mixing Everything Together

After everything is mixed together and cooked at a slow simmer, we put it up in jars to freeze for later. We use pints, as this gives a generous amount of sauce without being too much after a couple of days. We leave about an inch or little more of space at the top to allow for expansion in the freezer.

Jar of Chile Sauce

All done except the clean-up! This particular batch made 17 pints of scrumptious chile sauce, with just a bit left over for the next morning’s eggs. This will give us almost a year’s worth of chile sauce.

Almost Finished

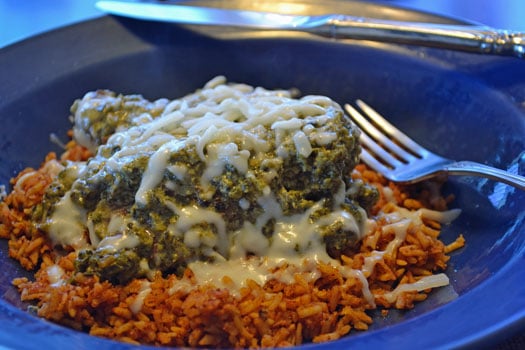
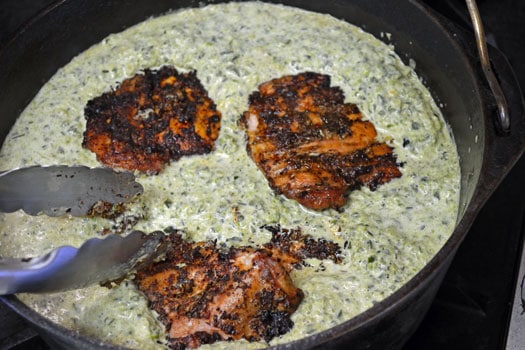
A close-up of the color and texture of the finished product. Well worth the work!

A Taste of Chile Heaven

I grew up eating this green chile stew, or as we simply called it – green chile. Mention green chile in most places in the Southwest, and people will understand that you are talking about a bowl of stew, made with green chiles, herbs, sesonings and usually pork. We would make a huge batch of it in the fall, roasting, peeling, seeding and chopping upwards of 50 pounds of the Hatch New Mexican green chiles on the first day. The next day we would make the recipe in huge kettles on the stove to serve at Thanksgiving, Christmas and celebrations at the end of the year. What we didn’t eat immediately we would freeze for the coming year. Thanksgiving just wasn’t really complete without a bowl of green chile on the table, to be ladled over the turkey, mashed potatoes or in a bowl on the side to be savored all by itself. Christmas was much the same. That green chile was something to be looked forward to each time we took it out of the freezer for that night’s dinner.

We learned the foundation of this recipe from an old family friend from a small town in the state of Chihuahua in Northern Mexico. She grew up poor, so her family grew and raised almost all of their own food, including chiles that were used in almost all of their cooking. The flour and oil is used to make a roux, or thickening sauce that gives the dish a nutty flavor as a backdrop for the chiles and meat to take center stage. It takes a bit of time to make, so make a lot to freeze for later. It doesn’t take any extra time to make more, especially if you aren’t roasting, peeling, seeding and chopping the chiles yourself. You can order them directly from companies such as Biad Chile Company and get them delivered to your door, or go to your local farmer’s market where there will probably be a propane powered chile roaster spinning away, creating fresh roasted chiles right before your eyes.

This recipe will give you highly tasty, mild green chile. You can spice it up with hotter green chiles, or with some varieties of hot red chiles as you like. Green chile is ubiquitous in the Southwest, every family has their own take or twist on the basics, so no two are alike. In Santa Fe, you can go from one restaurant to another directly across the street and the tastes will be noticeably different, but delicious.

Here’s where the story takes a little jag. Last year we raised Navajo Churro sheep for the first time. After we got them back in little white packages, we tried them in this recipe, as we had run out of pork. It turned out to be one the best tasting green chiles that I had ever eaten. The Churro has just the right flavoring that pairs beautifully with the chiles to make an outstanding dish. Home or locally raised pork is also excellent, as it has much more flavor than commercially raised supermarket pork.

Serve with a garnish of chopped cilantro and a swirl of sour cream if you want to dress it up a bit. Warm tortillas are a great accompaniment. Give it a try and let us know what you think!

Old Time Green Chile Stew

  • 1/2 cup flour
  • 1/2 cup oil – olive, coconut or vegetable
  • 2 – 3 medium onions, chopped
  • 4 – 6 cups water
  • 2 – 3 lbs Navajo churro lamb or home raised pork cut into bite sized pieces
  • 5 lbs Hatch mild green chiles, roasted, peeled and diced
  • 2 heads of garlic, peeled and sliced
  • 1 Tbs fresh ground black pepper
  • 2 Tsp salt
  • 1 Tbs whole cumin seed, roasted and freshly ground
  • 1 Tsp whole coriander seed, roasted and freshly ground
  • 1 Tbs Mexican oregano, lightly toasted and freshly ground
  • 1 Lb fresh tomatoes or 1 16 oz can of chopped tomatoes (optional)
  • 2 – 3 medium potatoes, diced (optional)
  1. Before starting, have onions, lamb/pork, green chiles and 2 cups water prepared and ready at hand.
  2. In a heavy stock pot, preferably cast iron, heat oil over medium heat. When oil is warm, add flour and brown to make a roux. Stir constantly with a spatula, reaching all parts of the bottom of the pan to keep flour from burning. The mixture will bubble and foam as it starts to brown, then settle into a smooth consistency. The color will change from white to an old copper penny color and the odor will go from flour and oil to a roasted aroma. Be careful not to burn the flour, as you will need to start over. If in doubt, stop browning at a slightly lighter color.
  3. To stop the browning process, add the onions and 2 cups water. It will hiss and steam as you add them, stir mixture well to cool roux and brown the onions. When onions have started to brown, add lamb/pork and brown.
  4. Add chiles and remainder of water, stirring well. While chiles start to simmer, roast cumin and coriander in small skillet over medium heat until they release their toasted aroma and add Mexican oregano at end to lightly toast. Grind them in mortar and pestle or food processer.
  5. Add herb mixture to chiles, along with garlic, salt and black pepper.
  6. Stir mixture well, reduce heat to a low simmer and check on every half hour or so until meat is tender and flavor has mingled well.
  7. If desired, tomatoes and potatoes can be added at start of simmering for a different flavor profile.

Makes plenty for a large dinner and enough to freeze 6 – 8 quarts.

Recipe Tip! This is a very mild “heat” with great flavor, but can be modified by using hotter chiles to suit your spice tolerance.

Herbed Dried Tomatoes

Here’s a recipe that will take a little preparation, but you will be thanking me for it later! Make a lot more of these dried tomatoes than you think that you will ever need, as once folks catch on to just how incredibly tasty these little jewels are, you will run out. You might want to hide some just for yourself!

These make beautifully presented, incredibly thoughtful gifts for the chef or serious home cook in your life. You cannot buy the flavor of these herbed tomatoes, anywhere, at any price. These will take a bit of time, but doesn’t require much hands-on time to make.

First, the tomatoes. Only heirloom tomatoes can really be considered, as the flavor is what you are after. The beauty of this process is that almost any tomato can be used, as the drying intensifies the flavors already present. Obviously, a paste tomato will give you a more substantial result. Good ones to look for are the plum and pear sizes with meaty walls, few seeds and a ton of flavor. If you don’t have these already growing in your garden, plan to plant some next year and look at your local farmer’s market. You will need a lot of fresh tomatoes, as they lose a lot of weight during drying. Plan on about 3 times the fresh volume as what you will get dried.

Drying them is the easy part. Wash them, slice and place on cookie sheets to dry. The oven is a great choice, as most gas fired ovens with a pilot light stay at around 90F or so. A consistently warm, sunny location is also good. If drying outside, cover with cheesecloth to prevent flies from snacking on your treats. Let them dry to a leather-like stage, then collect and start the marinating.

There are several different directions you can go with the herbs. A traditional approach is to use basil, oregano and garlic. A French approach would include lavender buds, Herbes de Provence with garlic. The strong punch of Mexican oregano accompanied by some smoked Jalapeno chiles, cumin and marjoram would be out of this world as well. Be creative, look at some herb combinations you enjoy and do some experimenting. The results will most likely be quite tasty!

We will start with the most basic recipe and then give you some alternatives to try. Use as you would sun-dried tomatoes – in soups, sauces, stews, bruschetta, pizza, spreads, salads or anywhere else the flavors would work well.

Herb Marinated Dried Tomatoes

  • 1 1/2 Cups dried tomatoes
  • 1 Tbs fresh basil leaves, chopped
  • 2 Tsp fresh oregano, chopped
  • 1/4 Tsp pickling salt
  • 2 Large garlic cloves, thinly sliced
  • 6 Tbs red wine vinegar
  • 2 Tbs Extra virgin olive oil
  1. If tomatoes are crispy dry, put into 2 cups boiling water for 5 minutes to soften, then drain. If tomatoes are leather dry and still slightly pliable, you don’t need to soften them.
  2. Add herbs, salt and vinegar to bowl and mix or toss well. You want to have all of the herbs well mixed before adding the tomatoes.
  3. Pack tomatoes and herb mixture into a 12 ounce to 1 pint jar, being sure to coat the tomatoes well with the herb mixture. Leave a small space at top of jar. Add olive oil to top and cap jar.
  4. Store in a cool, dry, dark place. Once opened and for longer storage, keep in refrigerator.

Use these following recipes as the herb ingredients for the basic recipe above.

Herbes de Provence Marinated Dried Tomatoes

  • 2 – 3 Tbs Herbes de Provence
  • 3 Large cloves garlic, thinly sliced
  • 1 Tsp freshly ground black pepper

Mexican Herbed Marinated Dried Tomatoes

  • 1 Tbs Mexican oregano, dried
  • 1 Tsp Sweet marjoram, dried
  • 1 Tsp Chipotle chile, finely chopped
  • 1 Tbs Whole cumin seed, toasted and ground
  • 1 Tsp Whole coriander seed, toasted and ground
  • 3 – 4 Large garlic cloves, thinly sliced

Italian Herbed Marinated Dried Tomatoes

  • 2 Tsp Fresh Greek oregano
  • 1 Tsp Sweet marjoram
  • 1 Tsp Summer Savory
  • 1 Tbs Fresh Marseilles basil, chopped
  • 2 Large garlic cloves, thinly sliced

Recipe Tip! Pickling salt is -simply put- fine, pure granulated salt. Grocery stores label it “canning and pickling salt”, health food stores call it “sea salt”. It is not table salt, which contains iodine and several other stabilizers and anti-caking agents that can ruin your pickles appearance.

"Seasons of My Heart" Cookbook

Oaxan Sopa de Tomate con Albóndigas

One of my favorite Mexican cookbooks is titled Seasons of My Heart, by Susana Trilling.  Susana was a chef and owner of a restaurant in New York City and also owned a very successful catering business.  She left all of this to pursue her ethnic roots in Mexico around Oaxaca, sharing the food, culture and traditions of the cooking of the region.  She wrote this cookbook to showcase the native foods that are not well known outside the region.  Seasons of My Hearthas become hard to find but is well worth pursuing once you do find it.

Today I’m going to share a recipe called Albóndigas, or meatball soup.  Many people are familiar with Albóndigas as a clear broth with a couple of meatballs in it as an appetizer or first course.  This particular soup is more rural in nature, with the broth enriched by the onions and tomato puree.  Many people are are amazed to find that this is “Mexican food”, as it doesn’t have the characteristic emphasis on chiles and heat that most Americans are accustomed to seeing in Mexican food.  This is one of those perfect hearty winter soups that has an abundance of rich and savory flavors.  Make extra, as this soup keeps exceptionally well and will prove to be very popular.

Oaxan Sopa de Tomate con Albóndigas

For the meatballs:

  • 1 1/4 pounds ground sirloin
  • 1 teaspoon freshly ground black pepper
  • 1/2 teaspoon salt
  • 1/4 cup sunflower or vegetable oil
  • 1 teaspoon mild chile powder
  • 1 teaspoon ground cumin

For the soup:

  • 4 cups beef stock
  • 1 1/2 medium white onions, finely chopped
  • One large leek, halved lengthwise and thinly sliced
  • 1 tablespoon finely chopped garlic
  • 1 1/2 teaspoons ground black pepper
  • 3 bay leaves
  • 5 cups thick tomato puree
  • 1 1/2 teaspoons salt
  • 1 tablespoon finely chopped fresh parsley
  • 1 tablespoon finely chopped garlic chives
  1. In a medium bowl, mix the ground beef with the pepper, salt, cumin and chili powder.
  2. Shape the mixture into tiny meatballs about the size of black cherries.
  3. In a heavy 4 quart stockpot, heat the oil over medium to high heat and brown the meat balls on all sides, for about 2 minutes, in small batches without crowding them.
  4. Remove from the pan and set aside.
  5. If there is extra oil in the stock pot, remove it, leaving about 2 tablespoons.
  6. Fry the onions and leek until they’re soft over medium heat, 4 to 6 minutes.
  7. Add the garlic and season with the pepper and bay leaves.
  8. And the beef broth, tomato puree, and meatballs.
  9. Lower the heat to a slow simmer, cover, and cook for 1 1/2 hours.
  10. Add the salt, parsley and chives and cook 5 to 10 minutes longer.
  11. Serve with garlic toast.

During the winter months, or cold weather, this is the type of soup that is very easy to make when you’re cooking out of your freezer with ingredients that you have prepared beforehand.  Making beef broth or beef stock is somewhat time consuming, but does not require constant attention and can be made in large batches, saving time later on.  Likewise, making tomato puree from extra tomatoes when your garden is in the height of production gives you a rich, fresh tomato taste in the dead of winter.

Please give this soup a try, and let us know what you think!

Here is another great recipe that takes advantage of the abundance of fresh vegetables out there now. This is an easy, foundational salsa recipe that is extremely tasty just as it is, but also lends itself very well to experimentation with whatever fresh vegetables you have available. Everything is roasted to bring out the fullness of the flavors, and to help them mingle better. I’ve been able to do an acceptable substitute in the winter with fresh frozen chiles from our garden, and canned Italian plum tomatoes!

This is one of those salsas that just grabs you by the taste buds and gets your attention. No matter if it is mild or hot, you keep coming back for “one more bite”, because it just tastes so good. When having guests over, a batch rarely lasts through the evening, when it’s at the height of its warm, rich goodness. Best cooked outside, this lends itself beautifully to doing fresh quesadillas, queso fundido, burgers or all three in succession on the grill, along with plenty of cold beer and good friends. Watching the late summer sun going down after a hot day and enjoying the salsa along with other great food is one of the memories that will be brought up many times.

I like using several kinds of chiles, some mild, medium and hot to bring more depth of flavor to my salsas. I will start picking the mild ones,  fewer of the medium, and less still of the hotter ones. This builds a base of flavor first, then heat. Don’t worry if it looks like you’re making tomato soup when you start roasting the tomatoes, everything will turn out just fine…

Roasted Fresh Garden Salsa

2 Lbs fresh tomatoes-diced.  Plum tomatoes are best, but use what is fresh- a couple of different kinds will give more depth of flavor! Dicing will help remove some of the excess juice.

3-4 Ripe red bell peppers– diced

10-15 Various Chiles to taste for heat- de-seeded, de-veined and diced

3-4 Ears fresh sweet or roasting corn– cut from the cob. About 1-2 Cups

5-6 Cloves garlic- sliced in 1/8 inch slices

1-2 Cups cooked Black beans (optional)

1 Tsp whole Cumin

1/2 Tsp whole Coriander

1/4 Cup Extra Virgin Olive Oil

1 Tsp salt

1/2 Tsp fresh ground black pepper

Splash of Balsamic Vinegar

You’ll need a couple of large, heavy, shallow pans for roasting- preferable cast iron, as it retains the heat well and is easy to keep at the best temperature for roasting vegetables. The grill or outdoor stove is the best place to do the cooking, as the heat stays outside, and you get to enjoy the late afternoon! A couple of large bowls to hold the roasted vegetables and a large food processor or blender will be needed after everything is roasted.

Heat the pans to a medium heat, add the tomatoes to one pan, the bell peppers and corn  to another, and if you have a third pan- the Chiles to that one. Let them roast until their skins start to turn dark. The skins should be a little black in spots and starting to loosen from the fruit. This can take up to a half hour depending on the heat of your grill or stovetop. Stir and turn with a wooden spatula occasionally. You will see some sticking, especially with the tomatoes- this is ok. When the Chile skins are starting to turn dark, add the garlic to that pan. Remove the veggies when they are fully roasted and have dark skins with a few black spots on them. The corn should have a dark yellow color to it. Put them all together into a large bowl and cover.

Toast the cumin and coriander in a small heavy pan over medium heat for 2-5 minutes, until they release their aromas. You will see the seeds start to darken and release their aromas- move the pan off of the heat for a second or two, then return to the heat. Continue this until the rich toasted aroma tells you they’re ready. Grind in a mortar and pestle or spice grinder to a coarse ground consistency.

Add the vegetables to the food processor in batches if needed and process with a chopping blade until a chunky consistency is reached. Do not over process to a smooth or fine consistency- you will lose flavor. Repeat until all the vegetables are processed, and return to a large serving bowl. Add ground spices, Olive Oil, salt and ground black pepper. Add splash of Balsamic Vinegar and mix well. Taste and adjust salt and pepper if needed.

Serve warm with chips, or in and on top of fresh hot quesedillas or accompanying queso fundido with chips.

Connecticut Field Pumpkin

Here’s 3 great heirloom pumpkin recipes that we have used and enjoyed. Too often people think of pumpkin in a strictly Halloween or pumpkin pie way, when there are so many other unique and wonderfully tasty ways to enjoy it. Pumpkin is not only a fall or winter vegetable, but can be frozen or stored in a cold cellar environment for several months, in addition to the traditional canning. Please try these, enjoy and tell us what you think!

Here’s what could come out of your garden for this recipe –  Pumpkin, Leeks and Thyme!

Pumpkin Soup with Chipotle Chile
This Southwestern recipe is a favorite of mine, as it is so unexpected yet delicious that everyone comes back for more. Vary the amount of chipotle, as a little gives a seductive smoky flavor and a little more adds some heat. Pie pumpkins will give a sweeter taste, but any heirloom pumpkin will give a rich, deep flavor once it is roasted. Any firm winter squash, such as acorn or butternut can also be used in addition or substitution for the pumpkin. You won’t believe how wonderful the flavor of fresh roasted pumpkin is! Do not use canned pumpkin, it will give the soup a canned flavor. Freeze extra soup in small quantities.
Servings: 10
Ingredients
  • 3 Lbs pumpkin
  • 3 Tbs unsalted butter
  • 3 Leeks white parts only-finely sliced
  • 2 large shallots minced
  • 5 scallions finely sliced
  • 1-2 garlic cloves minced
  • 2 Tbs fresh ginger minced
  • 1 Tbs pureed chipotle en adobo
  • 8 cups rich chicken stock- can use 4 cups stock and 4 of water for lighter flavor
  • 3 Tbs fresh thyme leaves or 1 Tbs dried
  • 1-2 cups heavy cream to taste
  • Salt and fresh ground pepper to taste
Instructions
  1. Cut pumpkin in half, scrape out and save seeds, peel and cut into 1 inch cubes on heavy cookie sheet or roasting pan. Roast in oven at 400F for 20-30 minutes. If skin is very tough, add 1/4 cup of water to pan while roasting.
  2. Saute leeks, shallots and scallions in butter in a large heavy pot for 10 minutes.
  3. Add garlic, ginger and chipotle en adobo, cook for 2 more minutes.
  4. Stir in the pumpkin, stock and thyme.
  5. Slow simmer for 45 minutes, until pumpkin is very soft.
  6. Puree in small batches in blender or food processor and return to pot.
  7. Add cream, taste for seasoning and add salt/pepper as needed.

Here’s what could come out of your garden for this recipe – Pumpkin, Onions, Chile, Cumin, Chives!

Warm Pumpkin Salsa
This is served on top of a flan or baked custard dessert, but can be used with many dishes as a counterpoint or accompaniment. Sweet, yet savory and a little spicy, this is another unusual use of pumpkin that wows friends and family. Everyone raves about this warm salsa, the time of year it is served and comes back for more. I even think it's pretty good over some real vanilla bean ice cream! Make a trial batch to see how the flavor evolves, then make extra when preparing for friends and family. It will go quickly!
Servings: 4
Ingredients
  • 2/3 cup small diced fresh pumpkin
  • 1/3 cup small diced tart apple- Granny Smith etc.
  • 2 medium red onions diced small
  • 1 1/3 Tbs coconut or olive oil
  • 1/3 cup Marsala wine
  • 1/4 Tsp fresh ground nutmeg
  • 1/4 Tsp ground red chile
  • 1/4 Tsp fresh ground cumin
  • 1/4 cup orange juice
  • 2-3 Tbs brown sugar
  • 1 Tbs apple cider vinegar
  • 2 Tsp minced red jalapeno chile- can use green jalapeno
  • 1 Tbs chopped chives
  • 2 Tbs roasted/salted pumpkin seeds
  • Salt and pepper to taste
Instructions
  1. Saute the pumpkin, apple and onion in canola oil in a heavy pan over medium heat until onion is slightly browned.
  2. Deglaze the pan with Marsala wine.
  3. Add spices, orange juice and brown sugar, cook over low heat until most of liquid has evaporated.
  4. Add apple cider vinegar, reduce slightly.
  5. Remove from heat, add jalapenos, chives and pumpkin seeds.
  6. Taste for seasoning, add salt and pepper as needed.

Here’s what could come out of your garden for this recipe – Pumpkin, Onions and Sage!

Pumpkin Soup with Sage
Simple yet rich in flavor, savory, hearty and deeply satisfying this pumpkin soup will do justice as an introduction to the Christmas meal. With the addition of meat such as turkey or ham, preferably smoked, this becomes a one dish main course that teams wonderfully with hot homemade biscuits.
Servings: 6
Ingredients
  • 1 small pumpkin- about 5 lbs.
  • 4 Tsp extra virgin olive oil
  • 6 Tbs unsalted butter
  • 2 medium yellow onions finely chopped
  • 2 cloves garlic minced
  • 4-6 cups chicken stock
  • Salt and freshly ground pepper
  • 18 fresh sage leaves and 1 cup vegetable oil for frying
  • 9 shallots halved lengthwise
Instructions
  1. Quarter, seed and peel pumpkin, rub with olive oil and roast on baking sheet in 350F oven for 30 minutes, or until soft. Allow to cool.
  2. In a heavy stock pot, melt 4 Tbs butter, then brown onions and garlic over medium heat for about 15 minutes, or until onions are soft.
  3. Add pumpkin to mixture, continue cooking for 5 minutes. Add chicken stock and slow simmer for 30 minutes.
  4. Puree soup in food processor or blender until just smooth.
  5. Return to pot, thinning with water if too thick. Keep soup warm on lowest flame and heat diffuser if needed.
  6. Heat vegetable oil and fry sage leaves until just crisp and drain on paper towels.
  7. Add to soup and keep warm.
  8. Drain oil, melt remaining 2 Tbs butter over medium heat and cook shallots until soft and golden, about 15 minutes.
Recipe Notes

To serve, ladle soup into individual bowls and distribute 3 sage leaves and 3 shallot halves into each bowl.