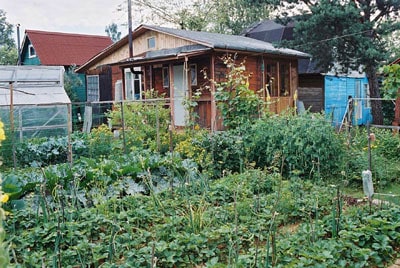
Now that the days are becoming slightly longer, the holidays are over and life is getting back to whatever consists of normal for you and your family, it’s time to dig into our garden seed catalog and start planning the eternally anticipated Spring garden.
After spending a little time reading – and realizing that you want to plant one of everything – the realization sinks in that this could be some work, and that’s before the real work of actually digging in the garden even begins!
What to plant, how to plant, when to plant, what will grow for me, should I start my heirloom tomatoes from seed or just buy starts, what do I need to do for my soil, and what exactly is succession planting are all questions that crop up and need answers.
All of a sudden, a garden seems pretty intimidating, definitely not for amateurs and something that might be best left to the experts. Well guess what? Everyone was an amateur at some point, starting out with not much knowledge and needing some help. It is easier to start your home garden today than in any other time in history, as there are mountains of information and education out there and it is all pretty easy to find. The Internet is full of good gardening advice in many areas.
What we will look at today are some points to consider about your home garden, we’ll do some initial planning and pass along some tools that will be very helpful in building your toolbox of gardening knowledge and problem solving. Let’s get started!
Now is the perfect time to start planning for what you want to do in your garden next year. Just get the planning started, then work on it as ideas bubble up from your subconscious. This way, you won’t be caught short when time becomes an issue in a couple of months.
To help you get the process rolling, we have the following points to consider, along with some tools to help get you there sooner.
1. Review last year’s garden. How did it do? Did you start enough seeds/seedlings to compensate for losses due to transplanting, weather, critters etc.? Were plants healthy and productive, or were there issues that need some researching, such as pests, insects, disease, weather conditions to plan for or try to mitigate?
We found that the rabbits and deer were a factor we didn’t even consider in planning how much of the White Eagle corn we planted as a test plot for growing our own heirloom seed corn. They took out almost a third of our crop! This is something that we will be planning for (in a couple of ways) in this year’s planting.
2. Plan early for varieties that might need a longer growing season, or take longer to germinate. This isn’t just a beginner’s mistake, many experienced gardeners get caught out on the timing for their garden. We’ll show you how to do the date planning later on in this article. Then it is just a matter of writing down the seed starting dates on a garden calender and sticking to the plan.
If you give yourself at least a week “cushion” on the timing, you won’t be stressed if you can’t get the seeds started or transplanted on the date you’ve chosen, whether due to busy schedules or the weather or some other unforeseen happening.
3. Try one new variety this year that you’ve never had out of your garden. It may be something that you don’t think you’ll like, or it may just be something that you’ve never had fresh just moments before from your own garden.
This was eggplant for me, and I now love it- from my own garden. This year it just might be turnips, as I’ve never had fresh turnips!
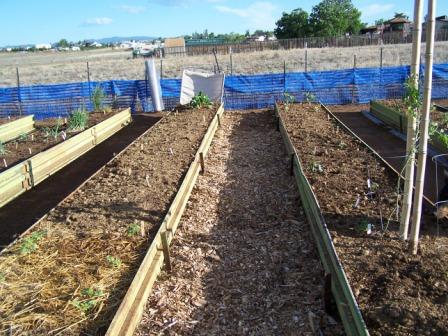
4. Make a garden plan. This can greatly help with spacing, intensive planting, succession planting and growing more food in your existing space. Also helps with small space/container growing.
Download and use our Garden Journal for more information and help.
Mother Earth News has a Vegetable Garden Planner that has several short videos showing how to get started. It is free for the first 30 days, and is $25 for a years subscription. There are other free garden planners if you do a search online.
5. Grow an herb this year. You won’t believe the exquisite flavor that one fresh heirloom herb can bring to your kitchen and meals. If you’ve grown herbs before, or are growing some now- try a new one.
To start, try something that is used extensively in cooking like Basil, Oregano or Thyme. All of these can be dried and used year round, with the added benefit of saving you money buying expensive dried herbs.
6. Plant some pollinator attractants. These can be herbs or flowers and will dramatically help your garden’s production. Just one or two varieties planted throughout the garden can make a huge difference.
7. Plan to save one variety of seed this year. Start with something easy and something that you are interested in. Read our Seed Saving articles to get started, or take a look at these books- “Saving Vegetable Seeds” is a new book that has great illustrations and introductions, while “Seed to Seed” is the established reference for all things seed saving.
8. Plant enough to share with a neighbor/senior center home or food bank. Plant an extra row if possible, a couple of plants extra if space is small. The difference even one gardener can make in another’s life is extraordinary!
Plant a Row for the Hungry is a public service program of the Garden Writers Association and has donated over 14 million pounds of food since 1995 to feed hungry folks in our local neighborhoods and communities across the nation. This is without government assistance, oversight, subsidy or bureaucratic red tape — just people helping people. It was started in Anchorage, Alaska by Jeff Lowenfels to provide food for Bean’s Cafe, a local soup kitchen.
9. Get your kids or grand-kids involved. Have them help plan the garden and plant something just for them. Don’t have kids or grand-kids? Use the neighbors, friends, etc. Start them on growing food and learning where our food comes from and how it gets to the plate. You will be surprised at how interested kids are in the garden once they are there. Combine this with #7 above and help them learn the full cycle of the garden from planting a seed to harvesting a seed.
10. Cook a meal with those kids mentioned above. Plan a simple, easy to make meal. Have them help harvest, clean and prepare the meal.
11. Review our website. If you have questions or need help, please, email or call us. We’re here to help you be more successful in your garden. We make our living on the sale of heirloom seeds, tools, books, etc. but if we can help you be more successful in your garden, everyone wins.
Here’s how we see it: you have a better garden, more fresh veggies and more food. You give some to your neighbor, who notices your garden is much more productive, disease, insect and pest resistant and they ask how you do it. You share what you’ve learned and they have a better garden with more food. They then help create a better, more resilient local food system.
Yes, we may get a few more customers, but that isn’t the point or the focus. Another possibility is that you do plant a row to donate, and make the local food bank, soup kitchen or retirement home’s day with fresh, healthy and tasty food.
All right, then- now that you’ve got plenty of ideas of what to do with your garden this year, how do you get started?
Getting the timeline down is one of the hardest parts, as there is some real confusion on when to start seeds, when to till the soil, when to direct sow these seeds and transplant those to get some great food growing in your garden. There is no fail-proof method, as even experience can be tripped up by an early spring followed up by a sneaky late cold snap that kills your tender seedlings.
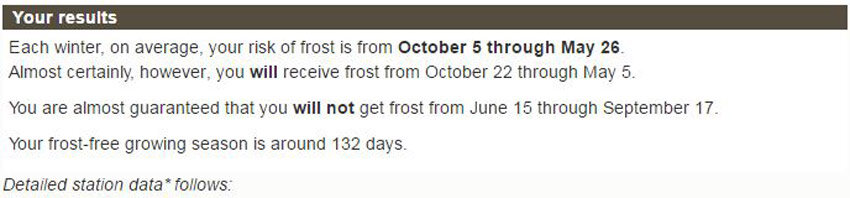
Here is a good tool to get some real world, historical weather data from the three closest weather stations to your zip code- the First and Last Frost Dates by Zip Code. Once you are there, add in your Zip code, click Go and this is similar to what you will see:
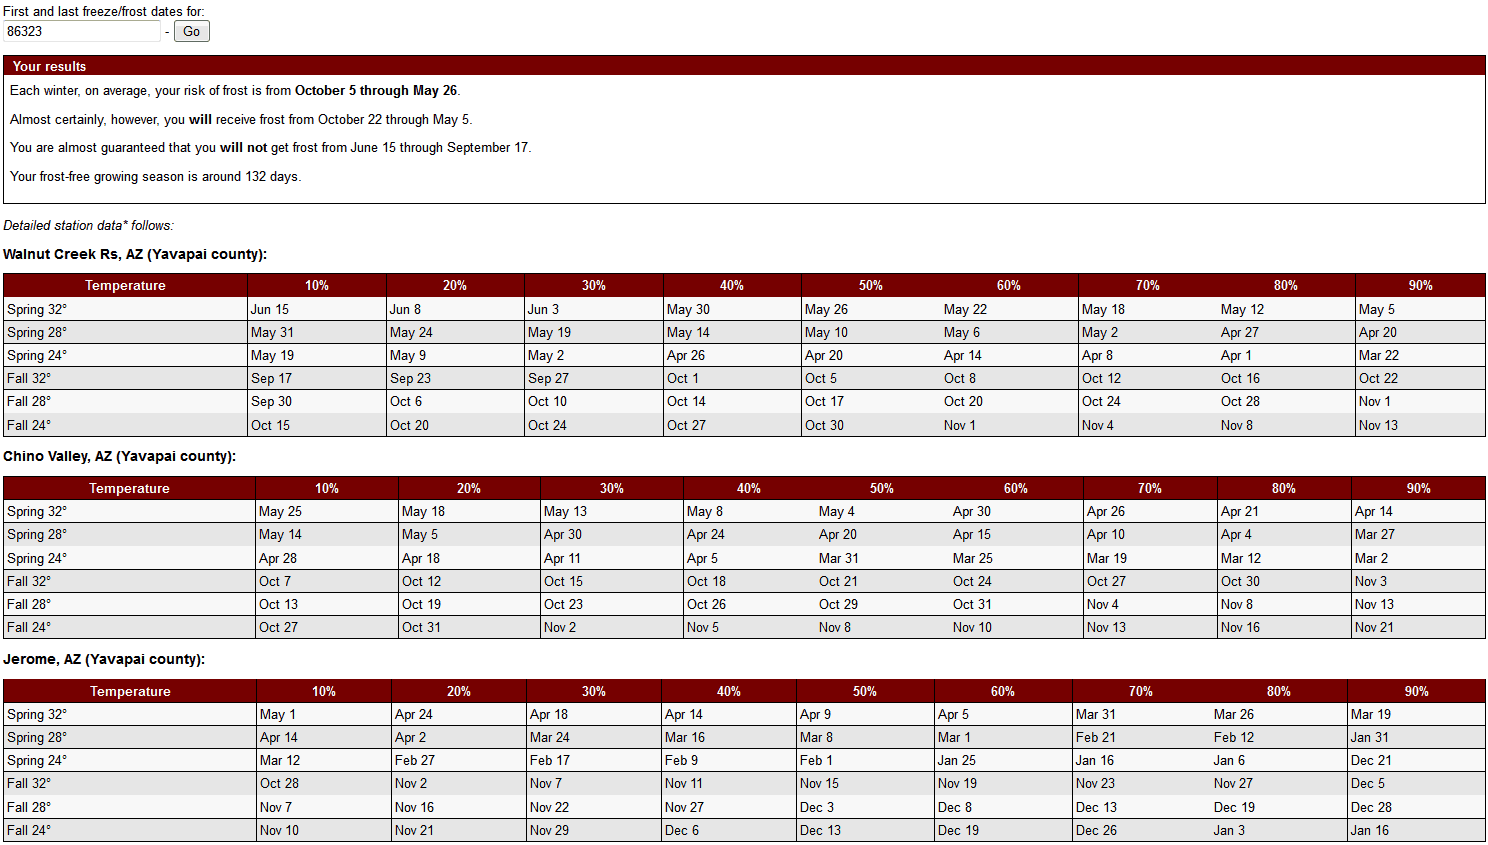
First and Last Frost Dates by Zip Code
We are using our Zip code of Chino Valley, AZ for this example. Click on the photo to make it bigger.
There is a lot of useful information here, so let’s break it down a bit to make sense of all of this. The three weather stations are included for locations that might not be really close to any one of the stations, so you can make an educated guess on dates. We are closest to the Chino Valley weather station, so that is what we will use.
The first box says this-
- Each winter, on average, your risk of frost is from October 5 through May 26.
- Almost certainly, however, you will receive frost from October 22 through May 5.
- You are almost guaranteed that you will not get frost from June 15 through September 17.
- Your frost-free growing season is around 132 days.
This is good information to use in planning your garden and in choosing varieties to plant that will be able to grow in your garden, with your growing season. For instance- if your growing season is 60 days, like our friends in Flagstaff, AZ, then you want to be careful in choosing too many things that need 90 days to produce food, if you don’t have a greenhouse or shelter for protection. This information also gives you a good idea of first and last frost dates, but we can get more selective with the information below this top box.
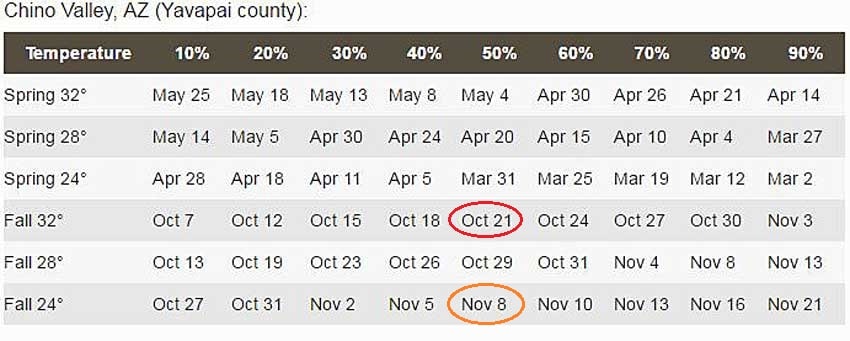
The next three boxes are the historical data from the closest weather stations to your Zip code. The top line of each box is the chance- in percentage- of a frost happening. So 10% is a really low chance, while 90% is a high chance. The temperatures on the left side represent the different frosts- 32F is considered a light frost, 28F is a moderate frost and 24F is a killing or hard frost. For garden planning, look at the 32F line. I usually choose the 50% column to start, then work from there. In our example 50% chance of a 32F frost in Chino Valley in Spring is May 4. This corresponds with the traditional time to direct sow and transplant of May 7-10 locally. Direct sowing cool season crops can be done up to 4-6 weeks earlier in some locations.
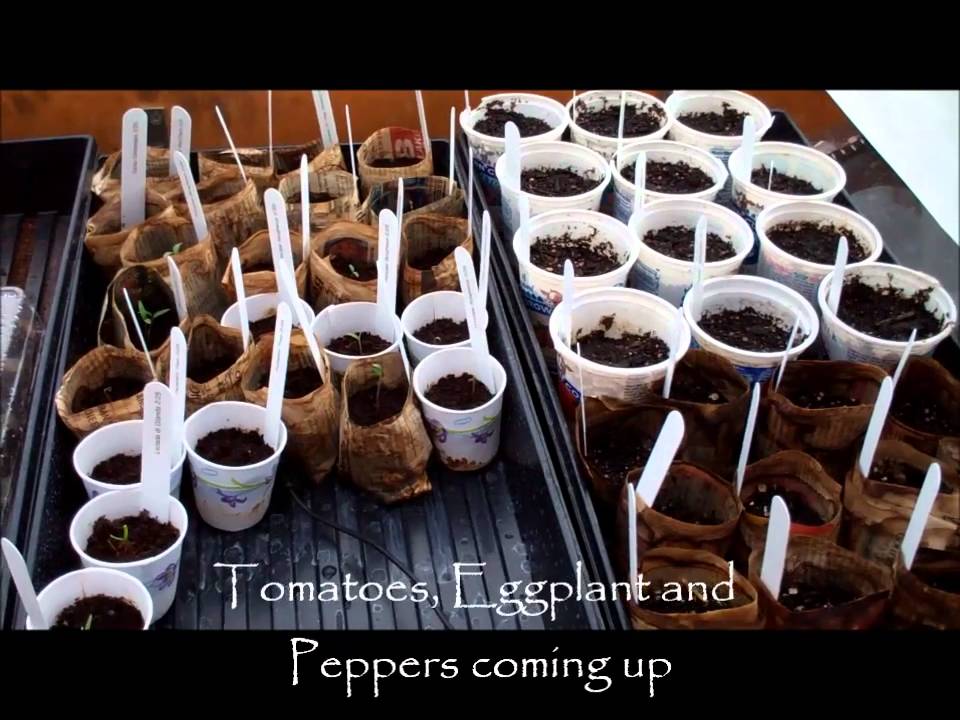
To get the timeline correct on starting seedlings like tomatoes, peppers and eggplant- subtract at least 6-8 weeks to allow the seedlings time to grow and get strong enough for transplanting. The more time seedlings have, the bigger and stronger they will be. They will also take up more space, so allow for that as well. We try to give the tomatoes and peppers a minimum of 8 weeks before transplanting them, as we always seem to have some weird weather event that causes havoc with younger, more tender seedlings. We’ve found that the larger ones blow through a heavy wind or late frost without too much worry.
So here is how the math looks and works-
In our example May 4 is the earliest date to direct sow and transplant tender varieties. We want to subtract 8 weeks from that to determine our seed starting date for transplants such as tomatoes, peppers and eggplant. This takes us to March 9, give or take a week or so. This is where the beauty of planning comes in, as you can “fudge” the dates by a week or so on each end if needed and still be very successful. For example: you are swamped the week you are scheduled to plant seeds for transplants, and get them planted one week late. On the other end, you can very easily just wait one more week if needed (weather, hectic schedule) before transplanting the seedlings into the garden. Getting them started a little earlier and waiting a little longer will only give you bigger, stronger transplants.
This tool also works very well for planning your timeline for direct sowing those early season, cool weather crops that go in earlier than anything else. All of our seed packets have planting instructions on the back, and some will indicate that they can be planted a certain number weeks before the last frost.
One last tool to leave you with is your local Master Gardeners. Click on the link, select your state, then county to see where your local Master Gardeners are located. These are volunteers through the land grant universities in each state. They will have really good, accurate information on your local conditions, pest and disease pressures and general gardening information. They are good folks to get to know. Some are mainly flower gardeners, while others focus more on vegetables, so talk with a few of them.
The Master Gardener manual lists good planting timelines for local conditions for pretty much all of the garden crops, what kind of production can be expected for each crop and how many feet of garden to plant per person. You can also do a search for “Arizona planting guide” or “Arizona garden planting guide” substituting Arizona for your state. The search results will show something like “Arizona Master Gardener Manual”. You can then download or print this to have for your future reference. The local Master Gardener office can also make copies for you if you ask.
There you have it, a lot of information to help you get more out of your garden and some great tools to get the planning and timing under control. It can seem daunting at first, so start small and simple, get a good feel for how it works for you, then expand as needed. Make sure to use the Garden Journal to keep track of what worked well and what didn’t so you don’t get frustrated and repeat your mistakes. As always, we are here to help and advise you on growing a better, bigger garden!