Tag Archive for: Soil Health

Spring Leaf Lettuce

Soil Elixir Jump-Starts Your Garden’s Soil

One of the most anticipated times of year for gardeners is Spring, with the attendant planting season. Everything is new and fresh; a chance to start over and improve on last year’s garden. A big subject for gardeners is what to do with the soil to prepare it for planting. If you have been reading our articles over the past several years, you know we advocate building the health and vitality of the soil in a natural, biologically safe manner. Soil becomes healthier, more productive, disease, weed and pest resistant. It results in an upward spiral where the garden gets better year after year.

Here is a unique recipe for a Spring garden elixir that is easy to mix, completely non-toxic and hugely beneficial to jump-starting your garden’s soil in getting it ready for planting. It comes courtesy of Crop Services International, who has over 35 years experience in helping growers accomplish their goals. They provide a Non-Toxic/Biological/Sustainable approach to growing food, from a full-scale commercial farm to the home gardener. We have read  “The Non-Toxic Farming Handbook” that they wrote to educate ourselves more on improving our knowledge and approach.

This recipe is based on a 20′ x 50′ garden or 1000 sq. ft. Make the adjustments for your garden size.

Before You Start

This recipe and applications assume an average garden soil that is basically good but could use some help.

It works in fertile soils by subtracting the lime or gypsum application, adding compost before spraying the elixir.

It helps very poor soils, but won’t give as much effect.

You’ll need to do a couple of things to prepare your garden beds to take advantage of the elixir.

First, evenly spread a 50 lb bag of high calcium lime (for acidic soils) or gypsum (for alkaline soils) across your beds. Your local garden center should have this. If using lime, it should be high calcium lime with as low magnesium as possible. 5% or less is great, up to 10% is acceptable, but nothing over 10%. The higher magnesium percentage releases excess nitrogen into your soil, greatly decreasing its fertility. It also overloads both the chemical and biological processes of your soil. Do not buy Dolomite lime, as it has too much magnesium.

Then, follow with 100 lbs of rich, aged compost, spread evenly across your beds, about 2 full-sized wheelbarrows full. This can be purchased or from your own compost pile. Again, the best is made by you, and it is easy – “Compost – Nourishing Your Garden Soil” has all the details.

After doing both of these, make and apply the elixir.

Notes on Ingredients

  • When purchasing the fish fertilizer, if you can find one that also has kelp or seaweed, even better. If you want the absolute best fish emulsion possible, brew your own! Read our “Best Homemade Fish Emulsion” for the recipe and instructions.
  • Blackstrap molasses is best for its increased mineral content. Unsulphured is preferred, but not absolutely necessary. One of the best sources of inexpensive molasses is a feed store that supplies horses, as it can be bought by the gallon for much less than at a supermarket.
  • Do not buy diet cola, as the Aspartame/NutriSweet used as the sweetener acts as a chelating agent, meaning it ties up the minerals and nutrients in the soil making them unavailable to the plants. (It also does the same thing in your body!) The cola has Phosphorus to add to the mix along with sugars.
  • The beer adds B vitamins – no, not vitamin Beer!
  • The Borax powder adds Boron, one of the most important elements in the biochemical sequence of plant growth.
  • Cranberry juice is full of vitamins and minerals, as well as acting as an anti-bacterial agent and having an acidic pH. Depending on how the juice is processed, it can contain significant amino acids as well.
Spring Garden Soil Elixir

This recipe is based on a 20′ x 50′ garden or 1000 sq. ft. Make the adjustments for your garden size.

Author: Stephen Scott
Ingredients
  • 20-24 oz liquid fish fertilizer Home-made is best
  • 1/2 cup molasses Black strap has more nutrients
  • 16 oz bottle of cola – NOT DIET!
  • 24 oz beer 2 - 12 oz cans, any beer works
  • 1/2 cup Borax powder
  • 1 qt cranberry juice – make sure to get 100% cranberry juice, not a dilution
Instructions
  1. Mix well with a stirrer and thin with enough water to enable mixture to be sprayed with a tank type or hose-end sprayer.
  2. Apply the mix evenly over lime or gypsum and compost base with sprayer. If needed, go back over with second application to use up all of the batch, just make sure to apply evenly.

  3. Broad-fork or lightly rototill garden soil. If using a rototiller, don’t go more than 2 inches deep at the maximum. Most of the biological growth happens at the 2-3 inch mark and the soil is turned over an inch or so beyond what the tines reach. Tilling deeper only destroys microbial life in the soil, setting you back in your efforts to create and build biologically active soil.

Recipe Notes

It must be noted that the sprayer cannot have been used to spray any chemical treatments like herbicides, pesticides, etc. as this will put those chemicals onto your soil, killing the microbial life in the soil and feeding the chemicals to the plants, where you wind up eating them!

Seed Planting Elixir

Once you have applied the elixir and broad-forked or lightly tilled the soil, get your garden planning and seedlings ready. We have another planting elixir to use just after planting the seeds and transplanting the seedlings into the garden that we’ll share with you: in a gallon milk jug mix – 1/2 cup of fish emulsion, 1 tsp sugar (preferably raw or brown) and 1/2 cup of cola, fill with water and shake well. Apply over seeds and transplants. Each gallon will treat approximately a 50-foot row.

This is a great start towards sustainable, biological agriculture in your own garden. Remember, though, it is just a start; a good step in the right direction. To continue to make progress in knowledge and in soil health, you need to find out where you are starting from. Do more reading, ask questions and get a complete soil analysis, not just the NPK and pH soil tests that are widely offered. Spend the money to find out exactly where your garden soil is at, and then you will be able to make sound decisions on where you want and need to go. Then you won’t be guessing and shooting in the dark, trying to do what is right but not really knowing if you are making positive progress.

Cover Crop Mix

Soil Builder vs Garden Cover Up Mix – which is best for your garden?

Both of our cover crop mixes give you multiple benefits in the soil and above it. You can’t go wrong with either one. The Garden Cover Up mix is a general use cover crop, while the Soil Builder mix is more specific toward improving the overall condition of your soil. 

Cover crops improve soil in a number of ways. They protect against erosion while increasing organic matter and catch nutrients before they can leach out of the soil. Legumes add nitrogen to the soil. Their roots help unlock nutrients, converting them to more available forms. Cover crops provide habitat or food source for important soil organisms, break up compacted soil layers, help dry out wet soils and maintain soil moisture in arid climates.

It’s always a good idea to maintain year-round soil cover whenever possible, and cover crops are the best way.

Let’s look at how cover crops work overall, then we’ll see the differences of each mix. 

Most cover crop mixes are legumes and grains or grasses. Each one has a different benefit to the soil. Legumes include alfalfa, clover, peas, beans, lentils, soybeans and peanuts. Well-known grains are wheat, rye, barley and oats which are used as grasses for animal forage. 

Crimson Clover Cover Crops

Crimson Clover

Legumes

Legumes help reduce or prevent erosion, produce biomass, suppress weeds and add organic matter to the soil. They also attract beneficial insects, but are most well-known for fixing nitrogen from the air into the soil in a plant-friendly form. They are generally lower in carbon and higher in nitrogen than grasses, so they break down faster releasing their nutrients sooner. Weed control may not last as long as an equivalent amount of grass residue. Legumes do not increase soil organic matter as much as grains or grasses. Their ground cover makes for good weed control, as well as benefiting other cover crops.

Rye Cover Crop

Rye Cover Crop

Grains or grasses

Grain or grass cover crops help retain nutrients—especially nitrogen—left over from a previous crop, reduce or prevent erosion and suppress weeds. They produce large amounts of mulch residue and add organic matter above and below the soil, reducing erosion and suppressing weeds. They are higher in carbon than legumes, breaking down slower resulting in longer-lasting mulch residue. This releases the nutrients over a longer time, complementing the faster-acting release of the legumes. 

This pretty well describes what our Garden Cover Up mix does, as it is made up of 70% legumes and 30% grasses.

Our Soil Builder mix takes this approach a couple of steps further in the soil improvement direction with the addition of several varieties known for their benefits to the soil structure, micro-organisms or overall fertility. 

For example, the mung bean is a legume used for nitrogen fixation and improving the mycorrhizal populations, which increase the amount of nutrients available to each plant through its roots. 

Spring Sunflower Cover Crop

Spring Sunflower

Sunflowers are renowned for their prolific root systems and ability to soak up residual nutrients out of reach for other commonly used covers or crops. The bright colors attract pollinators and beneficials such as bees, damsel bugs, lacewings, hoverflies, minute pirate bugs, and non-stinging parasitic wasps.

Safflower has an exceptionally deep taproot reaching down 8-10 feet, breaking up hard pans, encouraging water and air movement into the soil and scavenging nutrients from depths unreachable to most crops. It does all of this while being resistant to all root lesion nematodes. Gardeners growing safflower usually see low pest pressure and an increase in beneficials such as spiders, ladybugs and lacewings.

Now you see why you can’t go wrong in choosing one of our cover crop mixes! Both greatly increase the health and fertility of the soil, along with above-ground improvements in a short time. Even if you only have a month, the Garden Cover Up mix will impress you for the next planting season. 

For a general approach with soils that need a boost but are still producing well, the Garden Cover Up mix is the best choice. Our Soil Builder mix is for rejuvenating a dormant bed or giving some intensive care to a soil that has struggled lately. Both will give you a serious head start in establishing a new growing area, whether it is for trees, shrubs, flowers, herbs or vegetables. 

Let one of our cover crops go to bat for you and see what happens when you play on Mother Nature’s team!

Kellog's Potting Soil OMRI

Potting soils come in all shapes and sizes, with most touting some form of “Organic & Natural” on the bag – but are they really certified organic? Do those potting soils really work as advertised and contain healthy, wholesome ingredients to help your precious seedlings get that critical head start they need?

To answer these questions and more, we bought a few bags of potting soils from our local sources, brought them home and opened them up to take a close look at what is there. We looked at the bag and labeling, seeing what is being sold and why, what wording and marketing is being used and if they stood up to closer scrutiny. One of those potting soils we have used for a few years, so we let you know of our past experiences.

Please note – this article is in no way meant to be a comprehensive, exhaustive laboratory research and review of all potting soils available to the average home gardener. There’s just no way for us to do that, as many are only regionally available and the ingredients change from region to region in the bigger brands.

As with our seed starting mixes article, we suspect there are a few companies producing potting soils for different markets with unique branding and bagging for each channel. We saw this with one product – one bag design and color set for the big box stores and another one for the smaller independent garden centers. This only underscores the need to read the labels, know what the descriptions, ingredients and marketing-speak mean and be able to decide for yourself if that particular bag will work for you and is worth the cost.

As with our seed starting mixes analysis, we found confusing and sometimes misleading labeling.

What are potting soils and do I need to use one?

Potting soils are traditionally what seedlings are transplanted into from the seed starting mixes. The seed is germinated in the seed starting mix, then when it is 3 – 4 inches tall and starting to put on its second or third set of true leaves, it is transplanted into a potting soil. Potting soils have nutrients which are missing in the seed starting mixes, continuing the growth of the seedling by feeding and supporting the root structure it is starting to develop.

What goes into potting soils varies widely, from a basic seed starting mix with some aged compost added for plant nutrition to full custom blends with compost, soil and nutrients coming from different ingredients – all to supposedly help the seedling grow stronger and faster.

Not everyone needs potting soils, as some have the space and materials availability to create an excellent rich, aged compost to use as the starting point of mixing their own special blend, while others just don’t have the time, space or materials available to do that.

Let’s take a look!

Kellog's Potting Soil

The first of the potting soils we found was the Kellogg Amend Organic Plus at Lowe’s and it’s available at Home Depot as well, so it should be available in most big box stores in the western US. We were interested to see what was in the bag and do some testing, as we’ve had several of our customers email us in alarm after transplanting into the Amend potting soils and within a few hours the seedlings were almost all dead or severely wilted. We found a commonality with most of them using the Kellogg Amend potting soils, but haven’t heard anything negative in the past couple of years.

As we mentioned in our seed starting mix article, we are not impressed with the words “Organic” or “Natural” on bags of soil, so seeing “Organic Plus” prominently splashed across the bag was an alert for us. It is branded as a garden soil for flowers and vegetables.

One label that did catch our eye and add to the intrigue was the OMRI listing on the bottom left of the bag. This indicates the contents are certified for organic food production, and are the equivalent of a “Certified Organic” label on food.

The OMRI label piqued our curiosity because our previous research as to why the Amend potting soils were killing seedlings led us to the fact that Kellogg had been using bio-solids, or treated municipal sewage, and possibly industrial runoff or wastewater. This easily explained why the seedlings died when transplanted into the potting soil. 

So the question was – is this the same potting/garden soil, and if so, how is it OMRI listed?

In doing some reading, it appears Kellogg has used bio-solids or treated municipal sewage as a major ingredient in its composting program for a number of years. It seems that their OMRI listed products do not have any bio-solids as an ingredient in their products, but you can’t tell from the label.

In looking at the OMRI listing for Kellogg Amend garden soil, we found it is listed but with restrictions. OMRI lists it in the category of “Fertilizers, Blended with micronutrients” with the restriction being –

May be used only in cases where soil or plant nutrient deficiency for the synthetic micronutrients being applied is documented by soil or tissue testing.

Kellogg’s Amend product page has this to say about their OMRI listing –

Proven Organic

All of our products are listed by the Organic Materials Review Institute (OMRI), the leading non-profit, internationally recognized third party accredited by the USDA’s National Organic Program (NOP). That means every ingredient and every process that goes into making our products has been verified 100% compliant as organic, all the way to the original source. Look for the OMRI logo on the bag, ensuring every product is proven organic.

All in all, it is OMRI listed – even with the discrepancies between Kellogg’s product information and the OMRI listing itself with the restrictions.

Kellog's Potting Soil OMRI

The OMRI listing is displayed in the lower left part of the bag, underneath the info box of what it is supposedly derived from and what it is good to use it for.

Kellog's Potting Soil Ingredients

The ingredients list compost as the primary ingredient with what makes up the compost. Recycled forest products are typically a blend of finely ground wood from leftovers of the timber industry. Arbor fines are finely ground tree trimmings. Hydrolyzed feather meal is crushed and boiled poultry feathers, used as a source of nitrogen.  

Dairy and poultry manure sound fine, until the source is looked at a little closer. What is the source of the dairy and the poultry manure? There is reasonable concern as to what is contained in the manure of animals from confined feeding operations – there are antibiotics and hormones used in the day to day operations which are passed through in their manure. Another concern is the possible presence of industrial herbicides and pesticides used in conventional grain production, which can easily be passed into the manure.

These are things to think about, especially if you want to grow as organically as possible.

One of our biggest initial concerns after getting it home and looking up both the Kellogg’s product listing page and the OMRI listing showing the restriction is there is no mention anywhere of the “synthetic micronutrients” from the OMRI listing on the bag or Kellogg’s website.

What are those synthetic micronutrients, and what is their source?

Kellog's Potting Soil Closup

On opening the bag we noticed it was moist and had some white mold spots on the woody material in the mix. This is not a bad thing, molds and fungi work to break down wood into more available nutrients. Woody material helps to boost microbial activity to do just this.

The bag had a rich, woody aroma but did not smell of raw or partially decomposed manure. It was a dark, rich brown verging into almost black.

A handful of the soil felt light and porous with a slightly damp feeling to it. There was a trace of dark residue left on the fingers after rolling a handful through the fingers and getting a feeling for it.

Kellog's Potting Soil Closup

On closer inspection, it is easy to see the woody residue of various sizes. Even though it is advertised as a soil, it was fairly light in texture without the more solid structure needed for long term growing of plants.

The white mold can be seen in the top right of the photo.

Organic Choice Potting Soil

The next bag we opened was Miracle-Gro Organic Choice. We also picked this up at Lowe’s and have seen an impressive selection of Miracle-Gro products at Home Depot as well, so any big box store will have this line. We’ve also seen this brand at every garden center, hardware store garden aisle and landscaping supply store we’ve visited. It’s hard not to find them.

Again, the word “Organic” is used as a marketing tool in the word choice for the name. This is advertised for use with in-ground vegetables, fruits, flowers and herbs. It has the “Natural & Organic” term next, above a statement that it will grow fresh vegetables in your backyard.

So far, pretty standard stuff and not really any different than the next pile of bags at the big box store.

Our concern with this Miracle-Gro product is much the same as we mentioned in our Seed Starting Mix article -their blend of plant food emphasizes vegetative growth and strong flowering, without the nutrients for fruit or food production. We have seen numerous gardeners with tomato plants growing lush, dark green leaves and covered in flowers but not producing a single tomato, or very few.

Organic Choice Potting Soil Container Warning

Looking at the back of the bag, we were surprised to see this product was not recommended for container gardening. It is also interesting to see the warning to wear gloves when using Organic Choice.

It’s labeled as “garden soil” on the front, but on the back the instructions say to mix 3” of Organic Choice with 6” of native soil, mix well to avoid a stratified layer, then plant. These instructions combined with the not for containers seems to indicate this is not a full potting soil and more of a soil amendment or fertilizer.

Organic Choice Potting Soil Ingredients

The ingredients listing says it is formulated with organic materials but doesn’t specify if “organic” means organic as in containing carbon, or organic as in certified organic.

It has much the same ingredients – forest products, compost, composted manure and pasteurized poultry litter. In addition it lists peat humus and sphagnum peat moss which are more commonly associated with seed starting mixes than potting soils.

The ingredients do vary regionally, which they do specify.

We searched the OMRI listing to see if this, or any, Miracle-Gro product was listed and found this is OMRI listed, along with several other products. This is somewhat surprising, as most other manufacturers proudly display the OMRI listing label. Another interesting detail is this has no restrictions, unlike Kellogg’s Amend. It is listed under fertilizer and soil amendments, which makes more sense of the instructions to mix with native soil.

Organic Choice Potting Soil Closeup

On opening the bag we noticed it was moist with a dark brown, rich earth color. There was woody material present, but seemed a bit more integrated and had an earthy, soil based aroma. There was no indication of partially composted manure or off odors.

It didn’t have any mold indication and a handful of the soil had more of a substance to the texture, while still being light and fluffy. There were smaller or finer components to the mixture.  There was less of a dark residue on the fingers after handling a handful for inspection.

Organic Choice Potting Soil Closeup

Closer inspection shows the more even distribution of size, along with the dark brown or earthy color. This seemed to be closer to a replacement soil but with enough lightness to allow good root development.

Square Foot Potting Soil

Square Foot Potting Soil

The next bag was Garden Time Square Foot Garden Soil from Gro-Well Brands. They are local to us, being based in Tempe, AZ. This was bought at Lowe’s and we’ve seen it at Home Depot also, and have seen garden forum threads where it is possible to special order it online in different quantities. We also saw it at our local True Value Hardware store in the garden aisle, with a different design bag – so it is probably also available in independent garden centers as well.

We have used this particular mix for a few years now with good results. We primarily use it as a seed starting mix and transplanting medium, but have experimented with it as a complete soil – like the bag’s labeling says – and have been pleased with the results.

Having said that, it isn’t perfect either and makes many of the same claims as the other brands. The “Natural & Organic” label is prominent on the bag, even though this is not OMRI listed. Some of the other claims are “Proven Formula for Optimum Growth” and “Great for Vegetables”. It does say “ready to use” and doesn’t need mixing with native soils, something that might be helpful for a container gardener with a small patio or apartment balcony.

Square Foot Potting Soil Ingredients

Square Foot Potting Soil Ingredients

The ingredients are compost, peat moss, coconut coir, vermiculite, bloodmeal, bone meal, kelp meal, cottonseed meal, alfalfa meal and worm castings. The peat moss, coir and vermiculite are classic seed starting mix ingredients, with the compost, different meals and worm castings adding nutrients to the soil for the plants growth and health. We use this as both a seed starting mix and potting soil or transplant soil because of the nutrients, which are lacking in straight seed starting mixes.

The same concern we voiced above at the vagueness of what is in the compost is valid here as well. In reading around a bit, I haven’t come across Gro-Well Brands using bio-solids in their compost, which is good news. On the other hand, that doesn’t mean the compost is organically sourced and not feedlot manure, but it’s a step in the right direction.

The more extensive list of ingredients give this some substance in nutrition so it can be used as a transplanting medium, a potting soil or as a complete standalone soil.

As another plus, we’ve not experienced seedlings dying when transplanted into this mix, nor have our customers said anything.

Square Foot Potting Soil Closeup

On opening the bag, the soil is slightly moist with a very dark, almost black color. It had almost no odor and felt light in weight but with some substance. This makes sense with the compost being 30 – 40% and much of the rest made up of lighter weight seed starting ingredients that have no odor of their own. The shiny vermiculite specks are easy to see and the texture is fairly even without lots of larger, identifiable chunks of wood.

A handful of the soil showed more of the smaller size particles making up the mix with an even and light feel to it. There was a trace of black residue on the fingers after a handful for inspection.

Square Foot Potting Soil

Square Foot Potting Soil

 A closer inspection shows the darker color, with the specks of vermiculite showing through.

Garden Time Potting Soil

Garden Time Potting Soil

The last bag was also from Gro-Well Brands – Garden Time Potting Soil. This was also bought from Lowe’s, and is available in big box stores. It may be regionally available in independent garden centers with a different bag.

The same technique of word use – “Natural & Organic” was in play, but the other trigger words were missing. This is advertised as an all-purpose potting soil for indoor and outdoor use in containers and garden beds, as well as for transplanting.

Like the Square Foot Gardening soil, this is not OMRI listed.

Garden Time Potting Soil Ingredients

Garden Time Potting Soil Ingredients

The ingredients are different, with fewer of the seed starting ingredients and less of the nutrient amendments. It does have peat moss and coconut coir fiber, common in seed starting mixes, but is without the perlite and such.

The standard forest wood products are there, as well as the compost listing again. What we found interesting is the addition of sand as the last ingredient.

Garden Time Potting Soil Closeup

Garden Time Potting Soil Closeup

When opening the bag we noticed this mix had a more woody aroma and was less earthy. It was also the driest of the mixes, leaving almost no residue on the hand after sifting through a handful of mix. It wasn’t dry, just much less moist than the other mixes. It had more substance and weight to the mix, probably as a result of the sand. This mix looked, smelled and felt the woodiest of the ones we inspected. It had no odor of compost or manure at all, only slightly of decomposed wood.

One thing we immediately noticed with a handful of soil is the white specks in the mix. In looking closely at them, they look much like perlite even though there is none listed on the ingredients. This could be an older bag with a new mix formulation, or a mistake in adding perlite to this mix. The perlite isn’t a negative, but the fact it isn’t listed in the ingredients makes us wonder a bit.

Even with this, the mix looks like it would be good as an amendment to loosen up native soils. The overly woody composition would be beneficial as it decomposed more, but might not add much to this season’s growth. 

Garden Time Potting Soil Closeup

Garden Time Potting Soil Closeup

A closer look shows the woody texture and color with the white specks of what looks to be perlite throughout.

Potting Soil Cost Chart

Potting Soil Cost Chart

In looking at the related costs, a couple of things stand out. The two best-looking soil mixes are also the most expensive – Miracle-Gro and the Square Foot Gardening Soil. They are also the smallest size bags. When adding in the positive benefits of an OMRI listing, the Miracle-Gro becomes the initial winner – something that surprised us.

In making a recommendation, an OMRI listing helps to assure a home gardener that the materials and ingredients used are of better quality and higher nutrient content than a non-listed mix. With that said, we would not recommend avoiding mixes which aren’t listed if you can be sure the ingredients meet reasonable standards. For example, compost from a neighborhood friend’s horses won’t be able to be OMRI listed, but would probably be excellent compost if the horses are fed well and wholesomely. The same would go for a grass-fed farmer in your area, who doesn’t feed growth hormones or regular antibiotics.

From this list, our two choices are the Miracle-Gro Organic Choice Garden Soil and the Square Foot Gardening Soil, with the others being a distant second choice if the first two weren’t available. This is conditional upon our testing some seedlings in each of these to see if they can actually support healthy seedling growth, but that will be another article!

For you, the best choice depends on what is available in your area, the amount of potting soil needed and what you can afford. Some gardeners, like ourselves, much prefer to make our own compost with multiple amendments to create a complex and wonderfully fertile soil amendment, while others simply don’t have the space or availability of materials. Some better options include creating a composting system as part of a community garden, or partnering with a friend or neighbor who has the space and is willing to boost their garden’s fertility. You might offer to do the work in setting up and maintaining the compost in return for some of the finished product for your garden.

Now you’ve got an overview of what to look for and be aware of when shopping for potting mixes, what are your thoughts and experiences? Do you have a dependable “go-to” potting mix you’ve used and loved for years? Or, do you have a tried and true recipe for mixing up your own potting soil that has never let you down? Please share!

Square Foot Potting Soil Closeup

Seed starting mixes can be confusing – there are so many at different price points; who’s to know what’s good and what’s junk? Is the extra expense worth it, or is the cheapest mix just as good?

We looked at a few examples on the market to see what is available from a range of prices and suppliers. Starting with the big box stores and going to a local hardware store with a good gardening selection and then to a garden center, we chose a representative sample to give you a good starting point in choosing what to use for your seed starting.

This is in no way meant to be an exhaustive or comprehensive review of all available seed starting mixes. From what we can tell, there are many different brands and types of seed starting mixes. We suspect that a few companies are producing many of the re-bagged or re-branded mixes, much like there are exactly two car battery manufacturers in the US, selling dozens of brands of batteries through different outlets. Our goal is to provide you with an educated overview of some middle of the road seed starting mixes so you will be better informed when confronted with the “Great Wall” of seed starting mixes at your local garden center. 

Along the way, we found seed starting mixes are seemingly designed to be confusing – especially when they are stacked next to each other in the garden section of the big box store or in the garden center. None of them were the same size, so easily comparing costs while in the store was difficult, requiring converting different prices to the same volume. We chose a quart size as the standard for the seed starting mixes, as most home gardeners will be using smaller amounts than market growers.

Another interesting thing we found was the labeling on each bag and the claims made. Some had the word “Organic” prominently displayed or used as part of the name, with no verification that the contents were, in fact, organic. “Natural” was also strongly used, with no substantiation.

In addition to the seed starting mixes, we have included a potting mix we’ve started seeds in for several years and have recommended to our customers. This is included as a reference point, as gardeners in some areas won’t be able to use a potting soil to start seeds due to high humidity and the associated fungi and mold challenges. Others, like us, will be able to use it to their advantage.

What are seed starting mixes and do I need one?

Seed starting mixes are not soil, they are blended to create a good environment to get the seed germinated and into the seedling stage, where it is transplanted into a potting soil or garden soil. For a closer look at the components that typically make up seed starting mixes, read Seed Starting Media for the Home Gardener.

Not everyone needs seed starting mixes, some gardeners do very well starting their seeds in potting soil or a rich garden soil. This often saves the work and stress of transplanting, but if you need a sterile soil because of mold or fungi pressures, then seed starting mixes will really help. Other gardeners just trust a sterile seed starting mix and have had good results for their garden.

Let’s take a look!

For all of the photos, click to enlarge them for more detail. 

Jiffy Seed Starting Mix

Jiffy Seed Starting Mix

First up is Jiffy “Natural & Organic” Seed Starting Mix. We bought this at our local True Value garden center, so it should be available at independent garden centers and possibly the big box stores. There are several interesting things about this seed starting mix. First off, there is no ingredients listed, either on the bag or on Jiffy’s website. Second, this is an OMRI listed product, meaning it is approved through the Organic Materials Review Institute (OMRI)

OMRI is an international nonprofit organization which certifies which input (fertilizer, herbicide, pesticide, etc.) products are allowed for use in certified organic agriculture. OMRI Listed® products are allowed for use in certified organic operations under the USDA National Organic Program. This is a big deal, there is no way to buy or sneak a product in and most companies will prominently display the OMRI listing on their bags, as you’ll see below.

Jiffy doesn’t mention it, or list the ingredients. With the OMRI listing, we feel pretty comfortable in using this, but would like to see what makes up the seed starting mix.

Here is what the bag looks like. On first read the “Natural & Organic” label is somewhat misleading, especially with no mention of the OMRI listing. The bag has 12 quarts for $6.99, so not a bad price, especially for a smaller home gardener who will use less than one bag to start their tomato, pepper and eggplant seeds. 

Jiffy Seed Starting Mix Closeup

Jiffy Seed Starting Mix Closeup

An initial look at the soil shows what looks to be some coconut coir, possibly some peat moss, perlite and maybe some compost, but it’s hard to be sure. It had a good, rich soil aroma and was finely textured with no large lumps or woody chunks in it.

Jiffy Seed Starting Mix

Jiffy Seed Starting Mix

Here’s a closer inspection. 

Overall, we were pleased at what we saw, with the caveat of wishing to know what the ingredients were making up the mix. On the plus side, OMRI listing is very good – indicating it is accepted for certified organic agriculture.


Miracle Gro Seed Starting Mix

Miracle Gro Seed Starting Mix

Miracle Gro Seed Starting Potting Mix was next up. The labeling seems to be trying to straddle the seed starting mix/ potting soil applications without specifying if it is suitable for both. The bag says it is enriched with Miracle Gro, which is no surprise, and the mix is excellent for starting cuttings. The bag has 8 quarts and is $4.77 at Lowe’s or Home Depot, which is enough for a small gardener to start seeds with. This mix is not OMRI listed. Here is Miracle Gro’s online listing. 

Our concern with Miracle Gro is their blend of plant food emphasizes vegetative growth and strong flowering, without the nutrients for fruit or food production. We have had numerous customers call or email asking why their tomato plants had such lush, dark green leaves and were covered in flowers but not producing a single tomato, or very few. When we asked if they were using Miracle Gro, they seemed shocked that we could know what they were using!


Miracle Gro Seed Starting Mix Ingredients

Miracle Gro Seed Starting Mix Ingredients

The ingredients are listed – peat moss, perlite, Miracle Gro fertilizer and a wetting agent. Not terrible, but not the greatest either. If you’ve read Starting Seeds at Home – a Deeper Look, you remember that during germination, seeds have no need for fertilizers as they carry everything they need to sprout and establish a seedling inside the seed coat. The fertilizer might be beneficial during the seedling phase, but more soil nutrients are definitely needed to sustain a healthy plant, so this is not a seed to garden transplant mix. The wetting agent will be beneficial in the germination stage, but could contribute to mold and fungal issues for the seedling if the gardener isn’t aware and careful in not over watering and inadvertently saturating the soil, which the wetting agents will make worse.

There is valid concerns raised about the harvesting of sphagnum peat moss from Canada as being sustainable or not. It takes peat moss bogs several hundred to a thousand years to mature, depending on the conditions, so it is hard to “sustainably” manage them.

Miracle Gro Seed Starting Mix Closuep

Miracle Gro Seed Starting Mix Closuep

Looking at the soil it was fine and fairly light with some perlite easily seen among the peat moss. It looks a bit chunky, but the feel wasn’t. It did seem to have a few larger chunks of material, but that shouldn’t matter in starting seeds.

Miracle Gro Seed Starting Mix

Miracle Gro Seed Starting Mix

Not a bad seed starting mix, and we would take this over several store brands we’ve seen.

Black Gold Seed Starting Mix

Black Gold Seed Starting Mix

Black Gold Seedling Mix is another of the seed starting mixes listed by OMRI, and it says so on the top right side of the bag. Black Gold is a well known supplier for hydroponic growers and would be considered one of the premium or super-premium seed starting mixes.

We sourced this from True Value, so it should be available from an independent garden center but probably not from the big box stores. The bag has 16 quarts for $6.99, so is a good value with enough to start seedlings for a very large garden or for sharing between a couple of neighbors or a community garden. Black Gold’s online listing. 

Black Gold Seed Starting Mix OMRI Listing

Black Gold Seed Starting Mix OMRI Listing

In addition to the OMRI listing, the label shows this seed starting mix to be enriched with silicon for thicker stems and improved root mass. While it is true that silica and silicon are important components to strong cell, stem and root growth, there is no mention of the silica in the ingredients. This might be a marketing approach, or it could be something worthwhile, but the bag doesn’t expand on the benefits.

Black Gold Seed Starting Mix Ingredients

Black Gold Seed Starting Mix Ingredients

Black Gold’s ingredients are pretty standard for seed starting mixes; peat moss, perlite, dolomite lime and Yucca extract as the organic wetting agent. Dolomite lime is calcium magnesium carbonate and increases the pH of soil, but also aids in organic decomposition. It is high in magnesium and calcium, which could be good for acidic soils but could be trouble for alkaline soils like we have in the West. The amount of dolomite lime is probably small and wouldn’t cause much of an effect in the amounts used in seed starting mixes, but might not be the best use as a garden or container amendment.

It is good to see what is used as the wetting agent – Yucca extract.

Black Gold Seed Starting Mix Closeup

Black Gold Seed Starting Mix Closeup

The appearance confirms what we would expect to see from the ingredients – lots of white perlite specks on a very dark peat moss background. It is light and fluffy, allowing good root penetration and establishment.

Black Gold Seed Starting Mix

Black Gold Seed Starting Mix

Because this is OMRI listed, we would choose it over a non-OMRI listed seed starting mix.

Square Foot Potting Soil

Square Foot Potting Soil

The final comparison is included even though it is labeled as a potting soil and isn’t one of the seed starting mixes. Garden Time’s Square Foot Gardening Potting Soil is about as close as you can come to a complete garden soil in a bag, and we’ve used it for a number of years to start seeds, transplant seedlings into and have been quite happy with the results.

The “Natural & Organic” label is prominent on the bag, even though this is not OMRI listed. Some of the other claims are “Proven Formula for Optimum Growth” and “Great for Vegetables”.

We sourced this from Lowe’s and have bought it at Home Depot in years past. We also saw it with a different bag in True Value. The company name is Garden Time and is a part of Gro-Well brands in Tempe, AZ. The bag is 1.3 cubic feet, which translates to 38.9 quarts for $8.98, making it by far the most cost effective seed starting medium. Garden Time’s Square Foot Gardening online listing. 

Square Foot Potting Soil Ingredients

Square Foot Potting Soil Ingredients

The ingredients are compost, peat moss, coconut coir, vermiculite, bloodmeal, bone meal, kelp meal, cottonseed meal, alfalfa meal and worm castings. The peat moss, coir and vermiculite are classic seed starting mix ingredients, with the compost, different meals and worm castings adding nutrients to the soil for the plants growth and health. We use this as both a seed starting mix and potting soil or transplant soil because of the nutrients, which are lacking in straight seed starting mixes.

Square Foot Potting Soil Closeup

Square Foot Potting Soil Closeup

Looking at the mix it’s easy to see the vermiculite granules, which are gold colored specks instead of the white of perlite. It has a lot darker look due to the compost and additional nutrients.

Vermiculite is mica expanded by intense heat and is used much like perlite to retain water, decrease soil compaction and improve water retention.

Square Foot Potting Soil

Square Foot Potting Soil

Here’s the closeup look. 


Seed Starting Mix Cost Chart

Seed Starting Mix Cost Chart


The breakdown of the costs per quart tell a story – they are in the ballpark of each other, with the exception of our rogue potting soil thrown in. Most of them have similar ingredients, with a few different additions.

If we had to buy a dedicated seed starting mix and couldn’t use the potting soil we do, our choice would be one that lists the ingredients and is OMRI listed. Having said that, any of the seed starting mixes with the primary ingredients of coconut coir (our preference) or peat moss with perlite or vermiculite would make a satisfactory seed starting mix.

What you choose will depend largely on the availability for you, how much you need and the cost.

As part of the test, we are starting seeds in all four mixes and have documented our results in Seed Germination Observations. Our Potting Soils article gives you some details on what to look for in good soils to transplant your young, tender seedlings into. 

Aphids on Leaf

Aphids and Nitrogen

Aphids are one of the perennial pests that gardeners deal with, often with very mixed results. What works one year seems to fall flat on its face the next, with the reverse also being true. Aphids are tiny, soft bodied insects that have piercing, sucking mouthparts to feed on plant saps. They live in colonies, most often the underside of leaves and where the tender young growth is on a plant.

By themselves, aphids rarely outright kill a plant but they can inflict serious damage to both its flowers and fruit. It only takes a few aphids sucking on a young flower or fruit to weaken it or damage it beyond being edible. The sap they extract weakens the plant, stunting its growth and food production. The aphids can also be carriers or vectors of diseases or viruses, which they infect the plant with as they pierce the cell walls and extract the plant sap. Just a few seconds is all it takes for a virus to transfer from the mouth of an aphid to the plant.

Aphids will often arrive in a garden or on a plant by flying in. A small number will arrive and leave their wingless young who feed on the plant and immediately lay eggs, increasing the population quickly. The adults will then fly off and repeat this several times. This is why gardeners will often complain that the aphids overwhelmed the garden “overnight”. Each adult aphid can produce up to 80 offspring every week!

So what can be done about these insects? There are several methods of dealing with them, broken down into two main approaches – prevention and treatment. The prevention phase happens in the fall and early winter with soil testing and amendments that set the stage for success the next growing season. Treatment is just that – what to do when those pesky insects show up uninvited in your garden!

Aphids Love Nitrogen

Let’s start at the beginning, shall we? Nitrogen is a big, big player in the aphid dance. Aphids love nitrogen, plain and simple. They are attracted to the soft growing parts of a plant that are high in nitrogen, as it is a major factor in plant growth. Aphids are also really attracted to young seedlings, since everything on a seedling is growing and there is lots of nitrogen to be had.

Nitrogen plays a very important part in a plants growth as well as the content of its sap. Soils with excessively high nitrogen create very fast growing plants. This leads to rapid cell wall growth, which are elongated, thinner and much easier for the piercing mouth-parts of an aphid to penetrate than normal. The plant sap will also be high in nitrogen and will be especially attractive for the aphid. It is very important to understand that high nitrogen sap will be lower in overall sugar content – also known as brix – because nitrogen forms amino acids and proteins – such as chlorophyll – but specifically needs magnesium, phosphorus and carbon to form sugars. This can’t happen if there is excess nitrogen, as there aren’t enough of the other elements to form those sugars. Once the soil is amended with the correct nutrients, the plant will increase the brix/sugar levels and the aphids will die from sucking high sugar content plant sap as it is deadly – aphids can’t digest the sugars with no pancreas and thus die.

What all this means is that using high doses of chemical fertilizers will encourage aphids to call your garden home! Almost all commercial fertilizers are high in nitrogen and release their nutrients much faster than compost or other soil amendments, making aphid pressures much worse than they would normally be. They also contribute to lots of flowers with little fruit production or stunted and smaller than normal sized fruit.

It is interesting to note with soybean studies at Penn State University naturally occurring nitrogen-fixing bacteria – called rhizobia – provided a better form of naturally occurring nitrogen than the laboratory bred inoculated strains did. Plants growing in the naturally occurring rhizobia soils had markedly fewer aphids and stress than the inoculated ones. The amount of nitrogen provided by the lab developed rhizobia and the naturally occurring strains were the same, with the natural rhizobia having much lower aphid populations on the plants. They are continuing the study to see why this happens.

There is a concept at work here that we need to briefly discuss so that you can understand where we are going from here. The “Law of the Minimum” shows how interrelated many nutrients and elements are to healthy plants, not just the N,P and K that are listed on fertilizer bags.

The Law of the Minimum states,

“Plant growth is determined by the scarcest, “limiting” nutrient; if even one of the many required nutrients is deficient, the plant will not grow and produce at its optimum.”

Prevention and Preparation

The preventative method is to have a complete, comprehensive soil analysis done by a professional lab. I’ve mentioned these before, but they bear another – Crop Services International and Texas Plant and Soil Lab are great labs. They are thorough, friendly and will give you the info you need at a reasonable price. From this analysis, you will know exactly what soil nutrients, amendments and trace minerals are needed to eliminate a high nitrogen condition in your soil and plants, and by extension reducing the population and attraction of aphids.

Another, very simple method is to stop using commercially available chemical fertilizers! Without naming names, these come in a bag and sometimes have the word “miracle” attached to them. There are a number of brands that can be bought at any garden center or big box store in their garden section. Well-aged and decomposed compost – especially if you’ve worked with it how we discuss in our articles on compost – will give you a continuous supply of “soil food” to apply to your garden twice a year, in the early spring and again in the late fall. This compost with the amendments will slowly release the nutrients that the garden needs, along with attracting the biological elements in the soil that do the real work – earthworms, pillbugs, beneficial nematodes, fungi and all sorts of other hard-working critters that seriously improve the soil on a continuous basis.

Another aspect of prevention is cultural control, or removing the suitable environments where aphids can overwinter or establish an initial population to then swarm your garden. Standing weeds can be harbors of aphids, so remove them and remove dead plants from the garden in the fall. Don’t wait until the springtime to clean up the garden, as this can provide the perfect habitat for aphid eggs to be sheltered under. Inspect trees and bushes for aphid eggs in the fall, remove them by hand, vacuum or with a strong blast of water.

Treatment Options

Now that you’ve got the prevention and preparation covered, what can be done if and when the nasty aphids arrive? This is where the treatment portion comes in, and it would be wise to prepare for this as well. Early detection is very important for successful treatment, as if the aphids get a toe-hold, it will be much more difficult to rid your plants of several sizable populations instead of just one or two small ones. The incoming flights of adult aphids are random, so consistent inspection is best. This is very easy, just flip over the top, youngest leaves of several plants and look for the clusters of small aphids on the underside. Look around bud areas as well. If you see any aphids, they will be in small clusters or colonies and can be easily dealt with at this stage. Crush them by hand or prune the leaves or buds to remove them. Once you see the first small populations, go back and be very thorough with the rest of your plants, taking the time to examine them well. Trust me on this, the time spent now will save you much heartache, back ache, time and frustration in the very near future!

Aphids will excrete “honeydew” – a sweet, sticky substance – and is sometimes fed on by ants. This isn’t always the case; but in your inspections look for travel pathways of ants up and down the plant where the aphid colonies are. Sometimes the ants will lead you to the aphids that you would have otherwise missed.

Anytime you see any aphids, it is a good practice to set out yellow sticky traps. Aphids are highly attracted to the color yellow, which lures these little monsters into the traps. They are available at most garden centers and will be in squares or strips. Place several of them in the area where you find the aphids, and put out a few more than you might think. They are good inexpensive insurance.

If the aphids have colonized more than about 5% of the bud and young leaves of a plant, or are on more than that amount of your total garden plants, then it’s time for the next round of action.

Beyond physically removing the aphids, there are two approaches to treatment – biological and chemical controls. Biological controls use biology – predatory insects – to eat and control the aphids. Chemical controls are just what they sound like – using sprays of varying toxicity to reduce the aphids’ population.

Using the biological approach first combined with a non-toxic soapy spray is often the knockout punch needed for smaller aphid infestations. Releasing parasitic wasps that lay their eggs inside the aphids, ladybugs, lacewings, soldier beetles and the syrphid fly larvae are all highly effective if done in time, before the aphids’ population explodes. One of the best resources for biological controls is Arbico Organics. They will help you decide what species will work best for your garden situation, how many to release and how many times. Keep in mind that the goal is not to completely eliminate every single aphid, as then the beneficial and predatory insects won’t have a food source. The goal is to keep the aphids controlled, where they aren’t damaging the plants.

Remember, weather can be on your side when dealing with aphids. Heat and high humidity can really knock them back as they are fairly fragile and die off in droves when temperatures are over 90°F.

Soap sprays work by smothering the aphids by coating their skins. Start with a completely harmless soapy water spray like Dr. Bronner’s – using a tablespoon per half gallon in a hand sprayer. Make sure to apply the spray when beneficial insects aren’t around, as they will also be affected. From there, work up to an insecticidal soap like Safer Brand or horticultural oil such as neem oil. With both of these approaches, make sure to cover the underside of the infested leaves well for the smothering effect to work. These are contact controls, and depend on contact with the aphids to work, so they will need to be re-applied as often as needed until you’ve gotten control of the situation. This could mean once a day for a few days, then twice a week for a week or so, then tapering down to once a week. It might well take 2 – 3 weeks to really get a handle on persistent outbreaks, so be patient but persistent!

Moving up the toxicity ladder, multi part sprays such as our Home Garden Bug Solution work very well, but need to be used carefully as they do have a high level of insect toxicity even though they are made with no petrochemical ingredients. If you do need to bring out these big guns, test in a small area to see the effects before spraying your entire garden!

Hopefully you now see that there are a number of ways to reduce and control the pesky aphids in your garden. It all starts with prevention and preparation with improving the soil and balancing the nutrients it needs. From there you now have several new tools in your “pest control” toolbox to help you manage aphids in your garden next growing season.

Blossom End Rot

Blossom end rot affects mainly tomatoes and peppers, but can affect other fruiting crops such as eggplant, watermelon and summer squash. This is a perennial problem, meaning that as a gardener, you will deal with this yearly in your garden. There are two approaches to working with blossom end rot – prevention and reaction, or a primary and secondary solution. Unfortunately, most gardeners only realize they have a problem when the fruit are showing black spots on the end. This is the acute phase – once there are problems – and immediate action is needed to prevent further damage to fruit that is just beginning to set.

We will look at the underlying causes of blossom end rot, along with what happens and what can be done about it in the prevention as well as the acute phase.

As mentioned, blossom end rot will affect more than just tomatoes and peppers, but we will focus mainly on those as this is what most gardeners’ experience. Just tuck the other varieties into the back of your mind, and you’ll have a jump start if you see it strike them. In reality, the prevention will most likely have a beneficial effect for everything as you will be creating an environment that won’t support the cause of the problem!

Blossom end rot is caused by a lack of enough available calcium in the fruit at the blossom end. What most often alerts us is a black spot or patch at the blossom end of the tomato or chile, opposite of the stem. This black spot is a secondary issue caused by a fungus attacking the weakened fruit. Contrary to what many think, we aren’t aiming for the eradication of the fungus and resulting black patch, but fixing and preventing the cause of the problem. Correcting the underlying issues that lead to the weakened fruit will automatically prevent the fungus from being able to attack.

Let’s start with the problem and work backwards, to better understand what is needed for both an acute fix and a preventative approach for blossom end rot. Calcium is a very important part of the growth process for plants and the proper development of high quality, tasty fruit as it contributes to healthy cell wall growth, insect resistance and helps to regulate many cell processes. Calcium is non-mobile in the plant once it is imported, meaning the plant can’t move it from one part of itself into the fruit, or from one part of the fruit to another. Thus, the tomato or chile plant needs a continuous supply of calcium as it grows, flowers and produce fruit all through the season.

Blossom end rot usually occurs early in the season with the first or second flush of fruit. It happens just when the plant is at maximum growth and is putting on the first fruit, with a second set of flowers on the way. It is in high gear and needs all of its nutrients available to be healthy, resist pests and disease, as well as grow lots of delicious tomatoes and peppers. The key to preventing blossom end rot is to supply a sufficient, steady amount of calcium to the plant so it can be transported into the fruit continuously. Problem solved!

Not so fast, just how can we make sure that the plant has a steady supply of calcium?

Early Blossom End Rot

Early Blossom End Rot

Here is where we branch off into the two approaches – the primary and the secondary. The primary, preventative approach is to have enough calcium in the soil that feeds the roots and is transported to the fruit throughout the growing season. That calcium in the soil must be ‘available’ meaning that the roots can actually absorb it and transport it where it is needed. Available means that it isn’t tied up by another mineral or a pH level that won’t ‘let go’ of it. There is more to the story than just adding a calcium amendment to the garden bed!

A very good example of this is where we live in central AZ, there is a decent amount of calcium in the soil that plates out on faucets and glassware as a calcium deposit. Conventional wisdom says not to worry about calcium because it is everywhere. That’s true, but the challenge we have is the pH of the soil is fairly alkaline at 8+ on the pH scale, so the calcium is ‘tied up’, or not available to the plants. This is proven by the weed populations we typically see that only grow in calcium deficient soils.

So what can be done? A comprehensive soil test is one of the best, first steps to take. This is much more than the simple NPK type of test done by university extension offices or the do-it-yourself test kits bought at the local garden center. A complete soil analysis is one that is collected and sent off to a recognized, professional lab that sends back a report on every mineral found along with recommendations on what direction to go and what nutrients to add in what form. They will usually cost from $25 to $75 range, depending on what analysis and information you need. There are several of these labs in the US; the two that we’ve worked with and are familiar with are Crop Services International  and Texas Plant and Soil Lab. From this, you will have a very good indication of where to go next.

Fall is a great time to get your soil tested and amended in preparation for next spring’s season for a few reasons – the soil testing labs are generally not as busy, so results are quicker; and soil amendments will need some time to become integrated and available into the soil nutrients, so fall gives you the needed time, and it is easily incorporated into the traditional fall garden cleanup and prep.

Calcium is closely tied with magnesium, and this will be indicated on the soil analysis. More acidic soils, such as those generally found in the eastern states, will benefit from lime or calcium carbonate, while the more alkaline soils in the western states will need gypsum or calcium sulfate. Lime tends to raise the pH, while gypsum tends to lower it.

Water plays an often overlooked, but equally important, role in the blossom end rot saga. Inconsistent levels and rates of water will greatly vary the amount of calcium and other nutrients available to the plant, increasing the chance of diseases attacking the fruit like blossom end rot. This is one of the reasons we talk a lot about a drip system on a timer – it really helps even out the moisture levels in the soil and greatly reduces the stress on the entire garden, with the happy result of lowered amounts of nutrient and stress related problems. Of course, the weather can also play havoc with all of our carefully laid plans, as heavy and sudden rainfall can cause blossom end rot and splitting of tomatoes, along with a noticeable ‘wash-out’ of flavor and taste.

This is where the acute or secondary approach is needed. Calcium carbonate tablets, or anti-acid tablets (Tums or the equivalent) work great when a couple of them are inserted at the base of a tomato or chile plant, where they will dissolve and make the calcium available to the plant in just a few hours, saving this flush of fruit if done right after the rains, or the next set if done when blossom end rot is first noticed.

Another approach is to feed calcium directly to the roots through the drip system as a liquid fertilizer, usually with calcium chloride or calcium nitrate. This approach works very well in offsetting one of the most overlooked causes of blossom end rot – great weather. That’s right – excellent weather with moderate temperatures and lots of sunshine put the plants into overdrive, and their rapid growth can often simply outstrip the amount of available calcium in the soil, even if you have been proactive last fall. The calcium just cannot be taken up out of the soil fast enough, so feeding through the drip system can be a big bonus during these times. The secondary approach will always be needed, even if you’ve done your homework and amended the soil the previous fall.

Calcium isn’t absorbed very well by the leaves of a plant, especially older leaves. The roots are much better at absorption, plus they can transport the calcium faster than through a foliar approach. For these reasons, stay away from trying a foliar spray to supply calcium to your tomatoes.

Blossom end rot won’t ever quite go away, because of the reasons you’ve seen here. With some knowledge and practice, you can easily create a much better environment in the soil that supports the plants much more fully and then use the supplemental approach to keeping the calcium levels high enough to minimize blossom end rot and keep more of your hard work for your dining table instead of as scraps for the chickens or compost pile!

Adding Sardines

Fish Emulsion Feeds Your Plants

Fish emulsion has been a go-to product for the organic and natural home gardener for years now, as it has proven its effectiveness in feeding the soil and plants with biologically available nutrients while increasing soil and microbe health. The main drawback to commercial fish emulsion is the cost and the smell. While we can’t do anything to help you with the fishy smell, we can help you make your own fish emulsion that will not only save you a lot of money in product and shipping costs, but just might make a better product than you can buy! This homemade fish emulsion will almost always supply more nutrients than commercially available, but also supplies much more beneficial bacteria from the brewing process. In order to ship, commercial emulsions have little to no active bacteria, because they make containers swell as they continue to grow!

All fish emulsions are good organic nitrogen sources, but they also supply phosphorus, potassium, amino acids, proteins and trace elements or micro-nutrients that are really needed to provide deep nutrition to your soil community and plants. One of the benefits of fish emulsion is that they provide a slower release of nutrients into the soil without over-feeding all at once. It is usually applied as a soil drench, but some gardeners swear by using it as a foliar fertilizer as well.

Adding seaweed or kelp to the brewing process adds about 60 trace elements and natural growth hormones to the mix, really boosting the effectiveness of the fish emulsion. The seaweed or kelp transforms the emulsion into a complete biological fertilizer. Beneficial soil fungi love seaweed. Dried seaweed is available at most oriental grocery stores. The amount you need to add will depend entirely on your soil needs. If you are just getting started in improving your soil, add up to a cup of dried seaweed or 2 – 3 cups fresh. If your soil is doing pretty good then add about 1/4 to 1/2 cup of dried seaweed and up to 1 – 2 cups fresh.

Making Your Own Fish Emulsion

Fish Emulsion Ingredients

To make your own, obtain a dedicated 5 gallon bucket for this project. Trust me; you won’t want to use it for anything else once you’re done! Buy 10 cans of herring type fish such as sardines, mackerel or anchovies. Sourcing these from a dollar store or scratch and dent store makes perfect sense, as you don’t care about the can and aren’t going to eat them.

Zeus with Compost

Rich, well-aged compost is a key ingredient to great fish emulsion, as it has lots of active microbes and other biological life which will help kick-start the fermentation of the fish. A good compost hunting dog is not required, but really helps. We’ve found the Doberman breed to be very helpful in finding just the right compost! Dalmatians do a pretty good job as well. 

Adding Compost to Bucket

Fill the bucket half full of well-aged compost, aged sawdust or leaves, or a combination of all three. You are looking for the dark brown, crumbly compost that smells like rich earth. 

Adding Water to Compost

Add water to about 2 inches from the top…

Adding Sardines

add in the cans of fish, rinsing the cans with the water to make sure you get every last drop of the “good stuff”. The juices or oils in the can will breed beneficial microbes and supply extra proteins.

Blackstrap Molasses

To supercharge the brew, add 1/4 to 1/2 cup of blackstrap molasses to provide sugars and minerals to the fermenting process. The sugars also help control odors. Next, add the chopped or powdered seaweed to the mix. If you need extra sulfur and magnesium, add 1 Tbs Epsom salts.

Stirring Compost and Sardines

Stir well and cover with a lid to control the odor, but not tightly as it will build pressure as it brews.

Be Careful!

NOTE – Make sure that flies do not get into the bucket or you will have a marvelous breeding ground for maggots! One solution is to drill several holes in the lid for the bucket and glue screen mesh on the inside of the lid, allowing air flow but keeping those pesky flies out. Remember, you are brewing the most delicious aromas the flies have ever smelled!

Let it Ferment

Let it brew for at least 2 weeks, a month is better. Give the contents a good stir every couple of days.

Once it has brewed for a month, it is ready for use!

There are a lot of ways to use this brew, so be creative. Some folks will strain off the solids, put them in the compost pile and use the liquid as a concentrated “tea” to be diluted with water. Others keep everything together and stir the mix well before taking what they need. What you have is a supply of bio-available nutrients in a soluble form.

Use as a Soil Drench and Foliar Fertilizer

For a soil drench, use 2 – 3 Tbs per gallon of water and apply to the roots on a monthly basis during the growing season. 1 Tbs per gallon of water makes a good foliar fertilizer. Just make sure to apply it by misting during the cooler parts of the day, not drenching the leaves in the heat. Half a cup per gallon will give your compost pile a kick start.

This brew will keep for at least a year, but you might want to make fresh each season. If you need less than 5 gallons, halve or quarter the recipe. It will smell, so store it where the odor won’t knock you out. I don’t trust the “deodorized” fish emulsions, as to remove the odor, some component of the fish product was removed either physically or chemically and is no longer available as a nutrient.

Coffee grounds

Fresh Coffee Grounds Are Great Source of Minerals and Nutrients

Looking to perk up your compost pile? Do you drink coffee? You might be holding the answer in your hands this very moment, or at least part of the answer. Coffee grounds have been used for many years by those “in the know” to boost the quality of their compost, making a superior soil amendment for free. The grounds are considered part of the “green” portion of the composting, speeding up the decomposition process while keeping temperatures high enough to kill off pathogens.

Coffee grounds provide energy in the form of nitrogen to the hard working bacteria doing all of the work in the compost. They also encourage beneficial microbe growth, contributing to a healthier soil. Another benefit is the minerals added to the compost such as phosphorus, potassium, magnesium and copper – all very necessary to the growing process. Earthworms absolutely love coffee grounds, preferring them to other food sources and turning them into highly prized vermicompost. For many years coffee grounds have been thought of as slightly acidic, but recent research shows that the grounds are usually pretty neutral in pH, but have a very high buffering capacity. This means that whether the soil is acidic or alkaline, the grounds will bring the pH back toward neutral, so they are good for any soil types. The moisture holding ability is very beneficial for loose soils, yet it acts to loosen heavy clay soils at the same time.

Some gardeners have worked the grounds directly into the soil, but it is best to add them to the compost pile and let decomposition release their nutrients first, then add the aged compost to the garden soil, working it into the top 2 – 3 inches in early spring and late fall. The grounds can make up to 25% by volume of the compost, and be used as a manure replacement for gardeners who don’t have ready access to those sources. Some city gardeners make their compost of leaves, cardboard and newspapers for the carbon side with coffee grounds and fresh grass clippings supplying the nitrogen to keep the pile going. It is best to let the compost decompose or age for at least 6 months, with a year time-frame yielding a higher quality amendment that looks very much like soil all by itself.

Coffee Grounds and Composting

Coffee grounds perk up compost pile with nitrogen

Milk as Soil Improver

“Can raw milk make grass grow? More specifically, can one application of three gallons of raw milk on an acre of land produce a large amount of grass?”

David Wetzel is the person possibly most responsible for bringing the ancient practice of applying milk to the soil in order to improve the health, disease resistance, and productivity of the soil. As part of a 10-year study in collaboration with the University of Nebraska soil specialists and weed specialists as well as insect specialists have proven the effectiveness of milk as a soil improver.

It started with David having excess skim milk that he didn’t want to waste, so he started applying it to a pasture on his farm and noticed several oddities about that particular pasture. When his dairy herd was turned out on it, the butterfat content of the milk increased by 3-4% within 2-3 days of being in that pasture, every time. Not only that, but the herd needed fewer vet visits, maintained their weight better and the pasture recovered faster and produced more hay than other pastures. David contacted his next-door neighbor, Terry Gompert, an extension agent for the University of Nebraska about the phenomenon, and a multiple-year study was born. One of the additional benefits of spraying the milk has been a drastic reduction in grasshopper populations in the pastures, as the milk sugars are toxic to soft-bodied insects. One theory is that grasshoppers will leave healthy plants alone, as the milk feeds the plant as well as the soil.

The following article is from Ralph Voss, a student of David’s methods, followed by David’s own observations on what is working on his farm.

Mon, 2010-03-08

“This article appeared in the March 10, 2010, issue of the Unterrified Democrat, a weekly newspaper published in Linn, Mo., since 1866.  In addition to writing for the paper, Voss raises registered South Poll cattle on pathetically poor grass that he is trying desperately to improve.”

Nebraska dairyman applies raw milk to pastures and watches the grass grow

An Illinois steel-company executive turned Nebraska dairyman has stumbled onto an amazingly low-cost way to grow high-quality grass – and probably even crops – on depleted soil.

Can raw milk make grass grow? More specifically, can one application of three gallons of raw milk on an acre of land produce a large amount of grass?

The answer to both questions is yes.

Call it the Nebraska Plan or call it the raw milk strategy or call it downright amazing, but the fact is Nebraska dairyman David Wetzel is producing high-quality grass by applying raw milk to his fields and a Nebraska Extension agent has confirmed the dairyman’s accomplishments.

David Wetzel is not your ordinary dairyman, nor is Terry Gompert your ordinary Extension agent. Ten years ago Wetzel was winding up a five-year stint as the vice president of an Illinois steel company and felt the need to get out of the corporate rat race. At first he and his wife thought they would purchase a resort, but he then decided on a farm because he liked to work with his hands. The Wetzels bought a 320 acre farm in Page, Neb., in the northeast part of the state, and moved to the farm on New Year’s Day in 2000.

“We had to figure out what to do with the farm,” Wetzel said, “so we took a class from Terry Gompert.” They were advised to start a grass-based dairy and that’s what they did. “There’s no money in farming unless you’re huge,” Wetzel said, or unless the farmer develops specialty products, which is what they did.

In their business, the Wetzels used the fats in the milk and the skim milk was a waste product. “We had a lot of extra skim milk and we started dumping it on our fields,” Wetzel said. “At first we had a tank and drove it up and down the fields with the spout open. Later we borrowed a neighbor’s sprayer.”

Sometime in the winter of 2002 they had arranged to have some soil samples taken by a fertilizer company and on the day company employees arrived to do the sampling, it was 15 below zero. To their astonishment they discovered the probe went right into the soil in the fields where raw milk had been applied. In other fields the probe would not penetrate at all.

“I didn’t realize what we had,” Wetzel said. “I had an inkling something was going on and I thought it was probably the right thing to do.” For a number of years he continued to apply the milk the same way he had been doing, but in recent years he has had a local fertilizer company spray a mixture that includes liquid molasses and liquid fish, as well as raw milk. In addition he spreads 100 to 200 pounds of lime each year.

Gompert, the extension agent that suggested Wetzel start a grass-based dairy, had always been nearby – literally. The two are neighbors and talk frequently. It was in 2005 that Gompert, with the help of university soils specialist Charles Shapiro and weed specialist Stevan Kenzevic, conducted a test to determine the effectiveness of what Wetzel had been doing.

That the raw milk had a big impact on the pasture was never in doubt, according to Gompert. “You could see by both the color and the volume of the grass that there was a big increase in production.” In the test the raw milk was sprayed on at four different rates – 3, 5, 10 and 20 gallons per acre – on four separate tracts of land. At the 3-gallon rate 17 gallons of water were mixed with the milk, while the 20-gallon rate was straight milk. Surprisingly the test showed no difference between the 3-, 5-, 10- and 20-gallon rates.

The test began with the spraying of the milk in mid-May, with mid-April being a reasonable target date here in central Missouri. Forty-five days later the 16 plots were clipped and an extra 1200 pounds of grass on a dry matter basis were shown to have been grown on the treated versus non-treated land. That’s phenomenal, but possibly even more amazing is the fact the porosity of the soil – that is, the ability to absorb water and air – was found to have doubled.

So what’s going on? Gompert and Wetzel are both convinced what we have here is microbial action. “When raw milk is applied to land that has been abused, it feeds what is left of the microbes, plus it introduces microbes to the soil,” Wetzel explained, adding that “In my calculations it is much more profitable (to put milk on his pastures) than to sell to any co-op for the price they are paying.”

Wetzel’s Observations

Wetzel has been applying raw milk to his fields for 10 years, and during that time has made the following observations:

* Raw milk can be sprayed on the ground or the grass; either will work.

* Spraying milk on land causes grasshoppers to disappear.  The theory is that insects do not bother healthy plants, which are defined by how much sugar is in the plants.  Insects (including grasshoppers) do not have a pancreas so they cannot process sugar.  Milk is a wonderful source of sugar and the grasshoppers cannot handle the sugar. They die or leave as fast as their little hoppers can take them.

* Theory why milk works.  The air is 78% nitrogen.  God did not put this in the air for us but rather the plants.  Raw milk feeds microbes/bugs in the soil.  What do microbes need for growth?  Protein, sugar, water, heat.  Raw milk has one of the most complete amino acid (protein) structures known in a food.  Raw milk has one of the best sugar complexes known in a food, including the natural enzyme structure to utilize these sugars.  For explosive microbe growth the microbes utilize vitamin B and enzymes.  What do you give a cow when the cow’s rumen is not functioning on all cylinders (the microbes are not working)?  Many will give a vitamin B shot (natural farmers will give a mouthful of raw milk yogurt).  Vitamin B is a super duper microbe stimulant.  There is not a food that is more potent in the complete vitamin B complex than raw milk (this complex is destroyed with pasteurization).  Raw milk is one of the best sources for enzymes, which break down food into more usable forms for both plants and microbes. (Again, pasteurization destroys enzyme systems.)

* Sodium in the soil is reduced by half.  I assume this reflects damage from chemicals is broken down/cleaned up by the microbes and or enzymes.

* If you choose to buy raw milk from a neighbor to spread on your land, consider offering the farmer double or triple what he is paid to sell to the local dairy plant.  Reward the dairy farmer as this will start a conversation and stir the pot.  The cost for the milk, even at double or triple the price of conventional marketing, is still a very cheap soil enhancer.

* Encourage all to use their imagination to grow the potential applications of raw milk in agriculture, horticulture and the like – even industrial uses – possibly waste water treatment.

Microbes

The purpose of this story is to convince farmers and livestock producers in this area to look into the possibility of using raw milk, compost tea, earthworm castings tea, liquid fish or sea minerals or some combination thereof to boost production at an affordable cost. It’s my experience that people in the Midwest are to a great extent unaware of the benefits of microbes. If the first part of this story has caught your attention and you intend to consider the use of raw milk or any of the other methods, you need to learn about microbes and the best way I have discovered is a book co-authored by Jeff Lowenfels and Wayne Lewis, Teaming with Microbes.

In this story I cannot go into detail about microbes, the miniscule little critters that exist in abundance in good soil. There are four principal types of microbes – bacteria, fungi, protozoa and nematodes. To get an example of their size, consider that there are a billion bacteria in one teaspoon of good soil. The role of microbes is to consume carbon, along with other minerals and nutrients, and these are stored in their cells until their ultimate release for use by plants. Microbes also store water, which make them drought-fighters as well.

I realize this is an inadequate description, but you need to read the book.

Brix

Brix is another concept that is not widely understood in the middle of the country. Brix is the measure of the sugar content of a plant (that’s an oversimplification but good enough for this article) and is measured by a device called a refractometer. If your grass has a brix of 1, that’s cause for nightmares. Our grass is routinely a 1. Clover and johnsongrass might on occasion measure 4 or 5 in the middle of the afternoon on a bright, sunny day. That’s deplorable for plants that should be double or triple that figure.

It’s not just our farm that has grass that’s not fit to feed livestock. I communicate frequently with three young cattlemen from this area – Jeremia Markway, Bruce Shanks and Chris Boeckmann – and they have the same problem. Last summer we were singing the blues over lunch and decided our refractometers must be broken. Someone came up with the idea of measuring sugar water. We tried it. Boom. The refractometer measured 26. Our equipment wasn’t broken, only our grass.

About three months ago Markway discovered a short article on what Wetzel and Gompert had been doing in Nebraska with raw milk. He emailed the article to me and that’s what got me to do this story. An interesting thing is what Markway discovered about the impact of raw milk on brix levels. He has a milk cow and took some of her milk, mixed with water and sprayed on his pastures with a small hand sprayer. Where he sprayed, the brix level of the grass was raised to a level of 10. That’s a great start and was good news to Wetzel and Gompert, who had not been measuring the brix levels of Wetzel’s grass.

Compost Tea

Raw milk is not the only thing that will improve soil. Compost tea is a liquid made by running compost through a “brewer,” a device somewhat akin to a fish tank, in that oxygen is added to the water containing the compost and this action flushes the microbes out of the compost into the water. The resulting liquid is a “tea” that can be sprayed on pastures and crops, to their great benefit.

Two men that make extensive use of compost tea are Mark Sturges and David Herringshaw. These two have never met and until recently had not even heard of each other.

Sturges lives in western Oregon near the coast and for 10 years has had a business spraying compost tea on vineyards, cranberry bogs, fruit and nut trees and pastures. Sturges adds malt extract, kelp and seas minerals to his tea, and if he is spraying pastures, he adds molasses to build the bacteria content.

Herringshaw lives in the near-desert southeast part of Oregon at an elevation of 4,100 feet. He uses compost tea on his own land and has the brix level of his pasture and hay ground up to 22. That’s tantamount to feeding corn. Herringshaw attributes the high brix to the compost tea and also sea minerals, which he applies at the same time. He uses nothing else.

I have seen the compost Sturges produces. It is so alive it literally moves. I have not seen the compost Herringshaw makes at the other end of the state. I can only imagine how good it might be. He fortifies it with raw milk.

Think for a second what Wetzel said about using your imagination to grow the applications for raw milk. Herringshaw has already used his imagination.

Earthworm Castings Tea

This tea is identical to compost tea except that worm poop is substituted for compost. Almost everyone thinks tea from earthworm castings is great stuff, and some even think this tea is superior to compost tea. Earthworm castings are known to suppress certain diseases of grass and some people think the use of castings might suppress harmful bacteria such as staph and E. coli.

There is a story going around that a university was having problems with athletes getting staph infections from burns sustained on grass practice fields and the university stopped applying chemicals to the grass and instead turned to worm castings and solved the problem. I spent two weeks trying to track down this story and at this point I don’t believe it is true. Maybe someone will prove me wrong.

I did, however, come across an interesting situation in St. Louis County, Mo., where the Parkway school district turned to earthworm castings in lieu of commercial fertilizer. The groundskeeper there is Matt Jenne, who prior to coming to St. Louis was a golf course superintendent in Florida. While working in Florida he noticed earthworms had built up their castings on the greens. They picked up the castings as part of cutting the grass, and then piled the grass-castings mixture and let it compost, after which they used it with great success on new grass and bare spots. To feed the life they had in the soil, they applied molasses once a month with their irrigation system.

When he got to St. Louis Jenne decided to go with worm castings on two football fields, applying between half a ton and a ton per field. The castings are applied dry and work best when the field has been aerated.

Jenne may have an explanation for the staph infection story. He says that artificial turf causes staph and the only way this can be controlled is to disinfect the artificial turf.

Here in Osage County earthworm castings are available at Eisterhold Brothers on U.S. 63 between Westphalia and Freeburg. Unfortunately they have decided to close their business when their current supply runs out.

Fish

Liquid fish or fish fertilizer is another product that has been successfully applied to pastures. Teddy Gentry, the founder of South Poll cattle, has been using a fish product for years and is pleased with the results. It seems especially beneficial in fighting the effects of a drought. Gentry mixes the fish with liquid calcium and is thinking about adding sea minerals to his mixture.

Sea Minerals

Sea minerals might be the best way to improve poor or depleted soils. We all know that a large deer in Iowa will weigh 100 pounds more than a large deer from that part of Missouri south of the Missouri River. Many people ascribe the difference to the mineral level of the soils. It’s difficult – if not impossible – to produce high-quality grass on soil that is no properly mineralized. It took Herringshaw years to get his grass to the 22 brix level and he is convinced he would not have gotten there without the seal minerals. Herringshaw prefers Redmond salt, while Sturges uses Sea-90. Sturges applies his sea minerals as a spray, along with compost tea. Herringshaw makes both dry and spray applications. He estimates he has broadcast approximately 85 pounds of Redmond salt per acre since he started using that product. This is in addition to what he has sprayed on. For both Sturges and Herringshaw a foliar application is one pound or less per acre.

Another individual that makes extensive use of sea minerals is Doug Gunnink of Gaylord, Minn. Gunnink produces high-brix grass for his grass-fed beef operation by the foliar application of liquid fish and sea minerals. He also tests his grass and adds those minerals that are in short supply in his pastures, whether boron, sulfur, copper or some other mineral.

Fish hydrolysate, Gunnink explained, is the entire fish ground up and then preserved with phosphoric or sulfuric acid. If the preservative is phosphoric acid, the phosphorus “bumps up the Brix,” he said, adding that “phosphorus gives grass power.” High-brix grass produces more organic matter, which in turn holds more water, Gunnink explained, stating that a 1% increase in organic matter will hold an additional 53,000 gallons of water per acre. “Organic matter is the sponge that holds water for dry spells.”

The organic matter also holds the nutrients that plants need.

Conventional Fertilizers

This story is not meant to be a war on conventional fertilizers. The late Dr. Maynard Murray, the pioneer that first advocated use of sea minerals, said there is a place for conventional N, P and K. We do, however, need to come up with better ways to use them. Bill Totemeier, a friend in southeast Iowa that is a commercial hay producer, uses ammonium sulfate rather than ammonium nitrate because the former is much more earthworm-friendly. He applies fertilizer two or three times per year in smaller amounts rather one large application in the spring. This reduces the shock to the microbes.

Houston-area rancher Tom McGrady spread ammonium sulfate on his ryegrass pasture in early March. In his area ammonium nitrate is no longer available. That may be a good thing.

For Row Crop Farmers

Row crop farmers can also benefit greatly from some of these practices. Lowenfels, who co-authored the book on microbes, urges anyone who uses herbicides or insecticides to soon thereafter apply compost tea to increase the microbe population that was probably greatly reduced by the chemical spray. Fish would also work in this situation.

For the busy grain guy, there are companies that make products ready to go into the sprayer. One such firm is AgriEnergy Resources. Mike Wyatt, an independent consultant that works with AgriEnergy, has helped me gain some insight into world of microbes.

Hunters

If you want bigger deer like you read about in Iowa and Illinois, the methods set out in this article should be used on your hunting land, especially the food plots. Animals are clearly attracted to plants that have been treated with sea salt. And they also choose high-brix plants over those with low brix levels.

My Experience

I know Terry Gompert personally. He’s the real deal. In 2007 he organized a high-stock-density grazing seminar in as remote an area of northeast Nebraska as you can find and attracted over 200 people. Included among that crew were Jeremia Markway and me. Based on my knowledge of and respect for Gompert and the results Markway experiences just down the road from us, why wouldn’t I be willing to try this? To me it’s a no-brainer. I’ve made arrangements to buy milk from Alfred Brandt, who lives just south of Linn, and Chamois MFA has agreed to spray 50 or 100 acres in mid-April. A 1,000 gallon tank containing 150 gallons of raw milk and 850 gallons of water will provide the perfect ratio of three gallons of milk and 17 gallons of water, which applied at the rate of 20 gallons per acre will cover 50 acres. I hope to get over at least 100 acres. Whether we include something with the milk – such as fish, molasses or earthworm casting tea – is a decision we haven’t made at this time.

We are also going to broadcast one ton of sea salt at a rate of 20 pounds per acre.

Conclusion

For years I’ve been a dung beetle fanatic, thinking that I needed dung beetles to build my soil. I’ve probably been wrong in this regard. I now think I need to build my soil and the dung beetles will come. Dr. James Nardi, in his classic work Life in the Soil, describes dung beetles as picky eaters. That may seem strange, but my experience convinces me his assessment is totally accurate. I hope – and I do believe this will happen – dung beetles will choose to come to our farm because we have upgraded the food supply.

We have just returned from The National Heirloom Exposition in Santa Rosa, CA. For three days we were able to meet and talk with many like-minded and very interested people that wanted to know more about local food, growing their garden and how heirlooms tied into all of this. We did a presentation that tied the concepts of healthy, vital soil combined with heirloom seeds to produce the most nutritious, flavorful and local food possible. We looked at how, exactly, to build that “black gold”- healthy soil that increases in production, pest, weed and disease resistance each year. Specifically why heirlooms and open pollinated seeds are so much more appropriate and beneficial for local and human scale agriculture was addressed, as well as how profitability, productivity and biodiversity are firmly on the side of small scale agriculture- from the home gardener and Farmer’s Market grower to the CSA grower.

Many of you have asked to see the presentation, as there were lots that couldn’t make it to the Exposition, and others that wanted to go back over it and make notes at their own pace.

Here it is in it’s entirety!

We hope that you enjoy it, please let us know if you have questions or comments by scrolling down to the bottom of this page.

Compost Feeds and Improves Your Soil

Compost is one of the best mulches and soil amendments available, easiest ways to feed your garden soil and can (and should) be used instead of commercial chemical fertilizers. It is easily improved or customized for your specific garden conditions and best of all, compost is cheap. You can often make it without spending anything, or very little.

Using compost improves soil structure, texture, and aeration and increases the soil’s water-holding capacity, while at the same time improving its drainage. All you need are some feedstocks, moisture and time.

Compost loosens clay soils and helps sandy soils retain water. Adding compost improves soil fertility and stimulates healthy root development in plants. The organic matter in compost provides food for the microorganisms that digest and break down the matter, which keeps the soil in a healthy, balanced condition. Feeding of the microorganisms also makes foundational minerals more readily available to the plants such as nitrogen, potassium, phosphorus, boron, silicon, magnesium and trace elements.  Well fed, properly produced compost applied to the garden soil can create a condition where few if any soil amendments will be needed.

We will examine several aspects of compost and techniques to build the nutrient value of the compost for the garden. One of the most useful aspects of compost is it’s adaptability, as it can be “customized” or enhanced with many additions that will increase it’s fertility and value to the garden. This is not meant as an introductory how-to compost article – see our article Compost – What We’ve Learned for that. You can use the techniques shown here to customize your compost for your garden’s needs.

For our discussion, we will assume a manure based compost, combined with leaves or straw for the close to ideal 25-30:1 ratio of carbon to nitrogen (C/N). Here are some examples the C/N ratio for common compost feedstocks-

Compost Carbon/Nitrogen Ratios

Compost Carbon/Nitrogen Ratios

One of the common techniques of the Genetic Engineering industry is called “Stacking”, or combining several traits into one variety to try to achieve multiple benefits. I’m not sure if it works, but the same thought pattern can be applied to our compost, with results that don’t need to be studied for a decade or two to determine if they are indeed dangerous. We will be looking at and discussing several of these techniques, all of which can be “Stacked”, or combined to achieve greater benefits. Some of these techniques are common use in the garden and will have similar effects in the compost pile.

Ingredients That Boost Compost


Azomite or Elemite Trace Minerals

Azomite or Elemite trace minerals

Mineralization– If you’ve followed the previous soil building blog posts, you understand the importance of adding minerals to your garden soil and the incredible benefits it has. For those who haven’t read it, read Mineral Restoration of Your Garden Soil for the first part and Mineral Restoration of Your Garden Soil Part II for the second. Adding a broad-based mineral supplement to your compost will kick-start the decomposition and feeding of the microorganisms, and give them a powerful, healthy start. This will carry over when you apply the compost to your garden, as the remainder of the minerals and trace elements will benefit the garden soil, your plants, veggies and ultimately – you.


MycoGrow soluble mycorrhizal fungi mix

MycoGrow soluble mycorrhizal fungi mix

Mycorrhizal Fungi– An ancient microscopic group of fungi that develop symbiotic relationships with about 90% of crop species. They colonize in and around the roots and root hairs, sending out hyphae– strands that are about 1/25 the diameter of a human hair- into the surrounding soil anywhere from 15 to 25 inches. This increases the nutrient “reach” of the plant from 10x to sometimes 100x! Mycorrhizae create enzymes to mobilize and release phosphorus, nitrogen, zinc, iron, calcium, magnesium, manganese, sulfur and several other nutrients from the soil and transport them to the roots of the host plant. They also produce antibiotic and other defensive compounds that fight damaging root diseases by other fungi and bacteria.


Jug of Molasses

Jug of molasses

Molasses– From Wikipedia: Molasses is a viscous by-product of the processing of sugar cane or sugar beets into sugar. Sulfured molasses is made from young sugar cane. Sulfur dioxide, which acts as a preservative, is added during the sugar extraction process. Unsulfured molasses is made from mature sugar cane, which does not require such treatment. There are three grades of molasses: mild or Barbados, also known as first molasses; dark, or second molasses; and blackstrap. The third boiling of the sugar syrup makes blackstrap molasses. The majority of sucrose from the original juice has been crystallized and removed. The calorie content of blackstrap molasses is still mostly from the small remaining sugar content. However, unlike refined sugars, it contains trace amounts of vitamins and significant amounts of several minerals. Blackstrap molasses is a source of calcium, magnesium, potassium, and iron; one tablespoon provides up to 20% of the daily value of each of those nutrients.

Molasses is a very valuable addition to the compost pile, as well as to the garden itself. Unsulfured blackstrap is the preferred variety, due to the mineral content, but any of the unsulfured ones will do fine. The benefits beyond the minerals are the natural sugar content that will feed the microorganisms in the compost or soil of the garden. Use one cup to a gallon of water and spray onto the pile, or add to the drip system of the garden. The readily available sugar content will skyrocket the microbial activity. Blackstrap molasses is also commonly used in horticulture as a flower blooming and fruiting enhancer, particularly in organic hydroponics. Use the before mentioned mixture in the drip system, or sprayed alongside the roots of fruiting vegetables as they start to flower to increase their flowering and fruiting.

See Milk & Molasses – Magic for Your Garden for the whole story!


Pitcher of Milk

Pitcher of milk

Milk-Using milk on your compost and in your garden will probably come as a surprise to most. Upon closer inspection, however, it starts to make sense. The amino acids, proteins, enzymes and natural sugars that make milk a food for humans and animals are the same ingredients in nurturing healthy communities of microbes, fungi, and beneficials in your compost and garden soil. Raw milk is the best, as it hasn’t been exposed to heat that alters the components in milk that provide a perfect food for the soil and plants. Using milk on crops and soils is another ancient technique that has been lost to large-scale modern industrial agriculture.

Recently a Nebraska farmer completed a 10-year study on applying milk at different rates to his pastures and recorded the results with the help of the local Agricultural Extension agent, a university soil specialist and weed specialist. What they found was amazing- the grass production was drastically increased; the soil porosity or ability to absorb air and water doubled; microbe activity and populations increased; cows were healthier and produced more milk on treated pastures; the brix or sugar level in the pasture tripled, indicating more nutrients were stored in the grass than before. Grasshoppers abandoned the treated pastures- the sugars are a poison to soft-bodied insects as they do not have a pancreas to process the sugars. This also explains why insects will leave healthy, high brix level plants alone, as they contain more sugars than the stressed and sickly ones.

The ratio can range from 100% milk to a 50/50 mixture with water, with no loss of benefits. Use as a spray on the compost and garden soil prior to planting, and as needed when insects appear. Spray directly on the insects and around the areas they inhabit.

See Milk & Molasses – Magic for Your Garden for the whole story!


Well aged compost

Well-aged compost

Manure– Earlier, I had said the assumption was a manure-based compost. Manure is usually available, even if you don’t have horses or cows. If you get to know farmers at the Farmer’s Market or growers that sell in your area, most have animals and that usually means excess manure. Most folks with animals are happy to have someone pick up their excess manure. The more different animals that contribute to the compost pile will ensure a healthier and more diverse population of microbes and critters in the pile, meaning a better, healthier compost. Horses are not ruminants, so their manure is pretty much just chopped grass and alfalfa. It decomposes well and provides a good compost. Sheep and cattle are ruminants, so their manure has been broken down further and has a lot of beneficial bacteria and microbes that will jump-start the compost. When these are combined, you get the best of both- to your soil’s benefit!


Coffee grounds

Coffee grounds

Coffee Grounds– Another unusual but highly beneficial and productive addition to your compost. The grounds of already brewed coffee are usually about pH neutral, yet have shown to have a great buffering capability. This simply means that if you add coffee grounds to acidic or basic soil, it will help to minimize the acidic or basic effects and bring the pH back toward neutral, about 7.0. Grounds are a Nitrogen source for the 25:1 C/N ratio, so depending on what feedstock is being used, coffee grounds can be very valuable to keep the decomposition moving along. The upper limit on grounds is 25%, so a LOT of coffee grounds can be added if needed! Worms absolutely love coffee grounds, so this acts as a “worm attractant”.

So, now that you’re considering adding coffee grounds to your compost, where in the world do you get them? Your office or work is a good start, as well as home. Starbucks has a corporate policy of working to reduce waste, so they usually have a covered bucket next to their stand that they put the used grounds in. The paper filters are compostable as well, being that they are usually unbleached paper. Coffee shops, diners, restaurants and donut shops are also great resources. If you feel funny asking for coffee grounds, you will probably be surprised when they respond enthusiastically when they understand what you’re trying to do.

See Coffee Grounds Build Compost and Soil Health to learn more! 


Shovelful of charcoal

Shovelful of charcoal

Charcoal or BioChar– This is another of the soil building articles previously written. Please read Terra Preta- Magic Soil of the Lost Amazon for part one and Terra Preta Part II to get up to speed. Charcoal needs to be hardwood or lump, not briquettes and should be crushed to smaller sized chunks, about the size of a corn seed. It needs time to “activate” where it absorbs minerals and trace elements as well as providing a home for the microbes, beneficial bacteria and fungi that make the compost so nourishing to the garden. Charcoal will last at least 100-300 years, so it isn’t something that will be depleted quickly. Adding it in small amounts to the compost, and thus to the garden for several years will only increase the health, fertility, and productivity of your garden soil each year.

Where to Start

Work with what you have. You may not have a lot of nitrogen (green) or an abundance of carbon (brown) ingredients. Use what you have readily available. It’s not complicated, if you don’t have the “correct” ratio, just substitute some time and everything will be just fine. Use the above chart and this article to get the ratio close, and don’t sweat the small stuff. The gentle folks in India have been composting for something like 5,000 years without compost tumblers or fancy enclosures. Work with your local conditions- for instance, we have to water our compost to keep it alive.

Now you can see what is meant by “Stacking” of these techniques! Compost by itself is very valuable, but when combined with some or all of these techniques, things will really start moving, and in a positive direction! The health and fertility benefits will increase exponentially, and not only once, but each time the compost is added to the garden soil, which should be twice a year- in the Spring prior to planting and again in the Fall. This creates an ever increasing spiral of benefits for the garden, the plants, the fruits and vegetables and of course for you and your health.

This proves what Sir Albert Howard said to the House of Commons in England at the end of the 19th Century when he said, “As goes the health of the soil, so goes the health of the nation.” He was laughed out of the House of Commons, but we are realizing now, 120 years later, that what he said is absolutely true. Improve the health of your soil, and your health will be improved from the produce of your garden.

Azomite or Elemite Trace Minerals

Why You and Your Garden Soil Need Minerals

There are many ways to introduce  needed minerals into your garden. One method starts with a soil test and adds or amends several different items or mixtures to get the pH level and major nutrients like N, P and K in appropriate ratios. Another is using multi animal manure compost worked into the soil. Both of these are good beginnings, but do not address the needed trace elements that are limiting factors when not present. They not only increase the garden’s yield, but also plant and soil health. This in turn increases our health, as these trace elements are also limiting factors in our health when not present in sufficient amounts.

For instance, Boron increases calcium uptake, promotes flowering and pollen production and is essential for strong plant growth. It also activates Silicon, which carries all of the other nutrients. Copper is a plant immune system regulator, controls  mold and fungi, is an important chain in photosynthesis and helps increase the plant’s stalk strength. Manganese helps with nitrogen utilization, is a key factor in pollinization and aids in the utilization of energy from the cells for the plant. Zinc improves phosphorus utilization, helps regulate the plant’s growth including leaf size, corn ear size, hastens maturity and contributes to increased weight of fruits and vegetables.

As can be seen, these trace elements play a very important role in the overall production of healthy plants, fruits and vegetables. Properly mineralized soils offer not only better nutrition and health for the plant but pest and disease resistance as well. In corn, once enough copper is in the soil and taken up by the plant, grasshoppers won’t come into the fields, so insect pressure and damage are greatly reduced. Weed pressures decrease, as weeds have been shown by recent research to be indicator species for soil problems. Specific weeds will show up where specific minerals or trace elements are missing from the soils. Tissue tests of the weeds in relation to soil tests taken at the weed roots shows this.  Improvements to the soil will cause weeds to “move” to areas of problem soils. Jay L. Mc Caman has published “Weeds and Why They Grow”, a look at over 800 different weed species and the soils that they grow in. As an example, burdock grows in soils with very high levels of iron and sulfate, very low levels of calcium and manganese. Mineralize the soil, lose the weed!

Insects are another indicator species, preying on weak, diseased and malnourished plants. They prefer lower brix, or plant sugar levels. Vibrant, healthy plants have a higher brix level than stressed or diseased ones. Experience shows that improved soils will decrease insect pressure, as brix levels increase, insects move on. In fact, several studies and practical observations have shown that as soil improvement occurs, insects move out followed by weeds. Then the insects start eating the weeds, as they have lower brix levels than your garden!

Combining these benefits with charcoal accelerates the process in a positive direction. Charcoal acts as a nutrient and trace element sponge, allows the soil food web to build much more organic carbon, living biomass & glomalins (soil glue) in addition to building soil infrastructure. The old adage of  “Feed the Soil Not the Plants” becomes; “Feed, Clothe and House the Soil, utilities included!”

We have chosen AZOMITE because it is easy to apply, safe to use and extremely effective. It is also completely organic or natural, meaning there are no man-made ingredients. It is simply powdered Utah volcanic rock dust that has about 70 minerals and trace elements, nothing more. The recommended application for gardens is 1 pound to 25 square feet of garden. It can also be sprinkled around established plants or trees and watered in.  For “charging” charcoal in the compost pile, I recommend 1 cup per 2 pounds of crushed charcoal, mixed into the compost for 6 months prior to application to the garden. Once again, we have no connection whatsoever with AZOMITE, they don’t even know we are talking about them.

Several studies with several vegetable plants show taller plants, larger diameter branches/stems, larger leaves with earlier fruiting, more prolific production of fruit, longer production and earlier first fruits with mineralized soils. Nutritional analysis of vegetables show higher levels of minerals and trace elements, showing that the soil minerals are more bio-available. More nutrition for plant = more nutrition in veggies = more nutrition for us. Better production in the garden means more veggies, which greatly increases the value of the garden and the value of its produce, especially in today’s market with much higher prices with lower quality produce available. Makes it much easier to grow your own food.

Better soil; bigger, healthier plants and vegetables; earlier, larger yields and better taste, nutrition and health for you- all from a few simple ingredients and preparation of your garden soil. This is the wonder of biological and sustainable agriculture, no matter the size of the “field”. As one farmer put it, “It’s not hard, it’s just different.” It’s a different way to look at gardening, but once some understanding is reached, knowledge and experience gained, it’s much more rewarding on many levels to work with the soil and plants this way, instead of trying to force them to work how we think they should, or want them to. Another benefit to this approach is that the applications last a long time- in the case of charcoal, at least 100-300 years, and the AZOMITE can last 3-5 years in hungry soil, longer in a more balanced one.

As always, please send in your comments and questions!

Next up will be a discussion of compost and the many approaches to building the best compost yet!


Azomite or Elemite Trace Minerals

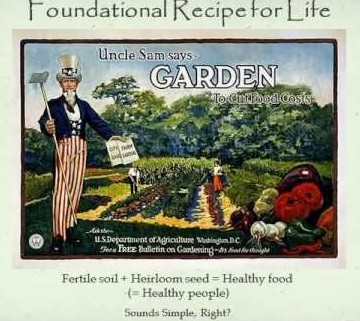
Why Your Garden Soil Needs Minerals

Today we  look at another aspect of building healthy, vibrant garden soil that is not only incredibly productive but provides pest and disease resilience. Conventional commercial farming and gardening has mainly paid attention to three elements for the past 65  years or so, pretty much to the exclusion of all else. These are N- Nitrogen, P- Phosphorus, and K- Potassium. You see these in ratios on fertilizer bags, hear about them in conversations about amending the soil and see them pointed to when troubleshooting growth or production problems.

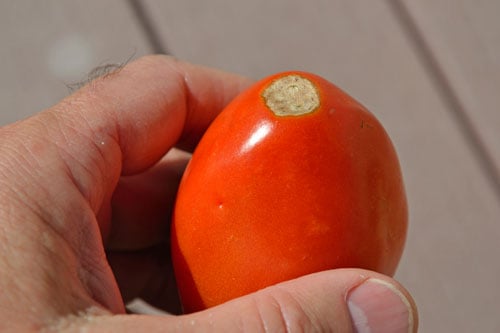
Commercial biological agriculture has found that there are many more minerals and trace elements that are extremely important to the growth, health and productivity of the soil as well as the plant. Some of these are Boron, Silicon, Calcium, Magnesium, Carbon, Potassium and Copper. These are not all of them by any means. By most research, there are about 70-80 minerals and trace elements that are critical to the full development and health of most plants and crops. For instance, a tomato’s nutritional profile includes 56 minerals and trace elements! This is one of the reasons that commercial farmers use the tomato as a benchmark to test the vitality and nutrient content of their soils, as the tomato is “hungry” and needs many nutrients to grow properly. The true test, however, is not limited to how the plant grows, how healthy the leaves are, how many flowers and fruit are set, but how the tomato tastes. If the tomato tastes rich, is juicy and has a complex flavor, then the soil is healthy. If not, then some work remains to get the soil to it’s optimum condition.

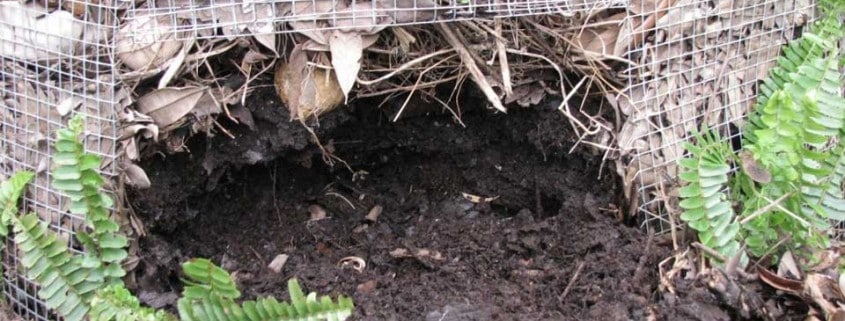
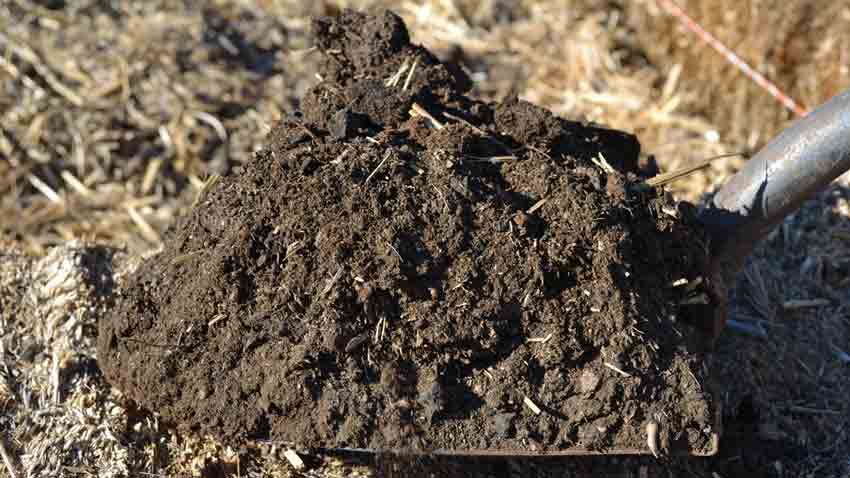
Minerals and trace elements are being studied much more now, as many people in agriculture begin to realize that without replacing the minerals and elements taken up by the crops yields begin to decrease, nutrition content drops and pest and disease resilience is lower over time. Studies have shown this for the past 30 years stating the nutritional content in many vegetables have decreased as compared to those of the past. Using a biological and organic method of growing helps, as the manure based compost has several of these mineral and elements, but not nearly enough. Self-sustainable, old time farming had many manure inputs to the compost pile, from different ruminants that contributed microbiological activity to non-ruminants that added finely chopped organic matter. These were better, but still did not address all of the minerals and elements needed for healthy soils.

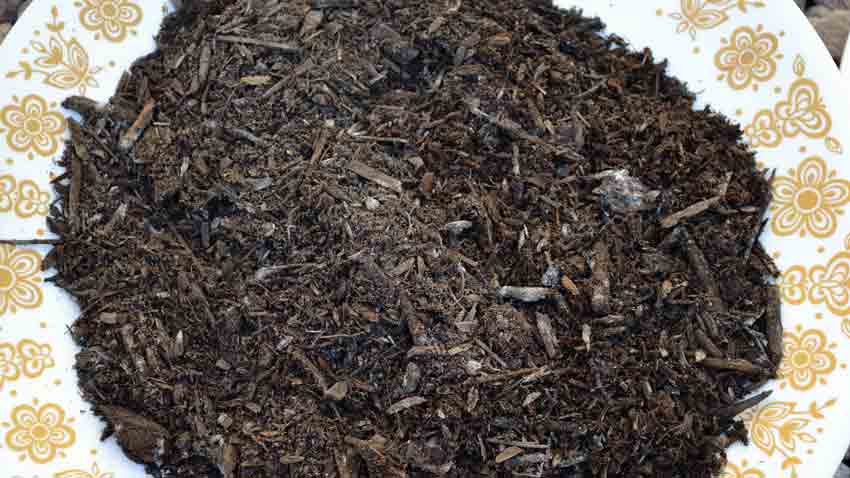
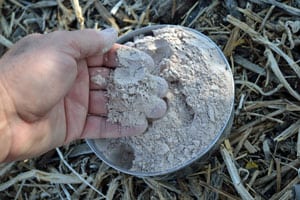
Two sources are readily available and usable for the home gardener to restore the minerals to the soil. One is sea minerals, the other is volcanic rock dust. Sea minerals are just as they sound- dried seawater. Many commercial farmers are using sea minerals to restore the mineral balance, some using 2200 pounds of sea minerals to the acre! That is just over a ton per acre. My concern with using sea minerals for the home gardener is the salt content, and the potential damaging impacts that salt might have. The second source- volcanic rock dust has no salt and is composed entirely of minerals. Thus there is less danger of over use causing catastrophic damage to your garden!

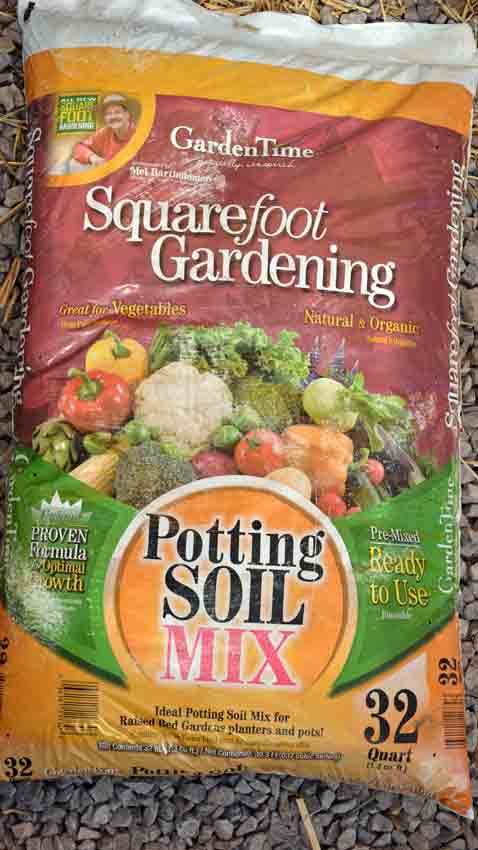
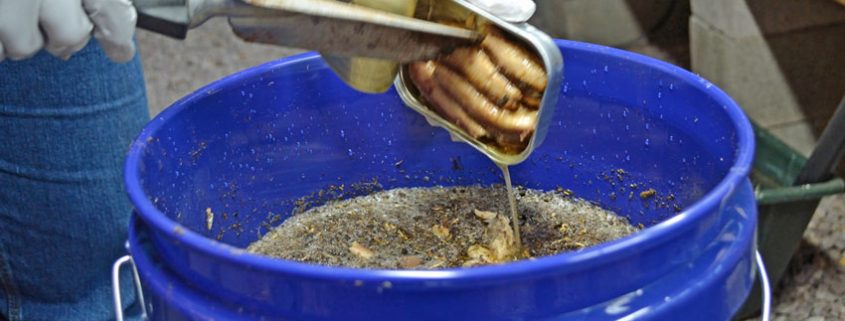
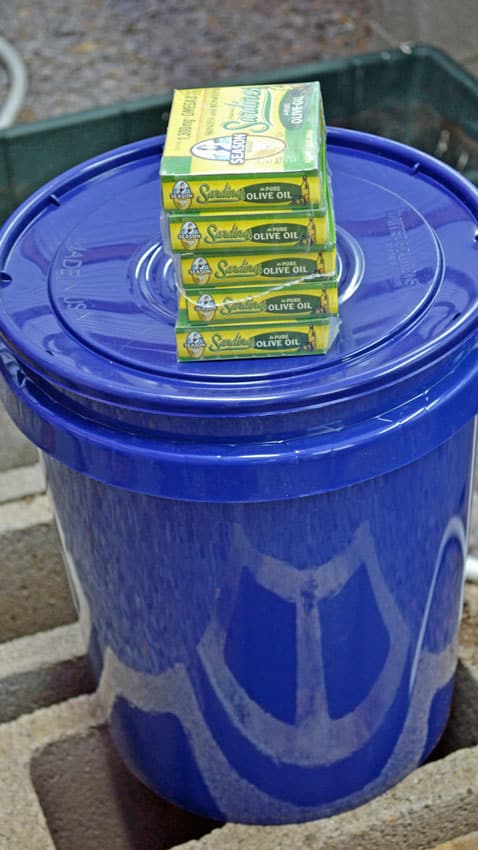
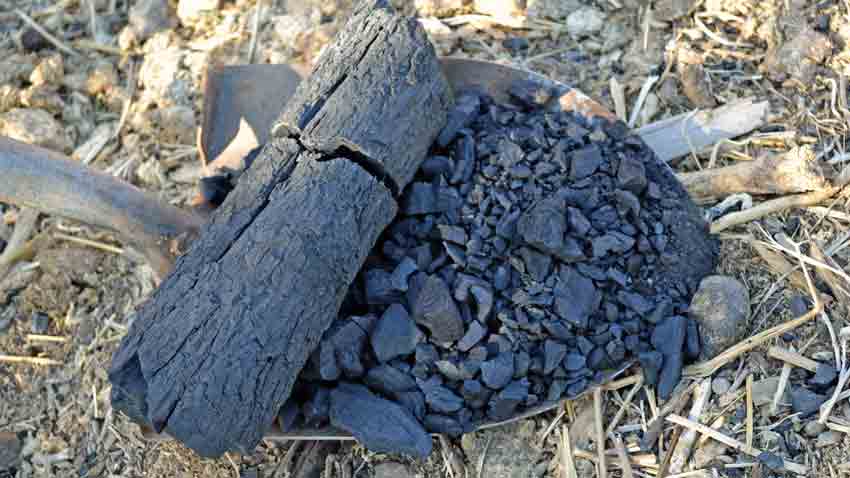
This article introduces volcanic rock dust in a product known as Azomite. This is a commercially available product, and we have no affiliation or connection with Azomite. They don’t even know we are writing about them! We use this in our gardens, and are using it to “charge” our charcoal in our compost piles, just like we wrote about in the last blog post. We won’t write about or recommend something that we haven’t used ourselves. This is the introduction, the second part of this post will be a discussion and examination of how and why it is so effective.

The article is graciously provided as a reprint from Acres USA.

Mineral Restoration and Utah Rock Dust

by David Yarrow

Like so many young people, Jared Milarch was in a hurry. At age 13, Jared began transplanting native sugar maple seedlings out of his family’s woodlands in northwest lower Michigan. Thinking ahead, Jared planned to sell them as street trees to pay for his college education.

Watching this investment in his future creep skyward, Jared wondered how to speed these trees up — grow taller faster.

“I got impatient because the trees weren’t growing fast enough,” Jared admitted.

About this time, Jared read Secrets of the Soil by Christopher Bird and Peter Tompkins. One chapter described a fertilizer that stimulated plants to remarkable vigor. This “miracle” plant food is a powdered pink clay from central Utah named Azomite, an acronym: A-to-Z Of Minerals, Including Trace Elements. It also goes by the name montmorillonite ore. I asked Jared what Azomite is. “Ground up sea floor bed from Utah mines,” he replied. “They grind it up talcum- powder fine. I guess it’s easier for plants to digest then.” “And for the microbes, too,” added his father. “Because plants don’t really take up nutrients in their root hairs, but from dead and living bodies of microorganisms that ingest the minerals.” Azomite is, in fact, a unique mineral deposit with special biological character. In ancient geologic times, central Utah was an inland sea. Water washing off then-young Rocky Mountains was rich in minerals, and, over eons, this body of water evaporated and shrunk, until today only the Great Salt Lake and Great Salt Desert remain. Bacteria living in this inland sea ate the minerals, then excreted them in oxidized, hydrated and blended forms. The microbial manure accumulated on the sea floor. This sediment has an abundance of over 60 elements, not just three or four, or a dozen.

“I didn’t have a lot of money, so I kept bugging my dad to order a few bags,” remembered Jared. “He reluctantly gave in. When the bags arrived, I sprinkled two tomato soup cans around each baby tree.” After 100 trees, his bags were empty, so his other 400 saplings got none.

The next spring, Jared watched his unfertilized trees grow 12 inches. But the Azomite-treated trees grew fully 3 feet in one spring spurt! In Jared’s years working in his family’s shade tree business, this was unprecedented beyond imagination.

“The results were just amazing!” enthused Jared. But even more, treated trees grew not only taller, but better — healthier. Treated trees had darker color. “Leaf tatter was minimal,” explained Jared. “Caliper [diameter] of their trunks was up, too.”

Impressed by these results, Jared bought more to sprinkle around all his trees. In the family garden, too, where the effect was similar — bigger, stronger plants, with one further benefit. “The taste of the vegetables is dramatically different,” reported Jared. “It’s a great taste!”

His father David — a third-generation nurseryman in this remote corner of northwest Michigan — took notice of Jared’s fertilizer results. In 1996, David decided he had seen enough financial gains on his tree farm, and read enough evidence, to become an Azomite distributor.

“After the Gazette article about Jared’s discovery, we got more and more calls from all over the country about Azomite. The closest distributor to Michigan was the State of Maine, so I decided to stockpile it here so local people don’t pay double freight, and make it available to anyone inclined to try rockdust in their garden, orchard or animal feed.”

Soon the Milarch barn was stacked with bags of pink Utah dust.

“Also, as Midwest horticulture and agriculture schools smarten up, I want to have a stockpile. In the horticulture industry, no one we work with on our trees in all 11 colleges across the United States has ever heard of remineralization with rock dust. They add magnesium to commercial fertilizers, but know nothing about trace elements. It’s time the tree industry — all the way from seedlings to champion trees up to wholesale shade tree industry — tested this in horticulture.”

David Milarch, with decades experience in the family shade tree business, founded The Champion Tree Project. The effects of Azomite on his tree farm urged him to require that every champion tree must be sold and planted with rockdust.

“In the Champion Tree Project, seedlings distributed to schools, children and youth groups for Arbor Day will have a small bag of rock dust, with instructions to sprinkle it around the roots. I recommend seed companies use it in soil mix as seedlings are produced. And right up the ladder when shade tree liners are grown by nurseries, I ask them to use rock dust. Then, as shade trees are planted at job sites, 1- or 2-pound bags must be spread by landscape industry.”

In 1997, Jared — a fast-track senior honor student at Benzie Central High School — enrolled in a botany class in Michigan State University’s Horticulture Extension Program at nearby Northwestern Michigan College in Traverse City.

For his botany lab, Jared decided to scrutinize this Azomite miracle more carefully to understand how a bit of dust boosts plant growth and health. He proposed
a controlled experiment in the college greenhouse to instructor Kirk Waterstripe.

His professor scoffed at the idea at first. Waterstripe, a Rutgers graduate, was skeptical a few ounces of powder from the Utah desert could have such dramatic effects
on plants. “I’ve done some organic gardening,” Kirk admitted, “but haven’t messed with rock powders at all. I heard about greensand and a few things. But I’m always open for new ideas.”

Jared insisted this new idea was worthwhile, so Waterstripe relented and assented.

With advice from his professor and father, Jared designed an experiment to test the effect of Azomite as a soil supplement on tomatoes. Jared’s very simple, but controlled experiment would clearly show any effects from Azomite.

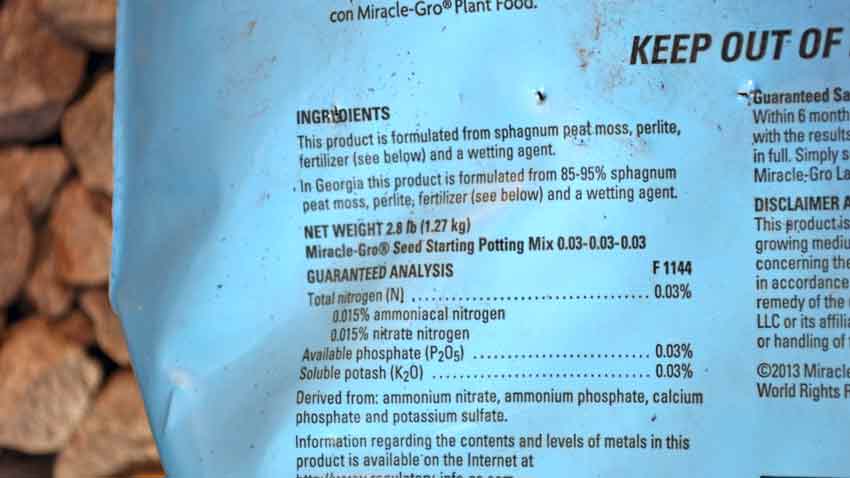
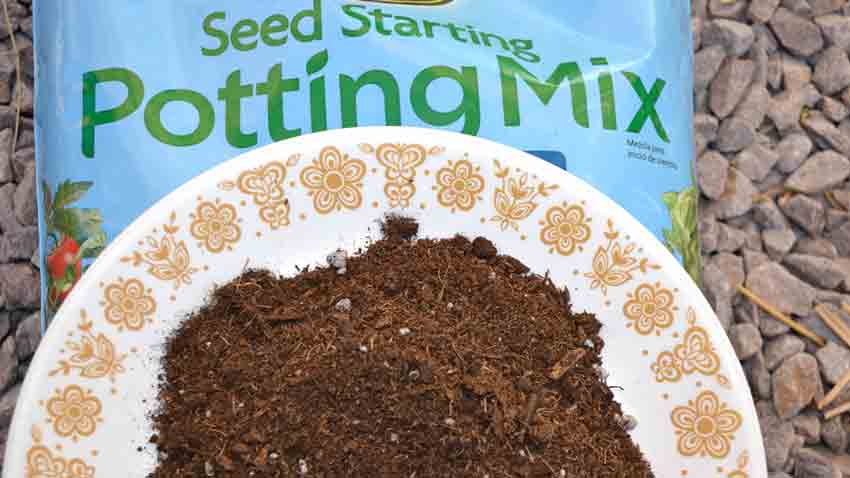
Eight tomato plants (“Fantastic” variety) of uniform size were grown in 1- gallon plastic pots, in a mix of standard potting soil with 6 tablespoons of composted cow manure. Two tablespoons of Azomite were added to the soil of four tomato plants; the other four had no clay mineral supplement.

The plants grew in uniform greenhouse conditions from June 17 to Sept. 9, got 150 ml of water three times a week, and were rotated in the greenhouse to ensure equal exposure to warmth and light. Height was measured from soil surface to uppermost branching point. All measured 30 cm at the experiment beginning, with no visible differences in health.

After 67 days, the tomatoes fed Azomite were easy to distinguish from untreated vines. On several measurable characteristics, Azomite yielded a better plant. Everyone agreed all four plants fed clay dust looked bigger and healthier.

“Color was a very obvious difference,” recalled Jared. “Plants not treated were more yellow in color, while treated plants were a deeper green color. Height was different. Plants that were treated weren’t a lot taller, but they weren’t ‘leggy.’”

Jared’s short written report listed five significant observations he had measured as numerical indications of “better, healthier” plants:
• Average height of Azomite-treated plants was 98.5 cm, compared to 89.75 cm for control plants.
• Whiteflies were found on both treated and control plants by day 28. After day 42, insecticidal soap was sprayed to control whiteflies. But treated plants had much less damage, defined as “honeydew” — sticky, sugary excretions by whiteflies.
• Azomite-treated plants flowered earlier, more prolifically.
• First tomato was on an Azomite treated plant on Aug. 26.
• Treated plants set more fruit.

In a summary as simple as his experiment, Jared wrote: “While four plants per treatment do not provide statistically testable results, this experiment suggests that mineral supplements such as Azomite may help produce plants that are more vigorous and pest-resistant, and that blossom and set fruit sooner than plants grown without any supplement. Further tests, both in lab and field, are highly recommended.”

But from this modest understatement issues a bright light of insight. The implications of this simple experiment could alter farm economics, food production and horticulture methods. Only four plants, but a solid, significant four versus- four superiority. This clear, consistent result confirms a long list of field observations. Definitely, this Utah powder provides some nutrient lacking in greenhouse potting soil — and northwest Michigan topsoil. Something so essential that just a trace of it effects significant gains in growth, vigor, sturdiness, color, flavor, flowering, fruiting, and pest resistance.

Tests of this remarkable result should be repeated not just by one observant and thoughtful high school senior, but also by other universities and high schools in many different locations.

“We need to encourage students, teachers and professors to try this simple experiment’” insisted David. “Not just my state, but around the nation, around the world.”

Waterstripe, impressed by Jared’s results, is singing a new song of praise and wonder. He now sees real potential value in this clay from the Utah desert, plans
to write his own paper for a science journal, and wants to test Azomite on other crops. The professor is even considering writing his doctoral thesis on this trace element effect.

Jared, David and Waterstripe all discussed with the financial potential of early flowering for farmers.

“Early flowering plants can mean money to farmers for having the first crop, and ultimately quicker money for the farmers,” Jared pointed out. “It’s a big fruit farming area around here.”

“Among farmers, for the first guy to market or processing plant,” David explained, “his products reap a premium profit. The first tomatoes. First sweet corn. First watermelons. Also, a shorter growing season means a faster pay-off, because farmers only have one paycheck a year.”

“Flowering is a measure of marketability,” agreed Waterstripe. “If you’re the first to the farmers market with vine ripened tomatoes, hundreds of people will stop by your truck. So, if you can get the plants to flower a week ahead, this gives you an economic advantage.”

“But how do you put a dollar sign on depleted soils?” asked David. “And toxic, even mutagenic, pesticides?”

I insist the single most crucial and significant effect of trace element fertilizers is increased flowering and seed formation. This can’t be adequately measured in
monetary quantity or economic values. Reproduction is the climax in a plant’s life cycle. Any substance that triggers such an increase in this activity activates and fulfills the plant’s full life potential, and is a near ideal and essential plant food.

In an ecosystem, this climax is an outburst of ecstasy as nature rejoices in this peak experience. This isn’t mere substance, it’s essence.

This experience has inspired Jared and mentor Waterstripe on to other experiments with winter oats, a common grain crop for Michigan farmers. “Oats have been — for millennia — a chief animal and human food,” David pointed out. “We eat oatmeal. Horses need oats, and it’s mixed with other animal feeds. And oats are used as a cover crop a lot.”

“Oats are easy to grow and study in a winter greenhouse,” added Waterstripe. “They don’t take a lot of room, and can take a cooler greenhouse.”

I weary of experiments to repeat what we rediscovered a decade ago that was discovered by others over a century ago. How many academics and scientists have to see the facts before serious research begins?

We need experiments to learn, not “if,” but “how” mineral powders restore soil fertility and boost plant vitality. Decades of research by dozens of investigators clearly show this happens, but we still have only fragments of real insight into the secret lives of soil that accomplish this miracle of minerals transformed to living cells.

I asked Jared what he thinks causes Azomite’s remarkable effects.

“I believe there’s a lack of minerals in the soil,” Jared mused. “It was probably depleted with chemical fertilizers. So, this was the first step to put minerals back in the soil. Almost healing the soil enough for the trees to really be able to use what’s in the soil.”

I pointed out that a few tablespoons of clay dust doesn’t supply much nitrogen or potassium. What minerals might this Azomite be feeding trees and seeds?

“I think it may be a balance,” he offered cautiously. “Not just one mineral, but all the minerals. Or it might catalyze other parts of the soil. It may be etheric, too. I’m not sure.”

Whatever substance or essence Azomite supplies, it boosts overall vitality and quality of tomatoes — for seemingly every plant it is fed to. One Michigan news reporter in 1996 headlined Jared’s discovery as “Tree Vitamins” — botanical equivalent to one-a- day health pills.

David Milarch pointed out, “Most soils only have their mineral elements replenished by volcanic action or glaciers. Here in north Michigan that was 10,000 years ago. Our old soils are worn out, especially with chemical agriculture and acid rain.”

The Milarchs’ positive results have been followed by an expansion of Azomite use.

“This year, one fellow got 3 tons for his commercial organic orchard and put 60 pounds on each tree — a generous feeding,” said David. “But that’s how he makes his living. It will probably take two years for fruit trees to fully respond. But if vegetables taste sweeter and are bigger, why won’t it do the same for apples, cherries, peaches . . . ”

“I sold another 1,000 pounds to add to computerized feed mix for dairy cattle to see if it affects butterfat and milk production. This one dairy farmer had a bad problem with hairy wart on his 300 cows’ feet — which is almost impossible to relieve. We figure if cattle are healthier, it will be easier to relieve, so he calculated adding 6 tablespoons a day to his cows’ feed. The old boy who first discovered this stuff fed it to his chickens, and the chicken industry had great success with it.”

I asked Jared what he will do with his new insight into soil fertility.

“For the immediate future, I want to apply this to our family nursery, and to the Champion Tree Project. More likely in the future I’d like to apply it or make it available for world crops — for all of our food crops.”

“And our garden,” injected David. “if it’s good for tomatoes and trees, it’s good for humans, too. So take that thought farther from the garden all the way up the food chain.”

“I’d also like to study other rock dusts,” added Jared. “Azomite is the first one I’ve discovered.”

David ended, “I’d like to see other colleges and students get involved with this investigation of how to restore our soils. And I hope to see the same in the nursery industry and farmers also.”

“In the long run, what would be the reduction in health care costs in humans after we get it into the food chain?” mused David, “and we remineralize our bodies? How many diseases — like AIDS and cancer — would be dramatically diminished?”

David Yarrow is a frequent contributor to the publication Remineralization of the Earth, now merging with Acres U.S.A. He has written extensively on the environment, macrobiotics and Native American issues.

In the next post, we will continue the discussion and examination of the benefits of restoring the minerals to your gardens soil. Stay tuned!

What is the Best Way to Build the Health and Resiliency of my Garden Soil?

Welcome to the second part of Terra Preta, or how using Stone Age agricultural techniques may just be the best way to build the health, fertility, resiliency and nutrient cycling of the soil several fold. We will start with the second part of the article from Acres USA, which is a Q and A session, then will look at several points to consider.

The photo is of a section of Terra Preta that is being studied by Dr. Etelvino Novotny of Brazil, a PhD in Physical Chemistry with a Masters in Soil Science. You can see the depth of the Terra Preta!

Terra Preta Q&A

Why did production of terra preta stop after European contact?
Although the decimation of the Amazonian population and the collapse of the elaborate social systems that supported terra preta creation (to make all that pottery and to make all that charcoal and incorporate it up to 2 feet in the ground really does take a village) was a contributing factor, it was undoubtedly the introduction of the steel axe by the Spanish that, in combination with the impact of contact, led to slash-and-burn by small bands replacing slash-and-char by large groups. When clearing land with a stone axe, a conservation of all biomas and an intensification of soil production becomes a necessity. Steel axes — and, later, chainsaws — contributed to exploiting the very short-term benefits of ash. It must be remembered that traditional methods can die out in a single generation, and that in Amazonian social structure, the elders were responsible for all technical knowledge. It makes sense that the elders were the hardest hit by epidemics, and the loss of their cultural knowledge combined with social disruption would lead to the replacement of a deeply effective technology with an less-effective mimicry.

Did natives use special microbial brews to inoculate the soil to create terra preta?
There is no proof that a “mother” culture was used for starting terra preta. Current research indicates that the incorporation of charcoal of certain qualities (created in relatively low heat, for example) in combination with appropriate initial fertilization (often, in university tests, with conventional fertilizers that are damaging to soil life) will produce a substantial increase in yields. It is assumed that the char provides such an effective habitat for microbes that effective communities will rapidly develop within most soils. What we don’t know yet is whether the simulated terra preta will have the ability to maintain its fertility for as long as the ancient form.

Has terra preta been discovered outside of the Amazon?
Yes, high-carbon terra preta-like dark soils have been discovered in Holland, Japan, South Africa and Indonesia and are currently being studied.

Can carbon inputs other than charcoal be used?
The Japanese are extensively investigating the use of coal dust for promoting field fertility. Coal dust does seem to reproduce many of the positive effects of wood charcoal. The research of Siegfried Marian on the benefits of carbon incorporation, as reported in Leonard Ridzon and Charles Walters’ The Carbon Connection and The Carbon Cycle, led to the development of Ridzon’s NutriCarb product (no longer being produced), which claimed agricultural benefits very similar to those claimed for terra preta . Those who want to use coal dust for soil fertility need to make certain that the dust is from brown coal, which is more humic, and that the coal does not contain toxins.

Why is terra preta often linked to alternative energy and climate change?
Terra preta is a carbon sink, as is most carbon in the soil. Slash-and-burn agriculture contributes greatly to global warming. If terra preta technologies were applied to tropical farming, less land would have to be cleared for farming, and if farmers in temperate zones such as the Midwest incorporated charcoal or other chars into their soil, more carbon could be sequestered. If this char is produced by appropriate technology, such as pyrolysis, both fuel and a “restorative, high-carbon fertilizer” can be produced. This process does not require wood — it is just as effective when agricultural wastes, such as peanut shells, are used as input. A good place to learn about this technology is at www.eprida.com.

How much charcoal needs to be incorporated?
In published reports on pot tests of the effect of charcoal on plant growth, incorporation at 20-30 percent by weight tended to consistently produce the most benefit. In row crops, this would translate to 30 percent by weight of the top 6 inches.

Are there benefits for plant health from terra preta ?

Better plant growth and health is evident with the use of native terra preta. Current investigations are primarily being conducted by archaeologists, geologists and soil scientists. There is no evidence of terra preta studies by an agriculturist, but positive reports from growers suggest that eco-farmers would be well advised to investigate terra preta technology.

Allan Balliett is a biodynamic farmer and educator who operates a CSA serving families in the Washington, D.C. metro area. He is the founder and moderator of BD Now!, the international progressive biodynamic food and farming discussion listserve. He can be reached at Fresh and Local CSA, P.O. Box 3047, Shepherdstown, West Virginia 25443, phone 304-876-3382, email allan@FreshAndLocalCSA.com, website www.freshandlocalcsa.com.

This ends the article from Acres USA.

It is interesting to note that of all the research and reading that I have done, most of the knowledge is indeed from the University research departments. Some are archeological based, others are looking at the carbon sequestering elements of charcoal or bio-char, and more than a few are interested in the continual fertility and regeneration of the soils once they have had charcoal incorporated into them.There are very few resources devoted to the thought of  how to incorporate charcoal into gardening and current agricultural practices.

The following is from a Biochar Discussion List

The following benefits occur with additions of biochar to the soil, in amounts ranging from 3 oz. per square foot up to 16 oz. per square foot-

  • Enhanced plant growth
  • Suppressed methane emission
  • Reduced nitrous oxide emission (estimate 50%)
  • Reduced fertilizer requirement (estimate 10%)
  • Reduced leaching of nutrients
  • Stored carbon in a long term stable sink
  • Reduces soil acidity: raises soil pH
  • Reduces aluminum toxicity
  • Increased soil aggregation due to increased fungal hyphae
  • Improved soil water handling characteristics
  • Increased soil levels of available Ca, Mg, P, and K
  • Increased soil microbial respiration
  • Increased soil microbial biomass
  • Stimulated symbiotic nitrogen fixation in legumes
  • Increased arbuscular mycorrhyzal fungi
  • Increased cation exchange capacity

Sounds pretty impressive, doesn’t it? There are many pages of discussions on the positive impacts of charcoal or biochar, what is the best method of making  biochar, how much to add to the soil, etc. and etc. It is easy to read oneself blind. It is wonderful to see so much attention devoted to studying the benefits of charcoal and how it interacts with the soil. The home gardener, however, is usually more concerned with how to incorporate an idea into their garden than reading all of the latest research. Let’s face it, sequestering carbon, qualifying for carbon credits, and reducing greenhouse gases for the home gardener is a smaller interest than the increased soil fertility, nutrient cycling, nitrogen fixing and improving plant growth, health and productivity that charcoal provides.

What we do know is this-

  • Charcoal is created by burning wood or similar materials in an oxygen free environment. Charcoal is not ash that comes out of your wood burning stove.
  • The addition of charcoal to soil has profoundly positive effects that are extensive and long lasting. By some estimates the lifespan of charcoal in soil is in excess of 1,600 years.
  • The amount needed is quite small- from 3 oz. per square foot to an upper limit of 16 oz. per square foot.
  • There is a definite, noticeable period of productivity lag after adding charcoal directly to the soil.
  • Charcoal needs to be “charged” or “activated” with minerals and trace elements prior to it being able to contribute to soil fertility. The best way to do this is in compost, preferably a manure-based compost that already has minerals and trace elements.
  • Adding a mineral and trace element rich supplement to the charcoal/compost greatly increases the nutrient cycling and “activation” of the charcoal
  • The time period needed to “charge” the charcoal is at least six months, preferably a year.
  • Soon after adding charcoal to compost, the fungal, microbial and earthworm activity drastically increases.
  • Adding charcoal to compost speeds up the decomposition by several times.
  • The ideal size for the charcoal chunks is between the size of rice and corn.

So how, exactly, does one go about incorporating charcoal into the garden? Charcoal is relatively easy to find. Lowe’s or Home Depot have it in the grill section. Look for “Lump” or “Hardwood” charcoal. Stay away from briquets, as they are pressed and formed out of much more than plain charcoal. They usually have chemical or petroleum fire-starting compounds in them along with fillers. Come to think of it, you probably don’t want to be cooking with them, either, as you don’t want the fillers and fire-starters on your burgers! Right now a 8.8 Lb bag is $6.99 locally. Sam’s Club has 40 Lb bags of mesquite charcoal for $17.00 in the spring and summer. It will look just like a burned log or branch.  Once you get your charcoal, it needs to be broken or crushed to smaller pieces. The optimum size is between a grain of rice and a kernel of corn. Be aware of the dust created from crushing the charcoal, as you don’t want to breathe it. The dust is fine for the compost pile. To crush it, you need to get creative. I have cut an old propane tank in half to make an industrial pestle and mortar, but a 3 Lb drilling hammer or hand sledge hammer on a piece of concrete will do just fine. A rock will do just fine. Remember, this is Stone Age technology here, so don’t over-think or over-complicate it! You want to create crushed charcoal with what tools and materials you have available. Once it is crushed, add it to the compost pile or bin. Make sure to mix it in so it will make the most contact possible with the compost. A very good technique is to crush a little each time you add to the compost. This mixes the charcoal evenly.

After incorporating charcoal into your compost, make sure it has sufficient moisture and let it do it’s magic for the next 6 months. You should see microbial, fungal and earthworm activity starting in about a month, along with an accelerated breakdown of the compost. At the end of the 6 months, it should resemble rich, humic soil that is full of life! Then you feed the garden soil with a top layer of about 2 inches in the fall and spring and watch everything in your garden grow like crazy.

Our next installment on building your garden soil will focus on the mineralization aspect, or how to get a sufficient amount of minerals into your soil without having to lug around endless bags of soil amendments! It ties in closely with the charcoal and compost, so stay tuned…

Terra preta soil

What is the Best Way to Build the Health and Resiliency of my Garden Soil?

This is an exploration on how best to build your garden soil. These are the results of much reading, experimenting and talking with several people who have been engaged in this exact pursuit for over 30 years. Our personal experiences span 20+ years, from rangeland monitoring for Holistic Resource Management, to researching how long it takes to build soil in the arid South West, to examining and monitoring cryptogammic soil crusts and how they fix nutrients that begin the process of building a foundational soil from rock and sand.

Much has been learned or re-learned in the last 30 years by sustainable and biological large scale farmers. These techniques have been combined with state of the art diagnoses and tests to confirm movement in a positive direction, and to correct drift or fall back. The complex but identifiable chemistry of the interactions and sequencing of specific elements and chemicals show us that nature is much, much more complex and inter-related than we originally thought when we came up with the N-P-K fix-all formula for successful farming.

As one farmer puts it, “It’s not difficult, it’s just different.” This is a different approach for many in creating a healthy garden, in starting with the soil. What we have learned is that everything really does start with the soil. Not only the health of the plant, and the attending nutrition that the produce has; but the pest and disease resistance or lack thereof has its foundation in the soil. Something that the commercial sustainable farmers have discovered- once there is enough copper in the soil that is picked up by the plant, grasshoppers won’t come near the crops. Additionally,  insects are attracted to the scent of phosphates, which are given off by diseased or stressed plants. Chemical farming over-utilizes phosphates which worsens the insect attacks, creating more demand for chemical pesticides. Using sustainable, biological farming methods balances the amount of phosphates so that the insects aren’t attracted to the plants. This is all done in and with the soil, not chasing from one perceived “problem” to another. Insects,  diseases and weeds are seen as indicators of weakness and imbalance, not problems in and of themselves.  This is not to say that there will never be the need to address particular pest or disease or weed issues, but they will be smaller, less frequent, and easier to manage.

One of the basic tenants of any scale agriculture is to get more carbon into the soil. There are three types of carbon- green, brown and black. Green carbon is readily used by the soil and its’ organisms for food and energy. It consists of grass clippings, green manures, and young compost. Brown carbon is a more stable form and consists of dried stalks of plants, straw and dead leaves. This is food for the fungi in the soil. Black carbon is the reserve of the soil and is obtained from decomposed brown carbon and mature, aged compost. It is also obtained from charcoal, or bio-char. This is the basis of creating a vibrant, dynamic and healthy soil structure with its attendant communities of fungi and micro-organisms that all play their parts in making nutrients available to the plants, and getting the plant sap sugars in return.

The first article is on Terra Preta, or black soil that is found in the Amazon, one of the harshest agricultural areas in the world. The soil is heavy clay and the enormous rainfall washes most nutrients off or out of the soil within just a few years. Until finding Terra Preta, that is. The results of people systematically working charcoal into the soils are astounding. This is the basis for creating dynamic, resilient soils in our gardens. Read this first article, and our discussion notes afterward. This is in two segments, with the notes after the second segment.

The original article was published by ACRES USA.

Terra Preta- Magic Soil of the Lost Amazon

by Allan Balliett

It’s like finding a lost chapter from Peter Tompkins and Christopher Bird’s Secrets of the Soil — Terra Preta (literally “black earth”) is a manmade soil of prehistoric origin that is higher in nitrogen, phosphorus, potassium and calcium than adjacent soils. It controls water and reduces leaching of nutrients from the rhizosphere. Rich in humus, pieces of pre-Columbian unfired clay pottery, and black carbon, it’s like a “microbial reef” that promotes and sustains the growth of mycorrhizae and other beneficial microbes, and it has been shown to retain its fertility for thousands of years. In university trials, terra preta has increased crop yields by as much as 800 percent. It regrows itself when excavated. It is even possible to produce carbon-negative usable energy (such as diesel or hydrogen) while making the major input (bio-char) for terra preta on the farm.

If these amazing properties haven’t convinced you that terra preta is important to eco-agriculture, then consider this: experts say that terra preta sequesters carbon at such a high rate that, in the near future, farming with this technique could be eligible for lucrative carbon credits.

Perhaps most amazing, though, is the fact that, unlike many if not most of the eco-ag technologies reported in Secrets of the Soil, the incredible properties of terra preta are not denied by myopic academics. In fact, almost everything we know about terra preta is coming from university studies!

Much is still unknown about terra preta and “Amazonian Dark Earths,” but as the key component of a proposed agricultural system that would both feed starving populations and solve global warming, grant money is coming in to fuel university investigations of the technology. For every unanswered question on terra preta, there appears to already be a funded study underway.

TERRA PRETA DEFINED
Terra preta do indio is a black, earth-like, anthropogenic (manmade) soil with enhanced fertility due to high levels of soil organic matter (SOM) and nutrients such as nitrogen, phosphorus, potassium, and calcium embedded in a landscape of infertile soils. Terra preta soils occur in small patches averaging 20 hectares (50 acres), but 350 hectare (865 acre) sites have also been reported. These 2,000-year-old manmade soils occur in the Brazilian Amazon basin and other regions of South America. Terra preta soils are very popular with the local farmers and are used especially to produce cash crops such as papaya and mango, which grow about three times as rapidly as on surrounding infertile soils.

South American terra preta soils are also full of pieces (sherds) of unfired pottery. It is generally believed that the pottery was introduced into the soil much as modern growers add perlite or sand to potting mix, as a way of keeping the soil from baking completely tight under the tropical sun before a cover of vegetation could grow over it. Much is made of these sherds as “proof” that terra preta deposits are really prehistoric trash piles, but Charles C. Mann asserts there are indications that much of this pottery was actually made specifically for incorporation into the soil.

Associated with terra preta is terra mulata, soils which are lighter than terra preta and tend not to contain cultural artifacts but are said to have similar qualities. Terra preta soils are found near historic settlements, while terra mulata soils are found where agricultural fields were once located. It is assumed that the village- related terra preta is darker because it received continual inputs of household wastes (including humanure), and that terra mulata fields were amended chiefly with bio-char, which was initially created by burning forest cover and later by slow-burning brush, weeds and crop wastes. Because of their overall similarities, terra preta and terra mulata are often grouped under the title “Amazonian Dark Earths” (ADE).

William Devan, a geologist from the University of Wisconsin who is prominent in terra preta research, offers these comments: “The black terra preta is associated with long-enduring Indian village sites, and is filled with ceramics, animal and fish bones, and other cultural debris. The brown terra mulata, on the other hand, is much more extensive, generally surrounds the black midden soils, contains few artifacts, and apparently is the result of semi-intensive cultivation over long periods. Both forms are much more fertile than the surrounding highly weathered reddish soil, mostly oxisol, and they have generally sustained this fertility to the present despite the tropical climate and despite frequent or periodic cultivation. This is probably because of high carbon content and an associated high microbial activity which is self perpetuating.”

Ironically, information about the agricultural value of terra preta is only emerging now because of a paradigm shift among archaeologists that has reevaluated the role of indigenous people (AmerIndians) in the pre-Columbian Americas. Put simply, before contact, there were heavy populations of indigenous people in the Americas, in fact, until the mid-16th century, some of the world’s largest and most sanitary cities were in the Americas. Pre-Columbian Indians made great achievements in architecture, art and agriculture. Not only did they breed many of the economically important plants of today’s world (corn, sunflower, beans, potato, sweet potato, tomato, peanut, avocado, tobacco and cotton), but they also developed incredibly productive methods of agriculture such as raised beds and “three sisters.” As Jerry Brunetti has pointed out, the rate of production of calories by Iroquois agriculture at the time of the New England settlement was unimaginable to Europeans. Not only did the Iroquois Nation produce high-value foods, they were also able to produce enough of it to ensure two to three years’ worth of food in storage at any given time!

What the AmerIndians lacked, unfortunately, was resistance to European diseases. Hard to believe as it is, precontact Amerindians apparently had no human-to-human diseases, with the possible exception of syphilis. According to Charles C. Mann, they didn’t even have the common cold until Europeans arrived. Several waves of deadly diseases (such as small pox and measles) swept through the Americas after Columbus’ first visit, spread not only by subsequent European explorers, but, after contact, by the AmerIndians themselves through their well established, hemisphere-wide, socially motivated trade routes.

By the mid-1500s, most of the indigenous Americans had died as a result of epidemics. Undermined by pain, suffering, superstition and loss of leadership (many important Incan leaders died of European diseases, including the most powerful, which opened the door for Pizarro’s conquest of this powerful empire), AmerIndian society began to collapse. Urban populations could not be fed, and cities were abandoned. In the stone-free Amazon, this meant that metropolises built of wood and soil were absorbed by the jungle at such a rate that areas reported by the first explorer as heavily populated with massive structures were, just 50 years later, reported as jungle wildernesses populated by small bands of scraggly natives.

The bottom line for mainstream archeological interpretation of the history of the Amazon was based on the assumption that the area was a “counterfeit paradise,” with all of its nutrients locked into its canopy, leaving soils poor, acidic and toxic. Although terra preta was described to academic America as early as 1870, rich soils in the Amazon were considered to be an anomaly, the result of prehistoric lakes or hydrological accidents. (An enjoyable period view of the value of Amazon agricultural land can be found in an 1867 book entitled Brazil, the Home for Southerners, by Confederate expatriate Ballard S. Dunn, which lauds the high fertility of Brazil’s Amazonian dark soil among other aspects of “planterlife” in Brazil; it is available online in its entirety through Google Books, www. books.google.com).

Caught in a “believing is seeing” syndrome, archeologists assumed that because typical Amazonian soils were thin and infertile, large populations could never have existed there. Accepting this assumption, they saw no point in looking for evidence of settlement. Betty J. Meggers, the Smithsonian archaeologist, said, “The apparent lushness of the rainforest is a sham. The soils are poor and can’t hold nutrients — the jungle flora exists only because it snatches up everything worthwhile before it leaches away in the rain. Agriculture, which depends on extracting the wealth of the soil, therefore faces inherent ecological limitations in the wet desert of Amazonia.”

Views are changing, however, and a new school of archaeologists, geologists and soil scientists have asserted that the Amazon was in fact heavily populated and that the fertility of terra preta was what made feeding these large groups of people possible. Although many questions remain unanswered, this new school of Amazon investigators feels that there is substantial physical proof that not only was the Amazon rainforest home of very large populations supported by an effective agriculture based on the robust fertility of the manmade terra preta soils, but also that the Amazon forest itself is better thought of as a manmade landscape.

It is important to note that the good news about terra preta is not the news about the physical soils in Brazil. Although soils are illegally mined and sold as potting mix and soil amendments in Brazil and Bolivia, native terra preta is not accessible to U.S. growers. Because they are filled with pre-Columbian artifacts and because they are associated with archaeological sites that have yet to be fully investigated, terra preta cannot be purchased or imported.

The current goal of scientists studying terra preta is to learn what it is and how it works so that it can be replicated anywhere in the world. The focus of most of this work, however, is not on benefiting small farm American agriculture, but on how to make more fertile land available in tropical South America and Africa, along with an interest in carbon sequestration. The time is ripe for innovative eco-growers and agricultural researchers to explore the benefits of the magic soil from a lost world.

Allan Balliett is a biodynamic farmer and educator who operates a CSA serving families in the Washington, D.C. metro area. He is the founder and moderator of BD Now!, the international progressive biodynamic food and farming discussion listserve. He can be reached at Fresh and Local CSA, P.O. Box 3047, Shepherdstown, West Virginia 25443, phone 304-876-3382, email allan@FreshAndLocalCSA.com, website www.freshandlocalcsa.com.

Part two concludes this article.